
Why We Built Kitchen Pegboards
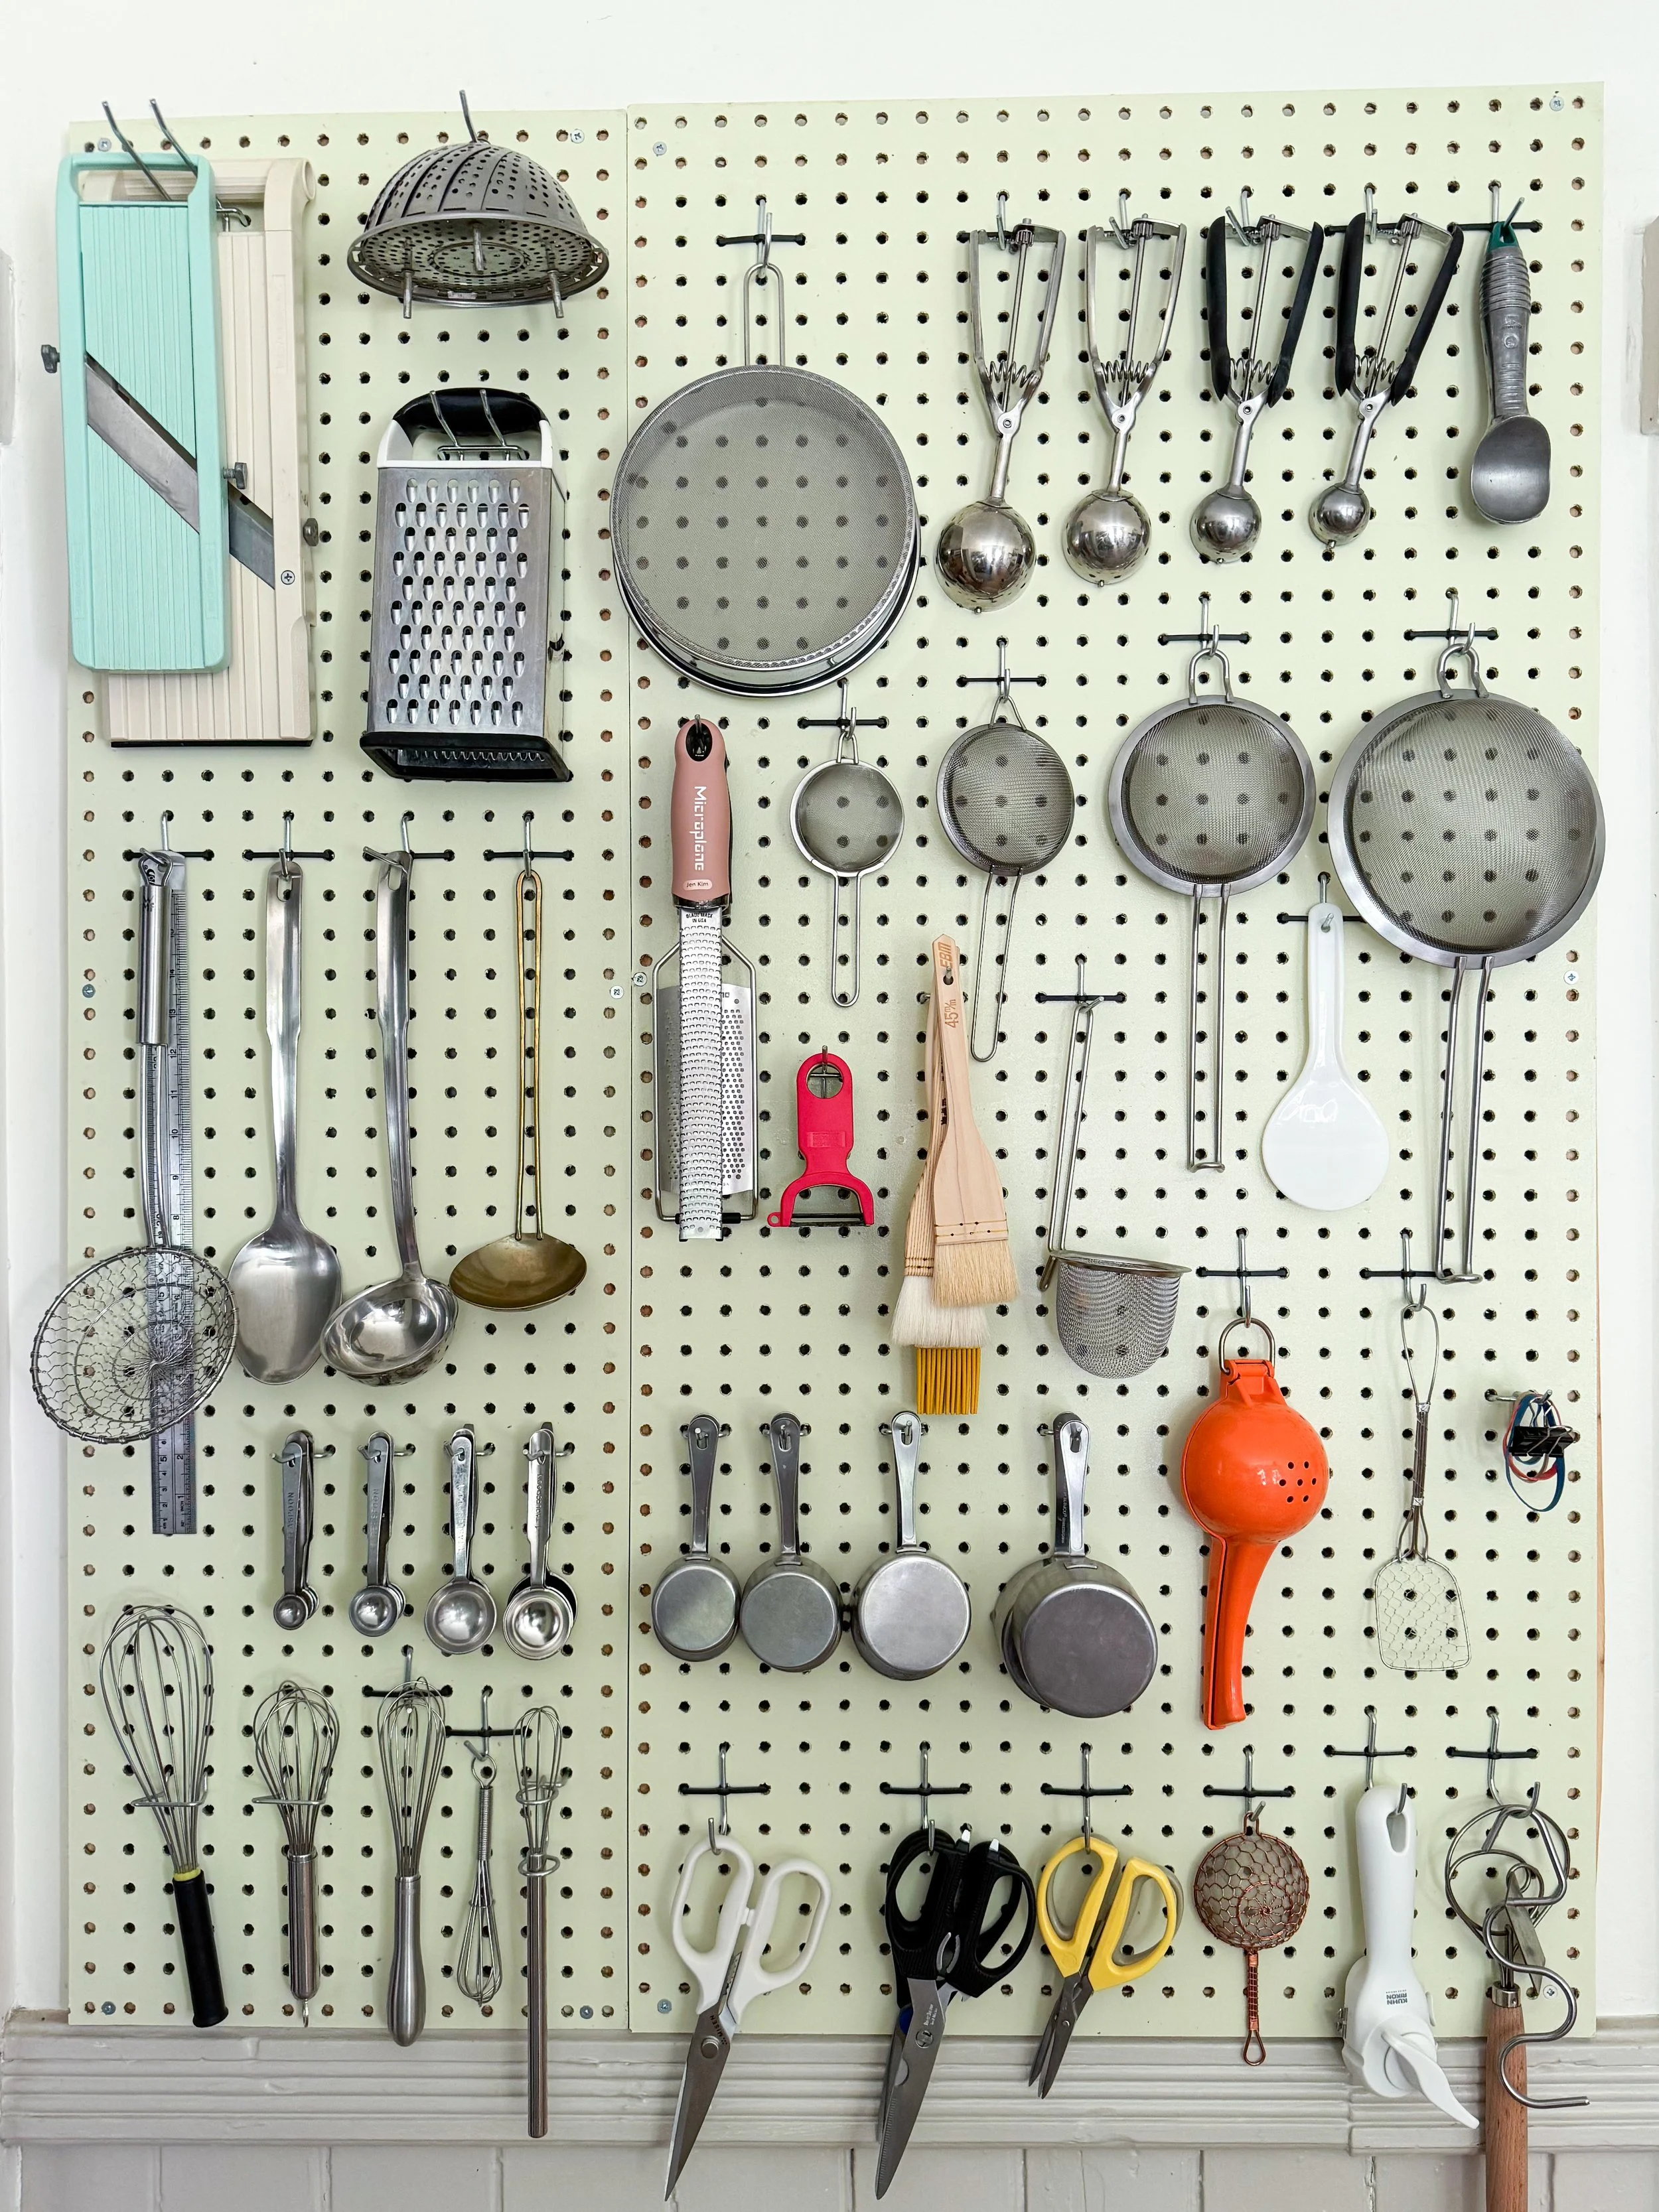
We built our kitchen pegboard when we moved into our home in August 2024, a Victorian cottage built in 1880 we picked for the charm. Our kitchen is beautiful, but lacks cabinetry, has terrible drawers, and limited storage. Romaine and I had to get creative setting up a space that worked as a home-catering kitchen (at the time I was catering and private cheffing) and for our family. Romaine suggested we put up a pegboard for our kitchen tools. Initially I was not interested. I prefer to have things neatly put away, and I was apprehensive about the inevitable kitchen grime and dust that would gather on the tools. I eventually decided to put up the pegboard because it seemed like a practical solution for our space.
How We Built the Pegboards
This task felt daunting. I had not yet taken a women’s woodworking class, and knew very little about building things for my home. Romaine and I watched a This Old House tutorial, and followed their comprehensive guide. I would categorize this as an intermediate DIY project that is completely do-able with the right tools and safety measures. What is important is that you secure the pegboard to the studs on your wall because you will be constantly interacting with the pegboard pulling tools off and on. If you do not feel up for it, I recommend outsourcing this project to a licensed contractor or builder.
We identified two spaces in our kitchen where we could put up a pegboard. After determining the sizes we needed, we went to our local hardware store and bought three panels of pegboard boards (made of composite wood) and some scrap wood for spacing.
Materials & Tools We Used
Pegboard panels
Scrap wood spacers
Circular saw
Paint sample jars
Clear poly-acrylic
Small paint rollers and foam paint brushes
Pegboard hooks
Hook locks
Stud finder
Screws
I called our friend Tim who came over with his circular saw, and cut our pegboards to the right size. We painted them with two coats of paint. I chose a pistachio green and a blush-y pink because they were giving me gelato vibes. I bought two small jars of paint samples for the green, and one jar of paint samples for the blush color (I do not remember the name of the colors). We painted the boards and let them dry overnight, and I cooked a lovely summer dinner with corn and zucchini fritters as a thank you to Tim.
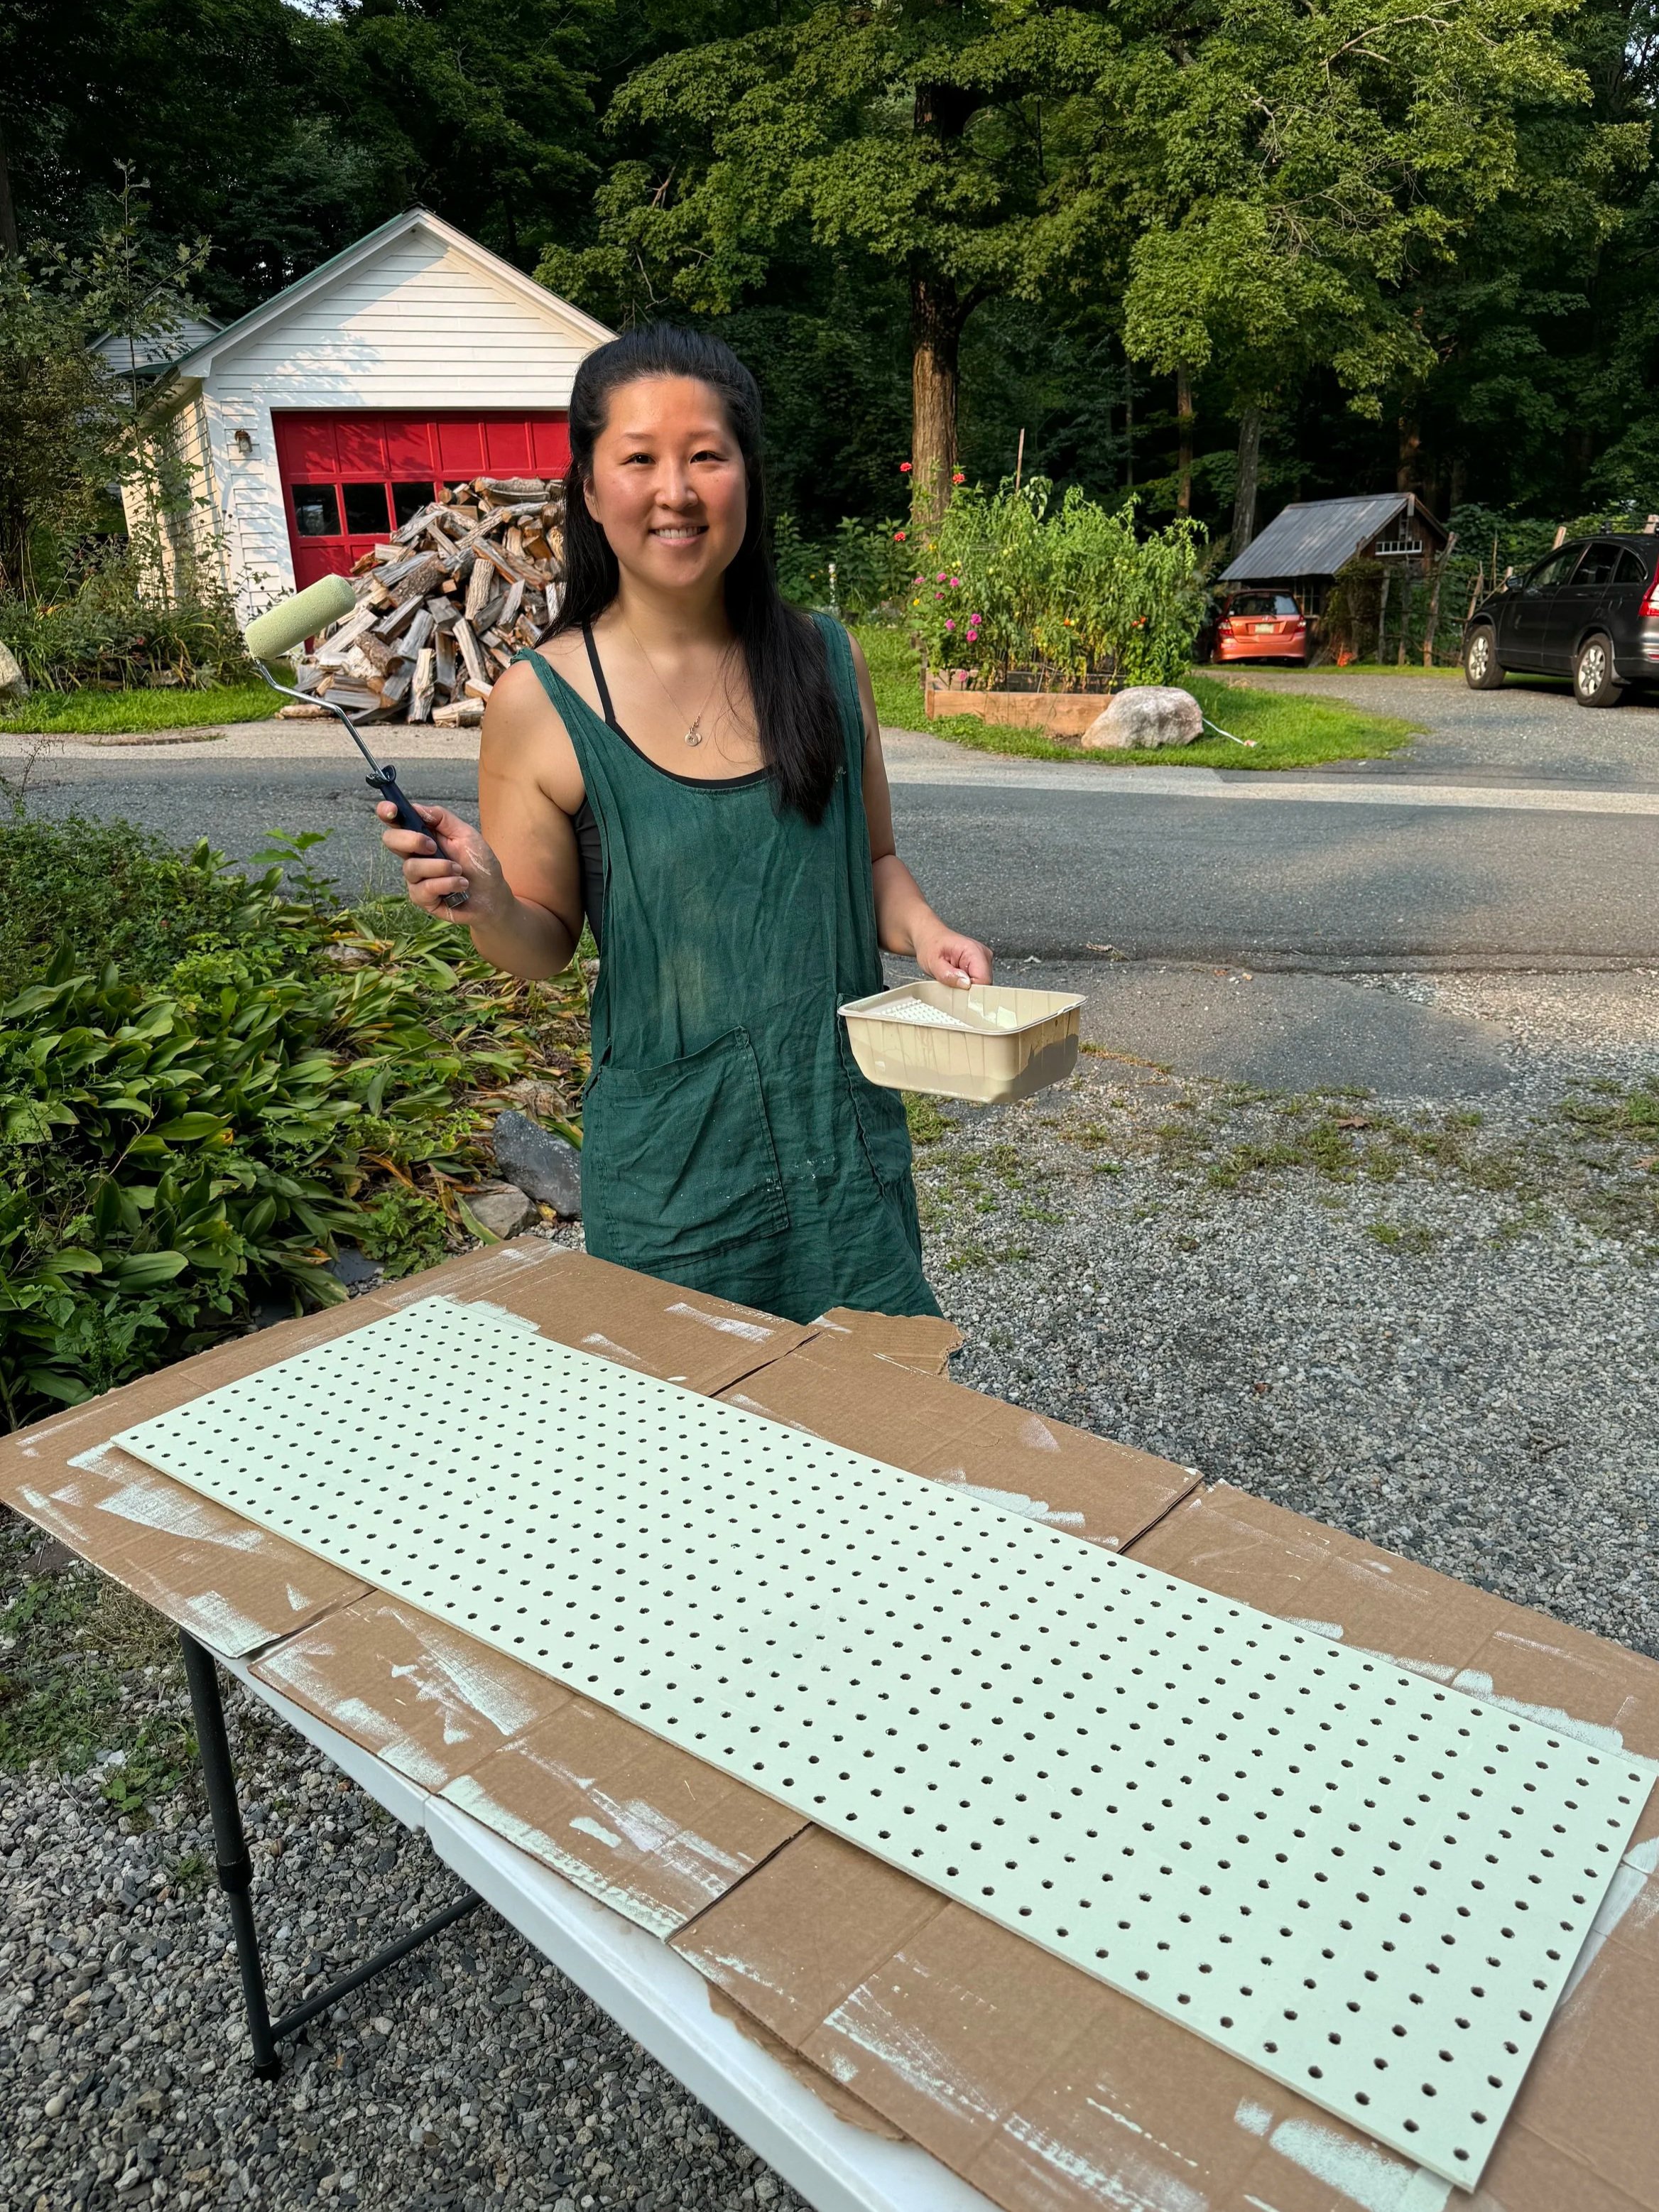
The next day, I put two coats of clear poly-acrylic on both sides of the pegboards to waterproof them. After they dried, Romaine secured them onto our walls.
Then, it was time to organize the pegboard. I ordered a pegboard organizer kit online and began arranging and organizing my tools on the pegboard.
Tips For Organizing Your Kitchen Pegboard
I purchased this set of pegboard organizing tools and these hook locks to secure some of the tools onto them. I recommend playing around with the configuration before securing with these hook locks because they are SECURE. I had to cut them off my pegboard.
When considering what goes on your pegboard, I recommend putting out items that you’ll use frequently so they won’t gather as much dust and kitchen grime.
Place your most used items within arm’s reach and less used/more dangerous items (such as mandolines) higher up.
Consider how far items protrude from the pegboard and place those items away from places of high traffic. I made the mistake of placing a colander near where we walked by and we would always run into it.
Revisit your peg board regularly after initial setup to see what needs to be moved. Make the pegboard work for your lifestyle!
FYI - I earn from qualifying purchases from some of these links.