I don’t care much for Halloween, probably because I didn’t grow up celebrating it. Yet I find myself surrounded by people who adore it. And since we live in New England in a (spooky?) Victorian Cottage in Vermont, I thought, why not embrace the season and throw a little get-together to carve some pumpkins.
Here is how I hosted my no-cook pumpkin-carving dinner party, complete with what I used, a timeline, and some pumpkin-carving tips.
The Invitation and Party Prep
I’m three weeks post-op from a second shoulder surgery, and I wanted this dinner to be easy on Romaine (my spouse), who has been taking excellent care of me. I decided to order delivery pizzas, salad, and appetizers for our meal.
I communicated to my guests that I would take care of food and pumpkin carving kits and that they should BYO pumpkins and beverages to share. This was my first encounter with pumpkin carving; I’ve never carved a pumpkin, and now I’ve learned a lot to carve one next year for the first time after my shoulder heals.
I planned this party on Thursday and had people over on Sunday, which is very spontaneous for my type A-minus personality. So as soon as I texted my guests to invite them, I placed an order to get these items delivered by Saturday. I would like to encourage you to give yourself plenty of time to order or gather your materials.
The Table
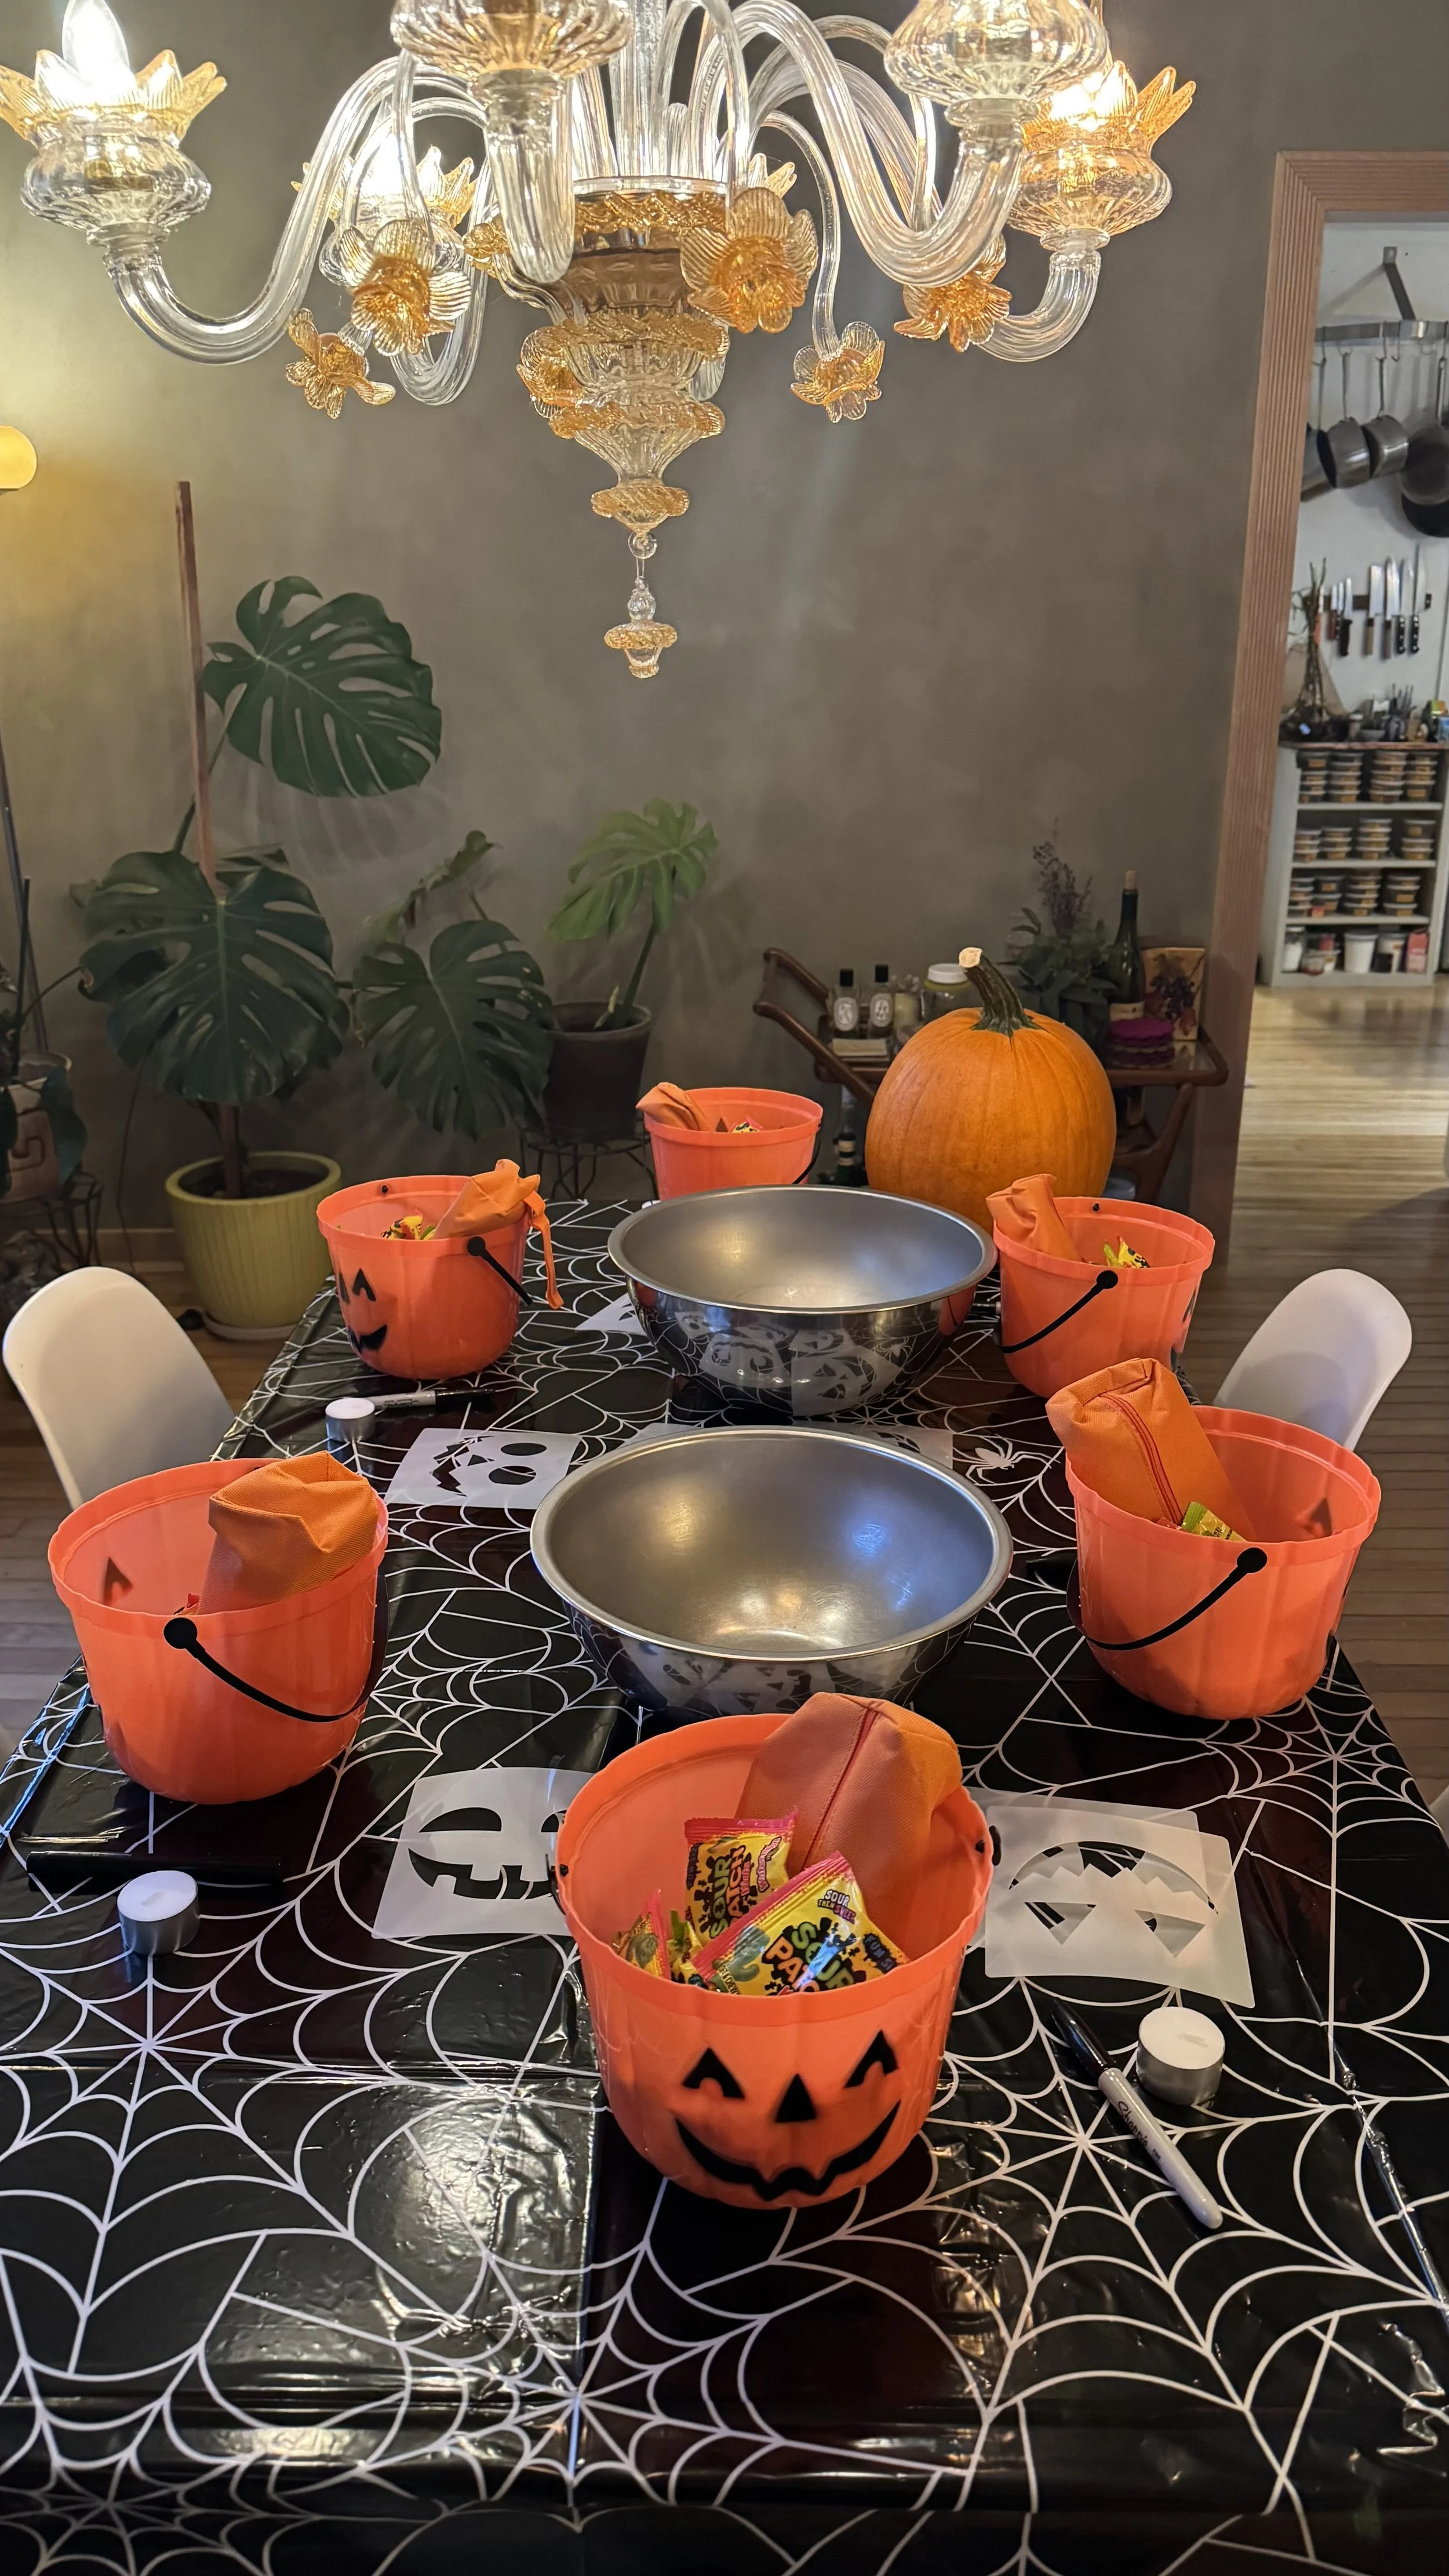
I wanted to make sure that cleanup was easy, so I placed a plastic tablecloth on my table. I put out two stainless steel bowls to gather pumpkin seeds and pulp in the center of the table, and scattered the stencils that came with the pumpkin carving kit in the middle of the table.
At each guest’s spot, I placed:
Sharpies for folks to sketch out their pumpkins’ faces. In hindsight, I think a dry-erase marker would have worked better so folks could wipe off mistakes or excess marks.
A wax candle to illuminate the pumpkins. You can also use LED or battery-operated tea lights.
One cute pumpkin carving set for each guest to keep. I filled each pumpkin container with candy. My guests told me these were high-quality carving tools.
Timeline for Setting Up
Romaine went grocery shopping for beers, candy, and cider for our guests in the early afternoon. Normally we go grocery shopping for our dinner parties a day or two before, but we were feeling quite casual about this dinner party. I suggested that we buy a pie for dessert, but Romaine made an apple crisp and salted caramel sauce to serve with store-bought ice cream.
Two hours before my guests arrived, I set up the table.
One hour before my guests arrived, I ordered the food for seven guests: three family-size pizzas, two orders of wings, mozzarella sticks, and two salads. I ordered too much food and should have ordered two family-size pizzas and one salad (plus the appetizers).
40 minutes before my guests arrived, we fed and walked our dogs.
Ten minutes before my guests arrived, I turned on some music and lit my candles. Ideally, this is when I would have heated my mulled cider.
La Fête
I completely forgot to heat the cider, and did so when guests were arriving. I tossed some cloves, cinnamon sticks, and cardamom in there as mulling spices (I was out of fresh ginger, but I would have added three thick slices to the pot). I set out some mugs, and Romaine put out some cognac, Scotch, and rum for guests who wanted to add a little nip to their drinks.
The food arrived just as our first guests arrived. We had hot mulled cider to start. Our friends brought wine and beers to share. We ate, mingled, and then folks slowly began carving their pumpkins. I did not carve one because I didn’t want to handle a serrated cutting tool with my nondominant arm. Instead, I chose to eat, chat, and watch. I did, however, collaborate with Romaine and drew the face on our pumpkin. I’d intended to clean out the pumpkin seeds and roast them while the guests were carving, but quickly gave up that idea.
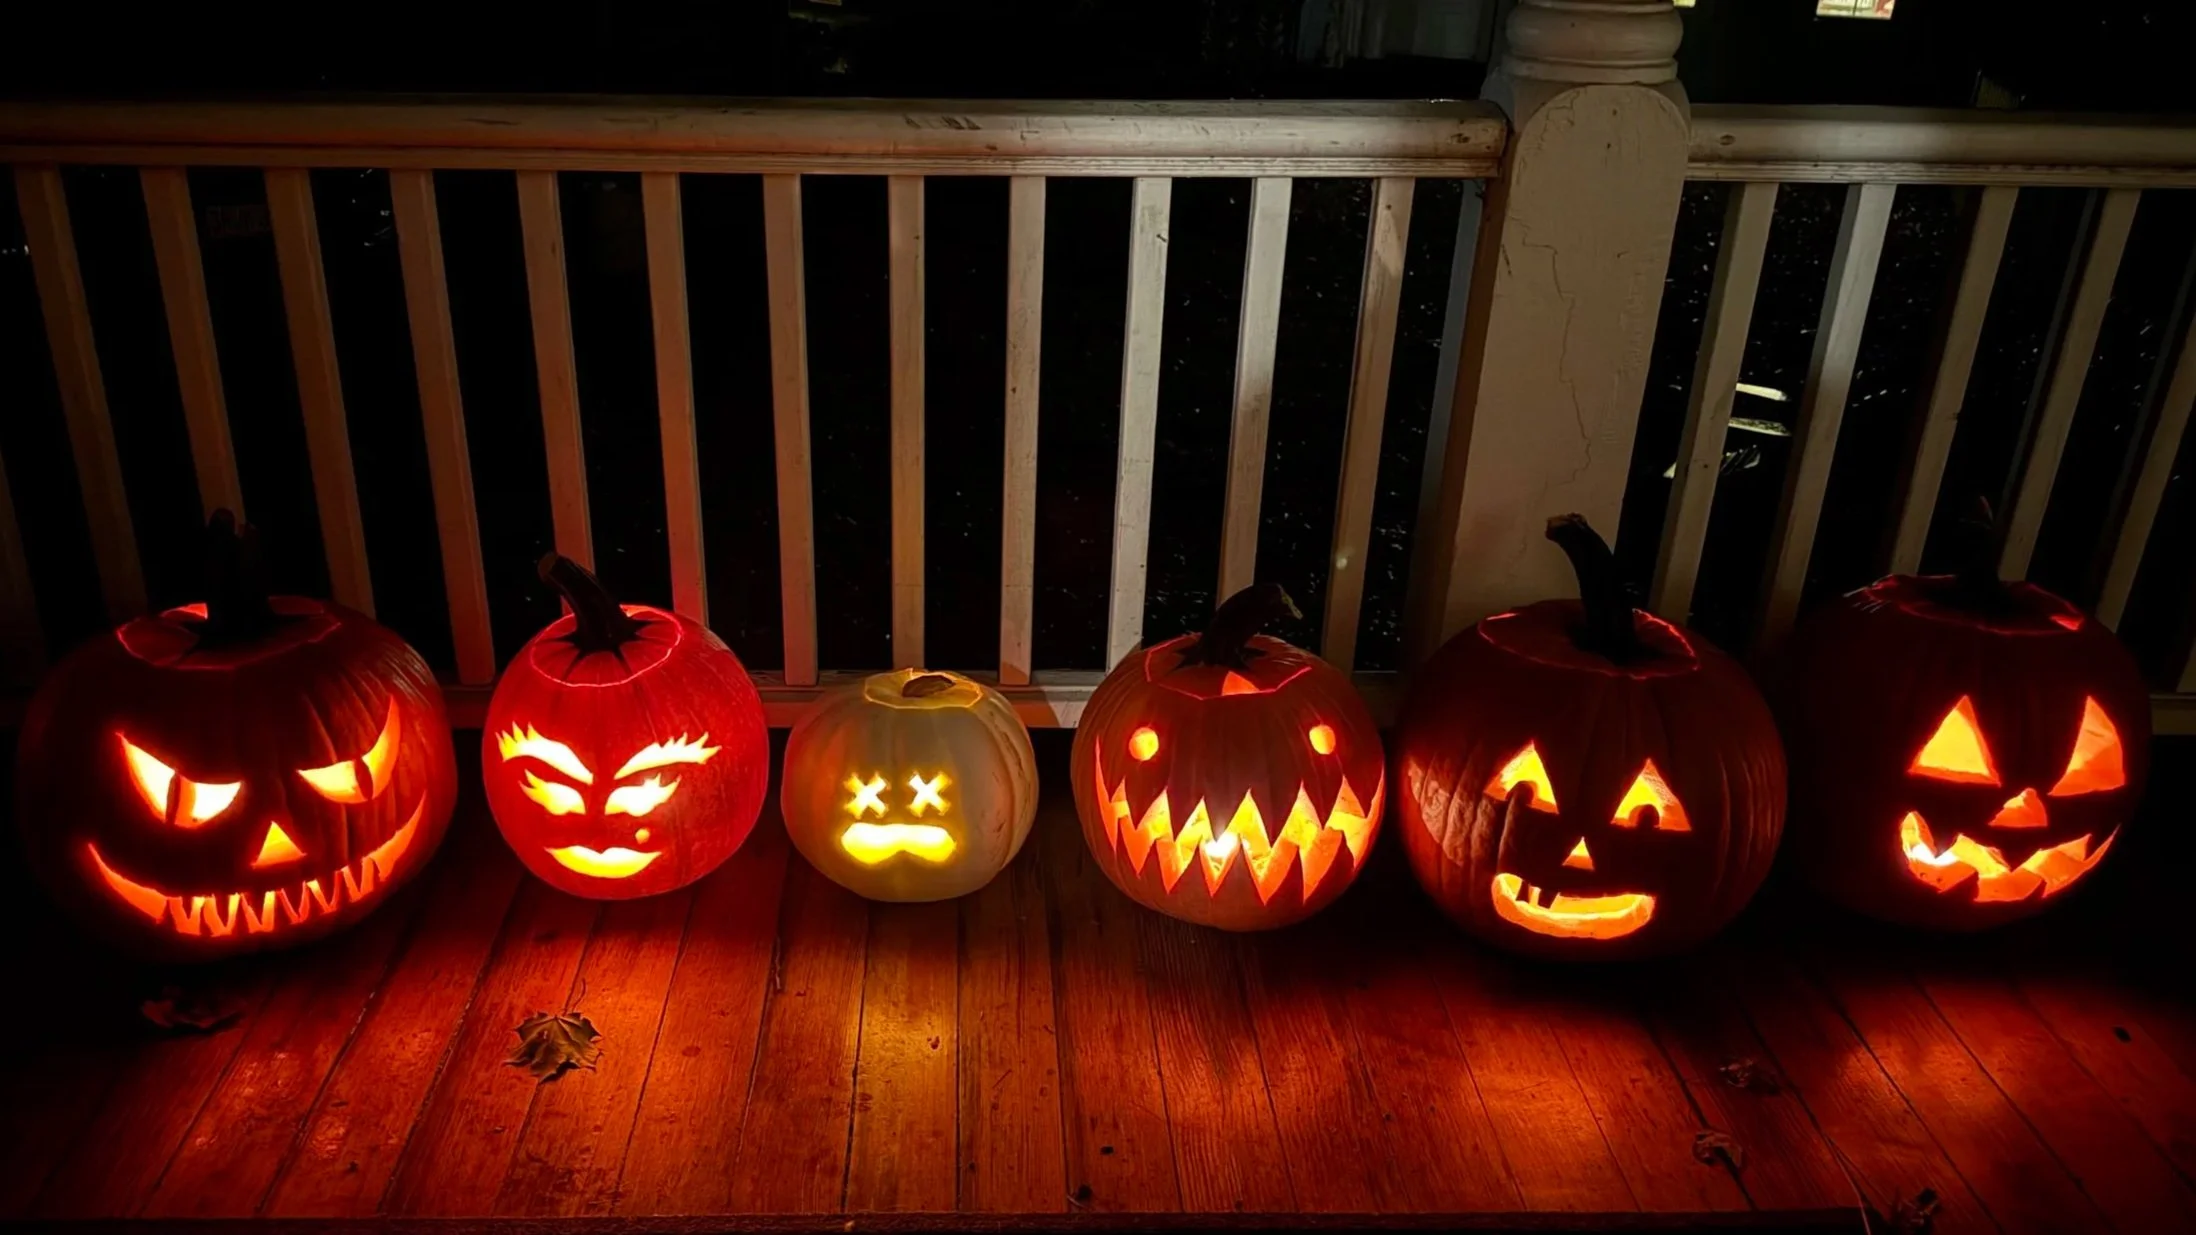
Everyone carved their pumpkins, scooping out their pumpkin flesh, sawing away at the faces. Each pumpkin reflected the artist’s personality. Some folks finished early and started digging into their pot of candy, which I realized is such a pleasure to do as an adult. And when folks finished, we lined up the pumpkins on the porch and admired the spooky cuties glowing in the dark.
Pumpkin Carving Tips
Consider when you want to display your pumpkin. You’ll want to factor in the climate of where you live and how that will impact the rate of decomposition (a colder climate will slow the rate of decay). Where I live, I would carve my pumpkin 3-4 days before I want to display it.
You can spray a mixture of 1 tablespoon of bleach diluted in a gallon of water on the cut surfaces of your pumpkin to kill any mold-causing bacteria and delay the decay of your pumpkin.
You can rub petroleum jelly on the cut parts of your pumpkin to lock in moisture.
Make sure your tools are clean to inhibit bacterial growth.
A battery-operated candle will help slow the decay of the pumpkin because it gives off less heat than a candle.
I hope you find this guide to be helpful in planning your pumpkin carving endeavors.