
Lactofermented cucumber pickles (or any other vegetable pickle) is quite simple to make, but takes a little bit of time. Rather than sharing a prescriptive recipe, I’ve shared a technique and method with helpful guidance so that you can learn how to create this type of pickle with whatever vegetables are in season.
In Southern Vermont, as I write this, we are in peak summer and have an abundance of beautiful, delicious, peak-season vegetables from our garden and the farm stands we love. I love preserving these peak-season beauties because we have long, long winters, and I find so much joy in opening a jar of something I’ve preserved that reminds me of my favorite warm summer days.
What is Lactofermentation?
Lactofermentation is a type of fermentation and food preservation method that uses salt to enable beneficial bacteria, lactobacilli, to convert the sugar in whatever produce you’re using (cucumbers in this case) into lactic acid. The salt inhibits the growth of bad bacteria and prevents spoilage while giving the food a lovely salty and tangy zip. Kimchi and sauerkraut are preserved through lactofermentation.
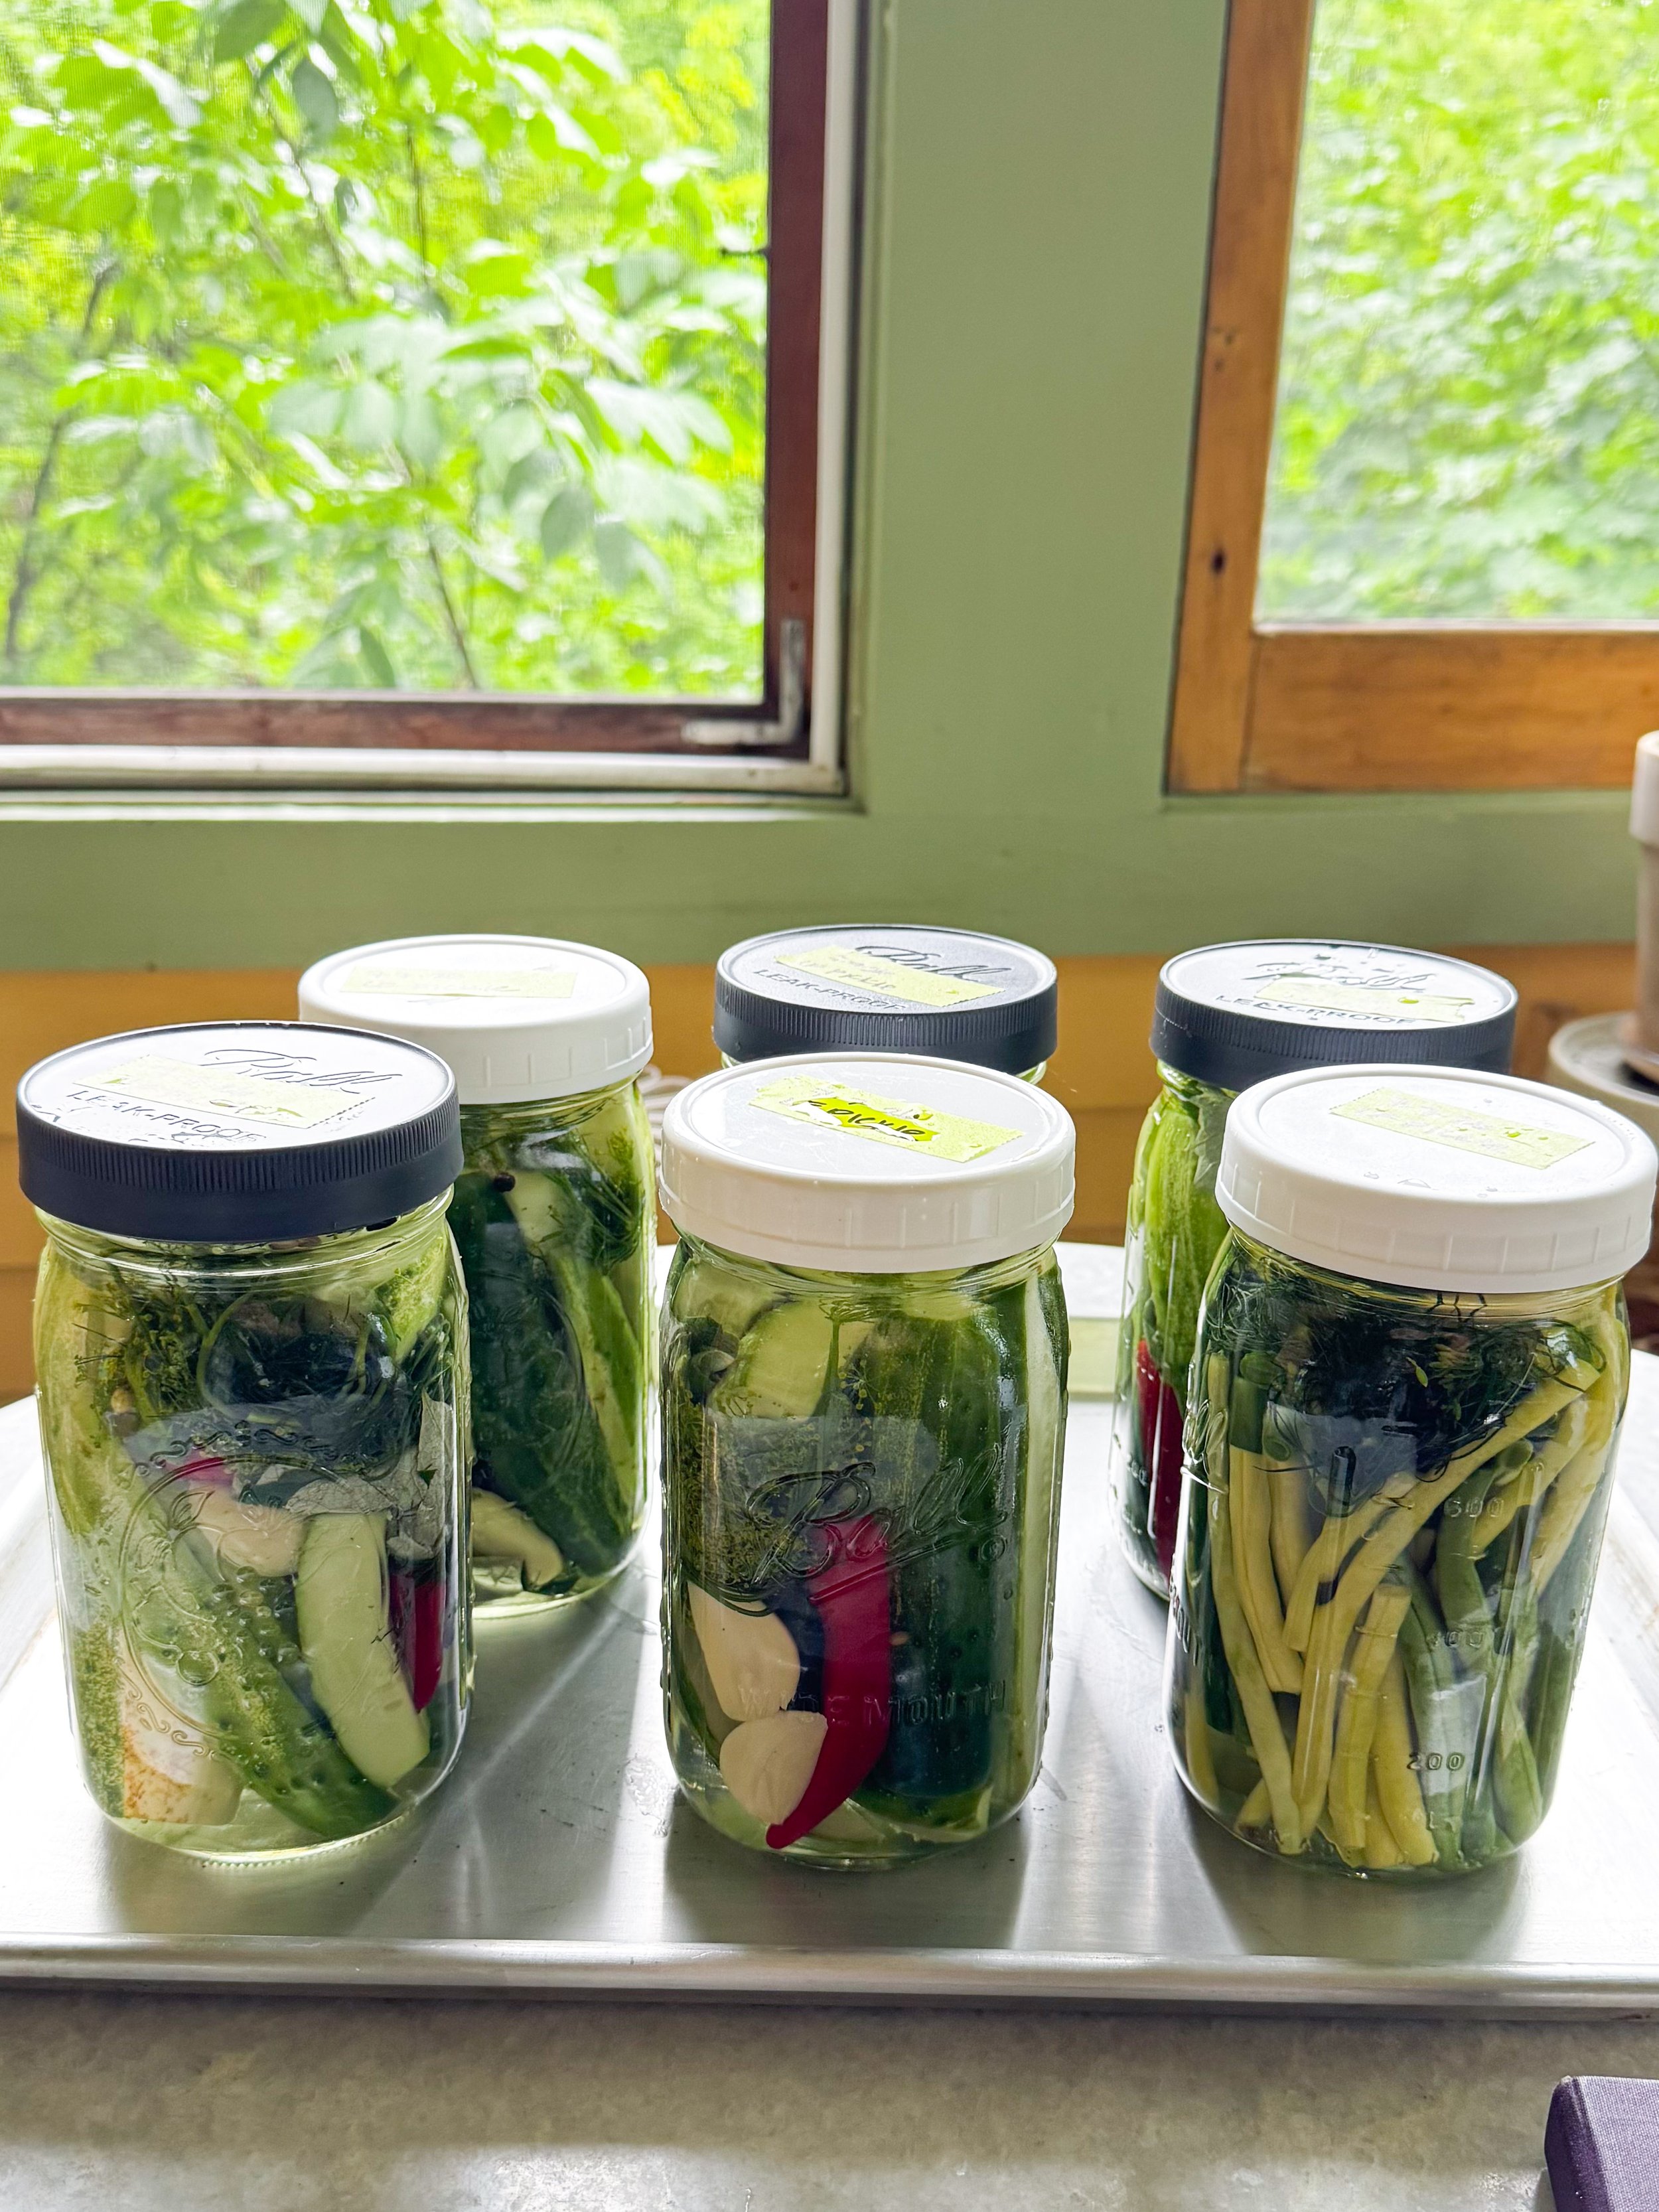
Recipe Type: This is more of a technique that you can adapt to your needs rather than a prescriptive recipe
Time: 30 minutes plus 4+ weeks for fermentation
Ingredients
Peak-season fresh produce (cucumbers, carrots, garlic scapes, green beans, etc.)
Pickling salt
Water (You can use distilled water, but I just use tap water since our tap water is fine to drink.)
Aromatics: garlic, chilis, dill flower
Spices: coriander seeds, peppercorns, dill seeds
Tannins: oak leaves, grape leaves, or black tea
Equipment
Clean quart sized mason jars
Mason jar lids (I like the plastic twist-off kind versus the metal canning lids)
Optional: fermentation weights
Scale
Mixing bowls or large measuring glass and spoons
Instructions
For this method of lacto-fermentation, we are submerging our peak-season produce in a 5% salt brine. If you find this to be too salty for your taste, you can lower it to 3 or 4%. At minimum, you need a 2% level of salinity for effective and safe lacto-fermentation.
Step 1: Wash and prepare your produce
After you’ve gathered your materials, wash and prepare your produce. Peak season produce will yield the most delicious results. This is how I like to prepare the veggies below for pickling:
Cucumbers
Cut off both ends of the cucumber and quarter the cucumber lengthwise. You really need to only cut off the blossom end, but I think it’s easier just to cut off both ends. Or, you can slice your cucumbers into discs or leave them whole with just the blossom end cut off.
Carrots
Cut off the carrot tops off, leaving an inch of the stem. Then, soak the carrots in a large bowl of water for 15 minutes to loosen the dirt on them. Scrub the carrots with a vegetable brush and rinse them to remove the dirt.
Green beans
Trim off both ends of the green beans after giving them a rinse.
Garlic scapes
Rinse the scapes and cut them into manageable sizes for eating (about 2 inches).
Step 2: Add ingredients to your jars
Add your clean, cut produce, aromatics (dill or flowering dill, 1 whole chili, 2–3 cloves of garlic, etc.), spices (peppercorns, coriander seeds, bay leaves, etc.), and tannin (1–2 fresh grape leaves, fresh oak leaves, or ½ teaspoon of black tea) to your jar. The aromatics and spices will infuse your produce with flavor, while the tannin will ensure your pickle is crunchy. I prefer not to use black tea because I don’t want my pickles to take on a dark brown color.
When packing the jars, make sure to gently squeeze as many veggies as you can into the jar. You can often arrange them so they’re all wedged in under the neck of the jar. You want everything to be submerged under the liquid so it doesn’t mold.
Step 3: Prepare your brine
After you’ve added your ingredients to your jars, you’ll know approximately how much brine to make. While the amount of liquid you’ll add to each jar will vary, I think it’s safe to estimate about 1 cup of brine per quart (depending on how tightly packed the jars are). One thousand grams of water is approximately 4.25 cups of water. Figure out the mass of the water and add 5% pickling salt to the water. If you don’t have enough brine, you can easily make more.
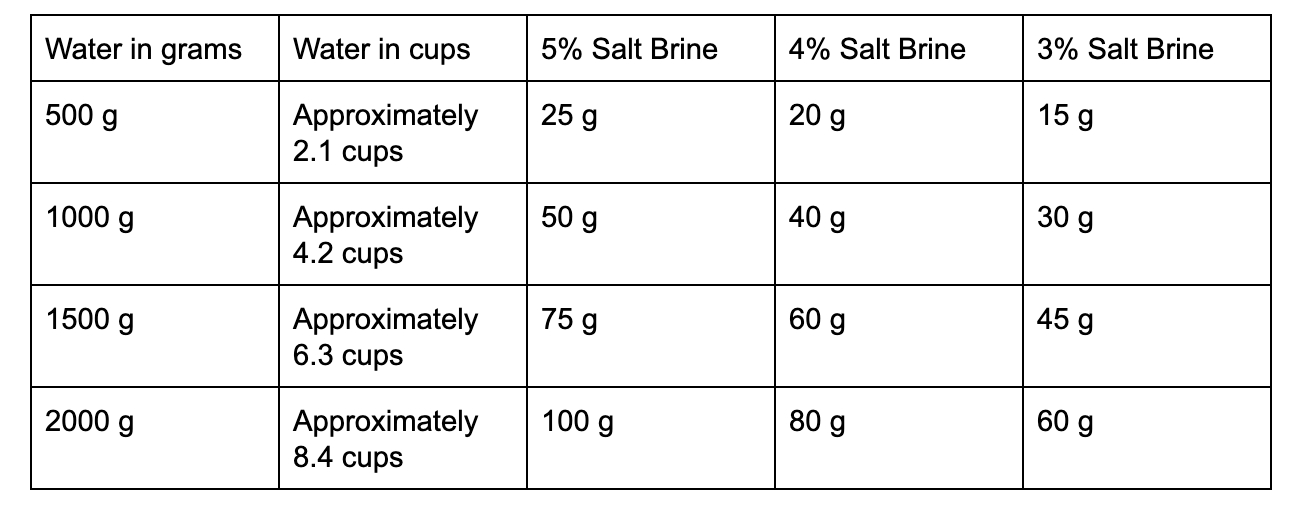
Here’s a table to help you calculate your salt brine
Stir the pickling salt into the water until it dissolves. Pickling salt is simply pure salt that has no caking agents or iodine. It easily dissolves in water and does not discolor vegetables.
Finish the pickles
Pour the salt brine into the jars over the pickles. Ideally, your vegetables will be wedged down and won’t float to the top (cucumbers are great in this situation). If you need to, add a glass fermentation weight to the top of your produce to submerge your veggies.
Fermentation
Add a lid and label your pickle. Place the jars onto a baking sheet to collect any brine that may spill over. Leave them out at room temperature for two days. Then, check your jars. You want to look for small bubbles to start forming on your pickles. You’ll notice that sometimes brine will have spilled out of the jar. This is a great time to top off the jars with additional salt brine to ensure the vegetables are submerged and prevent mold.
Place the jars into the refrigerator and let them ferment. I like to taste my pickles over time to see how they ferment and change. They usually take about 4 weeks to get to my preferred level of fermentation, but that is completely a personal preference. They will last in the fridge, submerged under brine, for up to a year.
If your pickles develop mold because something is above the brine, the whole jar will be contaminated with the mold. Toss it out.