Happy Wednesdays, dahlings!
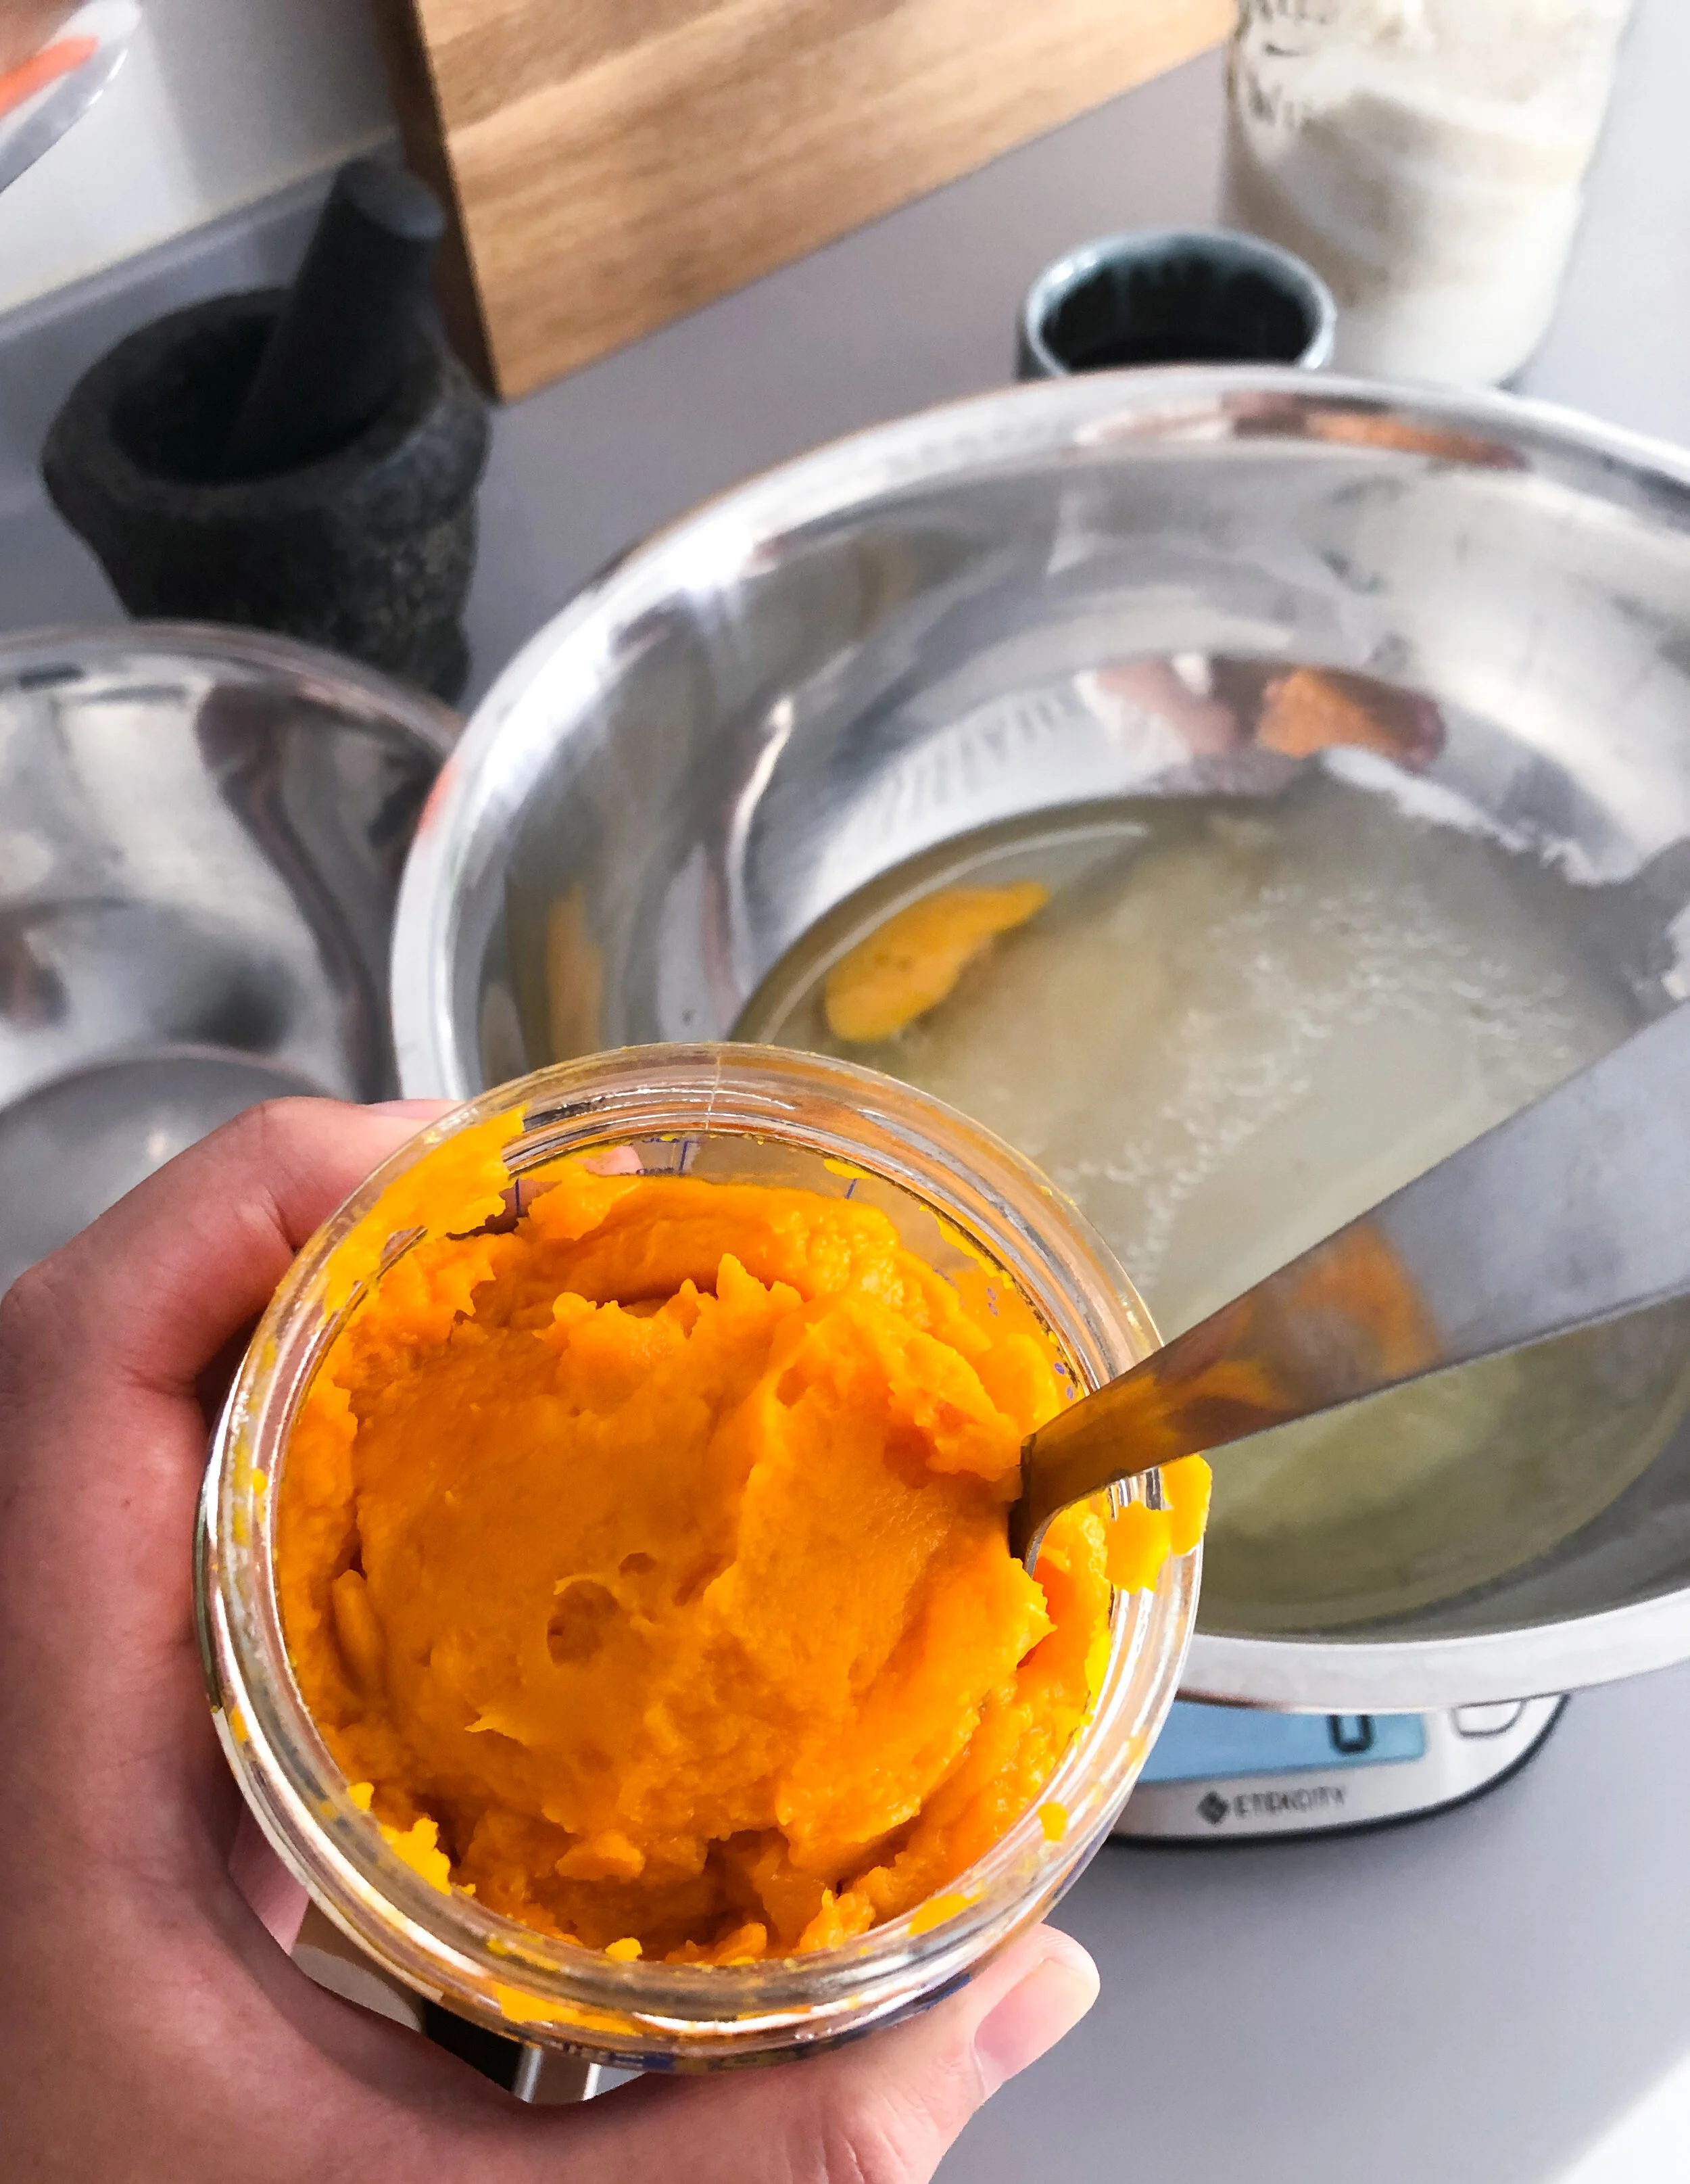
Here’s a cute two and a half minute video on how to make homemade pumpkin purée for baking and savory dishes. Also, a friendly reminder that the October newsletter goes out tomorrow. Sign up so you don’t miss it!
Happy Wednesdays, dahlings!
Here’s a cute two and a half minute video on how to make homemade pumpkin purée for baking and savory dishes. Also, a friendly reminder that the October newsletter goes out tomorrow. Sign up so you don’t miss it!
Roasted fall butternut squash salad is a hearty, savory, and fabulously easy dinner or side dish. When cooking vegetable-forward dishes or meals, I want them to be satiating and delicious. This salad maximizes flavors and textures from the ingredients by simply roasting or boiling the main ingredients. The roasted squash and onions have concentrated flavor and umami-packed browned bits while the cooked French lentils add a creamy and hearty bite. Dill + red wine/sherry vinegar give this salad a pop of brightness, and a generous drizzle of lovely olive oil adds some luxury and opulence. Serve this salad d’automne with some crusty sourdough bread for an easy and delicious fall meal.

Recipe Type: Vegan Meal or Side
Time: 1 hour
Servings: 4 as a side 2 as a main
Two cups of cubed butternut squash (1 small whole squash)
½ cup French lentils (lentilles du puy)
8 small onions (such as cippolini or spring onions if available) or 1 yellow onion
A handful of fresh dill and chives (sage can be a great substitute)
1 tablespoon maple syrup
Salt and pepper
Red wine or sherry vinegar
1 clove of garlic
Neutral oil (grapeseed or sunflower)
Olive oil
2 Baking sheets
Y Vegetable peeler
Medium or small pot
Knife and cutting board
Fine Mesh Sieve
Parchment paper
One medium or large mixing bowl
Microplane
Preheat the oven to 400℉ or 205℃. Prepare the squash by cutting off the top and bottom of the squash, peel the squash with a sharp vegetable peeler, discard the peels, then cut the squash lengthwise. Scoop out the seeds (you can clean and roast them to snack on if you’d like), and dice the squash into ½ inch pieces.
Toss the diced squash in 2 tablespoons of neutral oil, a generous sprinkle of salt, and maple syrup. Place on an even layer on a parchment sheet lined baking sheet and set aside.
Clean the onions by removing the skins and trimming off the roots. Cut into halves or quarters if you have small onions or dice a large one into 1 inch cubes.
Toss in one tablespoon of neutral oil and a generous pinch of salt. Place on another parchment paper lined baking sheet cut side down.
Roast the squash and onion for about around 30-45 minutes until the squash becomes tender browns at the edges and the onions char on the edges. Give the squash and onions a stir in the middle of cooking to promote even roasting and change the position of the vegetables in the oven.
Bring a medium or small pot of water to boil. When boiling, add lentils and lower to a simmer. Cook gently until the lentils are tender (around 30-40 minutes). Taste them to test for doneness.
When they are cooked to your liking, drain the lentils in a sieve and add them to the mixing bowl.
While the vegetables are roasting and the lentils are cooking, wash the dill and chives and set aside. Reserve a few dill fronds for garnish.
Once the vegetables have roasted, place them into the mixing bowl with the lentils.
Chop the dill and chives and add to the mixing bowl.
Grate one clove of garlic with a microplane directly into the bowl (if you don’t have a microplane finely chop the garlic after chopping the herbs). Add two glugs of olive oil and about one tablespoon of red wine or sherry vinegar for acid. Add freshly ground pepper and season with salt to taste.
Garnish with dill fronds and serve warm or at room temperature with some crusty sourdough bread.
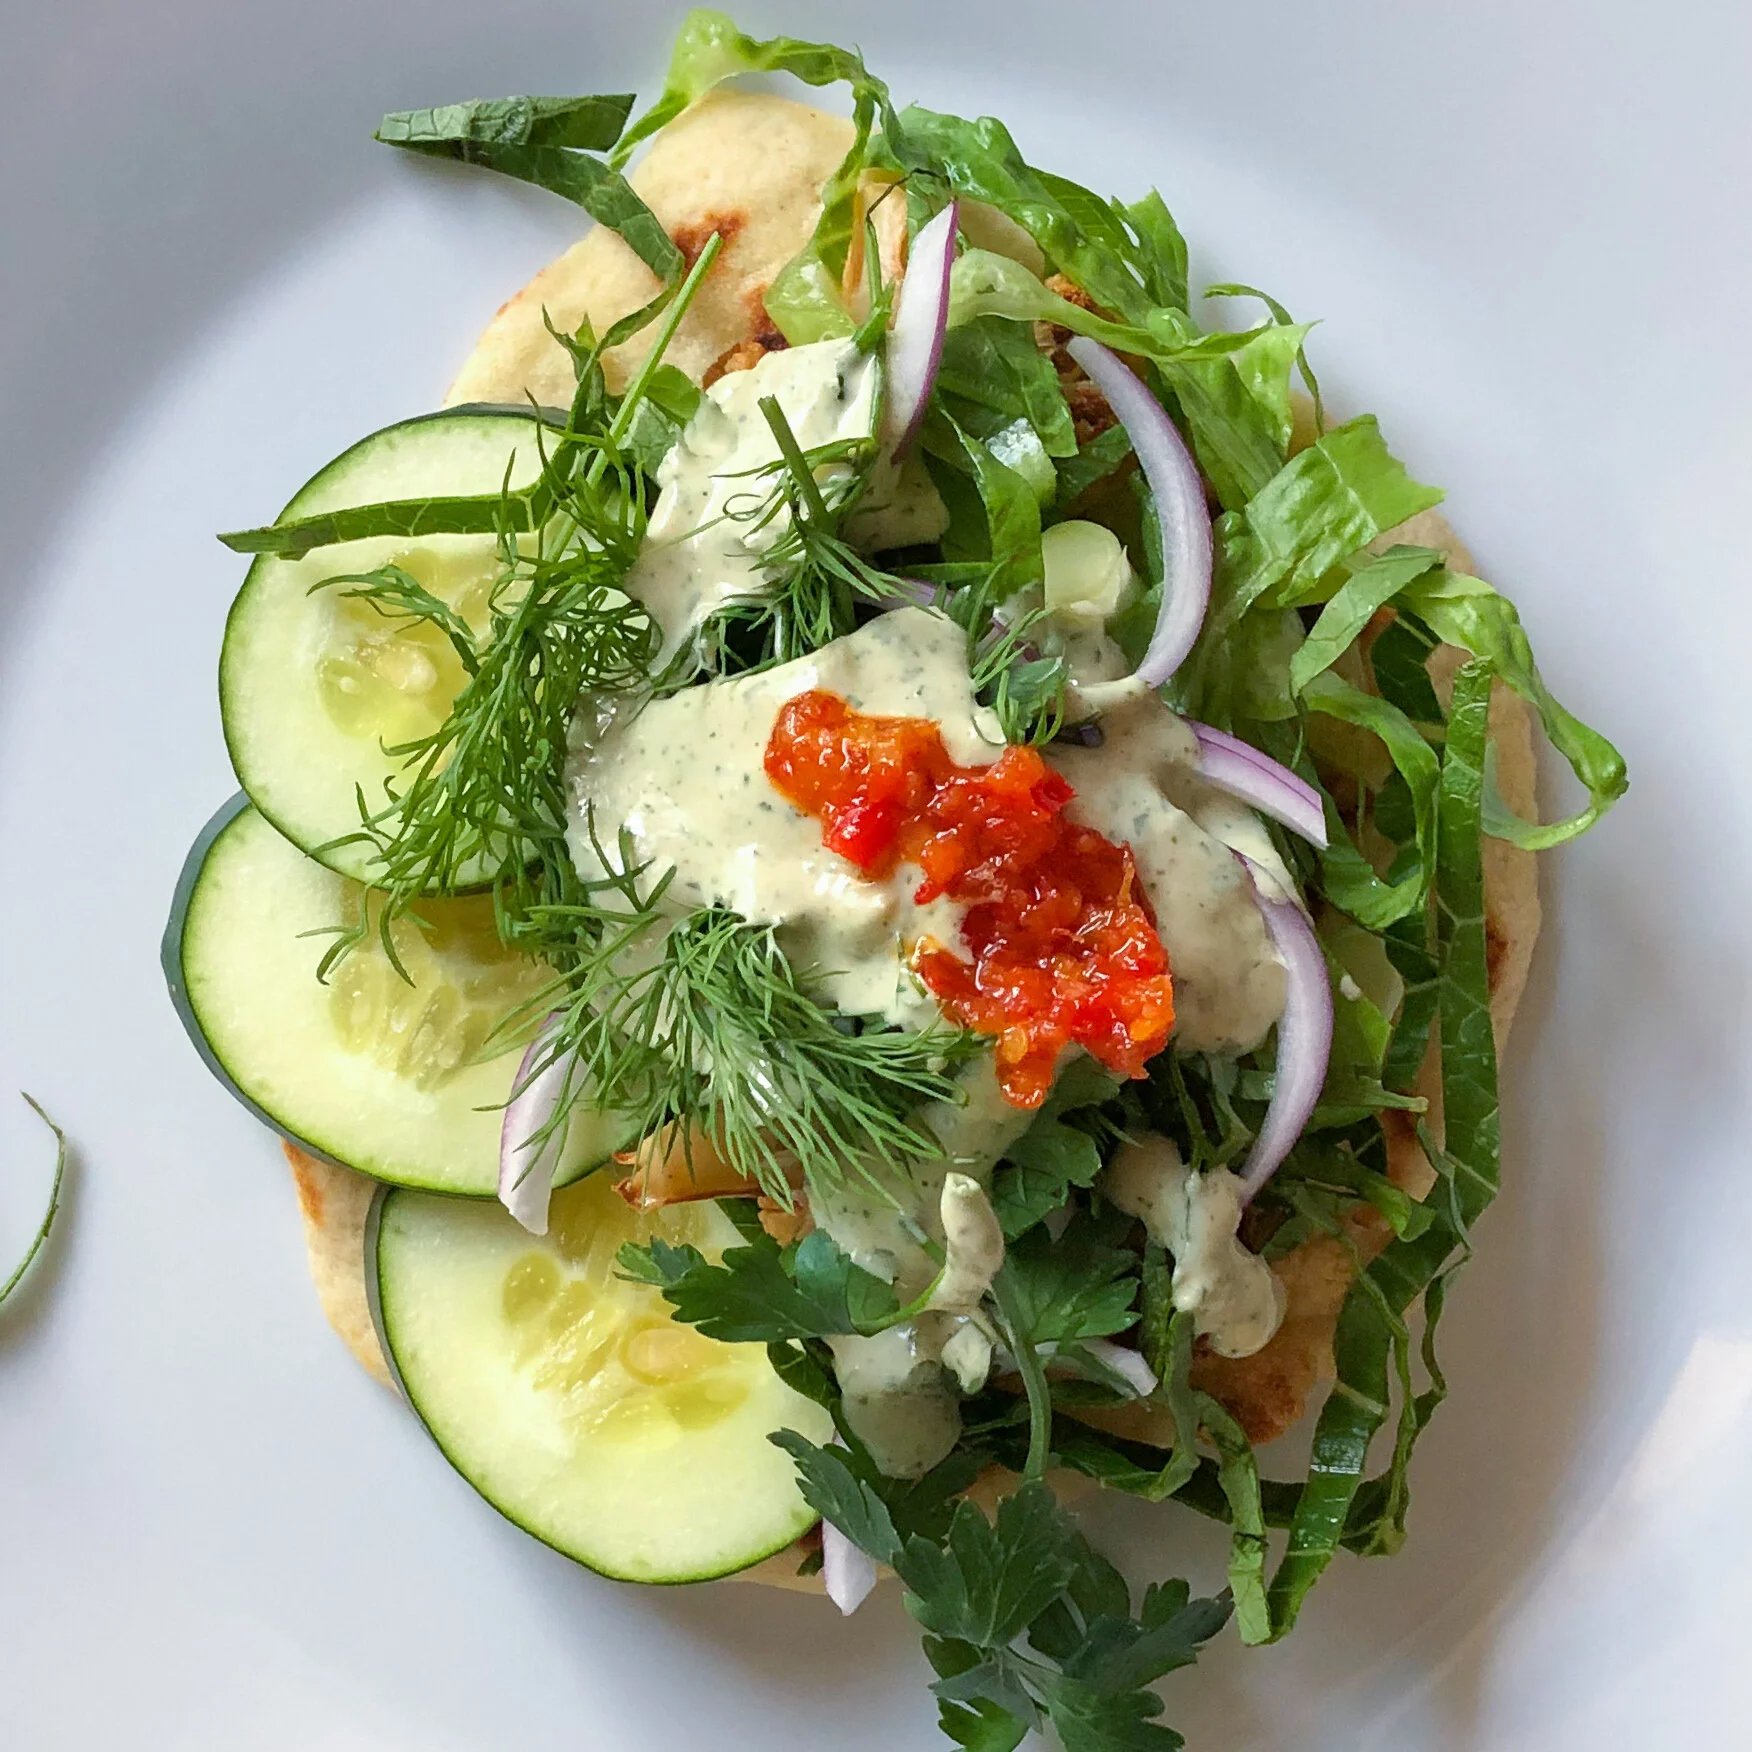
It's cauliflower season, and I want to be more inclusive to my vegan readers and share a fabulous sandwich that's easy to scale up or down for a quick dinner or a feast with friends. I like to roast a whole cauliflower broken into florets to concentrate the cauliflower's flavor. When roasted, the cauliflower will get browned and crispy on the edges and soft and tender in the center. Before preparing the ingredients, I make the dough for homemade chapati, a flatbread that my friend Maya taught me how to make (check out her Brika recipe). While the dough is rising, I cook the cauliflower and assemble the vegetables for the sandwich. When it's time to eat, I cook the bread, and place everything on the table to serve family style so that everyone can help themselves: a large plate of veggies for garnishing (and texture), the roasted cauliflower, warm bread, tahini dressing, olive oil, harissa, and salt/pepper. To make this sandwich into a feast, simply serve with a large green salad, houmous, and eggplant caviar/baba ganoush with some sliced carrots and cucumbers for dipping.
In case you missed it, here’s my first monthly newsletter that went out last week. You can stay up to date on all things Le Dinner Party by subscribing!
Recipe Type: Vegan, Sandwich
Time: 1 hour
Servings: 4
1 large head of cauliflower
1 lime or lemon
2 cloves of garlic
Red onion
Cucumber
¼ head of crispy lettuce of your choice
Harissa or any other hot sauce of your choosing
½ cup of tahini
Olive Oil
Neutral oil (I use sunflower or grapeseed)
Salt and pepper
Any combination of fresh tender herbs; I love to use dill, scallions, mint, and cilantro or parsley
2-3 pieces of flatbread for each person
Baking sheets
Food processor
Microplane
Prepare Bread
If you're making homemade bread, prepare the dough before cooking the cauliflower.
Roast Cauliflower
Preheat the oven to 400℉ or 205℃.
Remove the outer green leaves of the cauliflower, and cut the cauliflower into approximately two-inch florets. I like to keep the stem and slice it into ¼ inch disks and roast them with the florets.
Wash and drain cauliflower.
Place the drained cauliflower into a large bowl and add 2-3 tablespoons of neutral oil, a generous sprinkle of salt. Toss to coat, and place in an even layer on a baking sheet. Roast until browned at the edges and tender when pierced with a knife (20-40 minutes depending on your oven).
Remove cauliflower and pour a couple of tablespoons of olive oil on top and add a splash (around 1 teaspoon) of acid red wine vinegar or lemon/lime juice. Toss to combine. When ready, place the cauliflower in a serving bowl covered in foil to keep warm.
You can prepare the cauliflower ahead of time and keep warm in the oven at 200℉ or 95℃.
Mise en Place and Garnishes
While the cauliflower is roasting, assemble the rest of your ingredients and set up your mise en place.
Wash lettuce and herbs.
If necessary, Trim dead parts off of the herbs and place onto a serving plate.
Cut lettuce into thin slices horizontal to the root to make shredded lettuce or shrettuce and add to a serving plate.
Peel the red onion and slice into half-moons, slice cucumbers into rounds or half-moons, and if you have scallions, cut into ⅛" pieces. Place on a serving plate.
Roughly chop 2 cloves of garlic and set aside.
Roughly chop a little bit of all the herbs you're using so that you have around ¼ cup for the tahini dressing.
Prepare Tahini Dressing
In a food processor, add the 2 cloves of roughly chopped garlic, and pulse a few times to mince.
Add ½ cup of tahini, ½ teaspoon of lemon zest, and the juice of ½ a lemon or lime, and the chopped herbs.
While running the food processor, drizzle in around ¼ cup of water (more or less depending on how loose you want your dressing) to make a silky dressing.
Season with salt, pepper, and more citrus juice if you want it to be more tart.
If you don't have a food processor, you can whisk the ingredients together (make sure to mince the garlic rather than roughly chop)

Before serving, heat the bread on a pan or in the oven. Place in a clean kitchen towel in a shallow bowl or plate to keep warm. Set all the veggies, herbs, and dressing, and harissa on the table to let guests assemble their own sandwiches.
Around July, little sugar plums would emerge at the Brooklyn Prospect Park farmer’s market plump and resplendent in their gold, ruby, and violet skins. Charmed by these gentle nuggets, I began preserving them with a Korean lacto-fermentation method used to make maesil-chung. Maesil-cheong is an extract or syrup made from green unripened apricots that are packed in sugar and left to ferment for 100 days. During this time, the sandy sugar turns into a clear then richly hued liquid. After 100 days, the syrup is ready to strain. The remaining fruit can be used one more time to make a plum flavored liquor.
This is a fabulous low-drama long term fermentation project. During this summer, I’ve made three types of syrup with cherries, green Reine Claude plums, and purple Quetsch plums. And, I’ll most likely make another jar of Quetsch syrup and one with small yellow Mirabel plums before the season ends. I love to burp the jars every few days and taste how the flavors of the syrups changes over time. Although I’m sad to see summer go, I’m excited for the syrups to become ready to brighten up my cooking during the dark and cold winter months.
I’ll share recipes of how to use this beauty syrup in the coming months. I hope you’ll make some syrup with me. Stay in the loop by subscribing to my monthly newsletter!


Recipe Type: Low-drama project
Time: 100 days, plus some light maintenance.
Servings: around ¾ a liter of syrup
~400 grams of firm summer plums (cherries or currants work well too)
~400 grams of white sugar
Optional
1 bottle of vodka or 4 bottles of soju
1 sterilized glass 1 liter jar or 1.5 liter glass jar
Scale
Masking tape and permanent marker
The ratio of fruit to sugar is 1:1. You can use as much or as little fruit as you want. I’ve written this recipe to fit into a one liter jar. You can scale it up or down as you wish.
Preservation
Wash, sterilize, and dry a 1 liter glass jar (you can sterilize with boiling water or run the jar through a dishwasher). Then, wash and drain the fruit. Weigh the fruit and add the exact same amount of sugar to another bowl—if you have 453 grams of fruit, you’ll need 453 grams of sugar. Set aside a half cup of sugar to top the fruit later.
Fill the sterilized jar by layering the fruit and sugar taking care to pack the jar tightly while not damaging the fruit. Add the reserved ½ cup of sugar to the top of the jar at the end so that the fruit is fully submerged in the sugar. If the jar is too full, don’t worry, keep the sugar in a separate jar or bag. Add it to the mixture in a couple of weeks after the sugar has liquefied.
Set the jar on top of a plate or small baking sheet in a cool part of your kitchen. Label the jar with the date started and the type of fruit you use. Your 100 day wait begins.


Fermentation and Observation
Over the next few weeks the sugar will begin to liquefy. If you have reserved sugar, add it back to the jar when there is room in the jar. Once 80% or so of the mixture is liquid, gently stir the mixture with a long sterilized spoon once a week or so to encourage the sugar at the bottom to liquefy. I like to submerge the fruit on top into the syrup while I’m stirring to prevent the tops of the fruit from getting moldy. You can also use fermentation weights to submerge the fruit under the liquid. I’m too lazy to do that, so I just stir the fruit occasionally. Take care to keep the fruit intact when you stir, and don’t add anything foreign to the mixture.
Carefully monitor the extract, small bubbles should emerge from the fruit as the sugar liquefies. The bubbles indicate that lacto-fermentation is happening. If there aren’t any bubbles after 4-6 weeks, chances are something went wrong. Toss this batch., it’s not worth the risk of consuming something contaminated. Burp the jar every couple of days depending on how active the mixture is so that pressure doesn’t build up in the jar. This is very important to release the carbon dioxide coming from the syrup so that the jar doesn’t explode. If you’re going to be away for a week, burp the jar, then, stick it in the fridge to slow down fermentation.
Sample the syrup occasionally with a sterilized spoon (only if there are bubbles coming from the fruit), and notice how the syrup evolves over time.
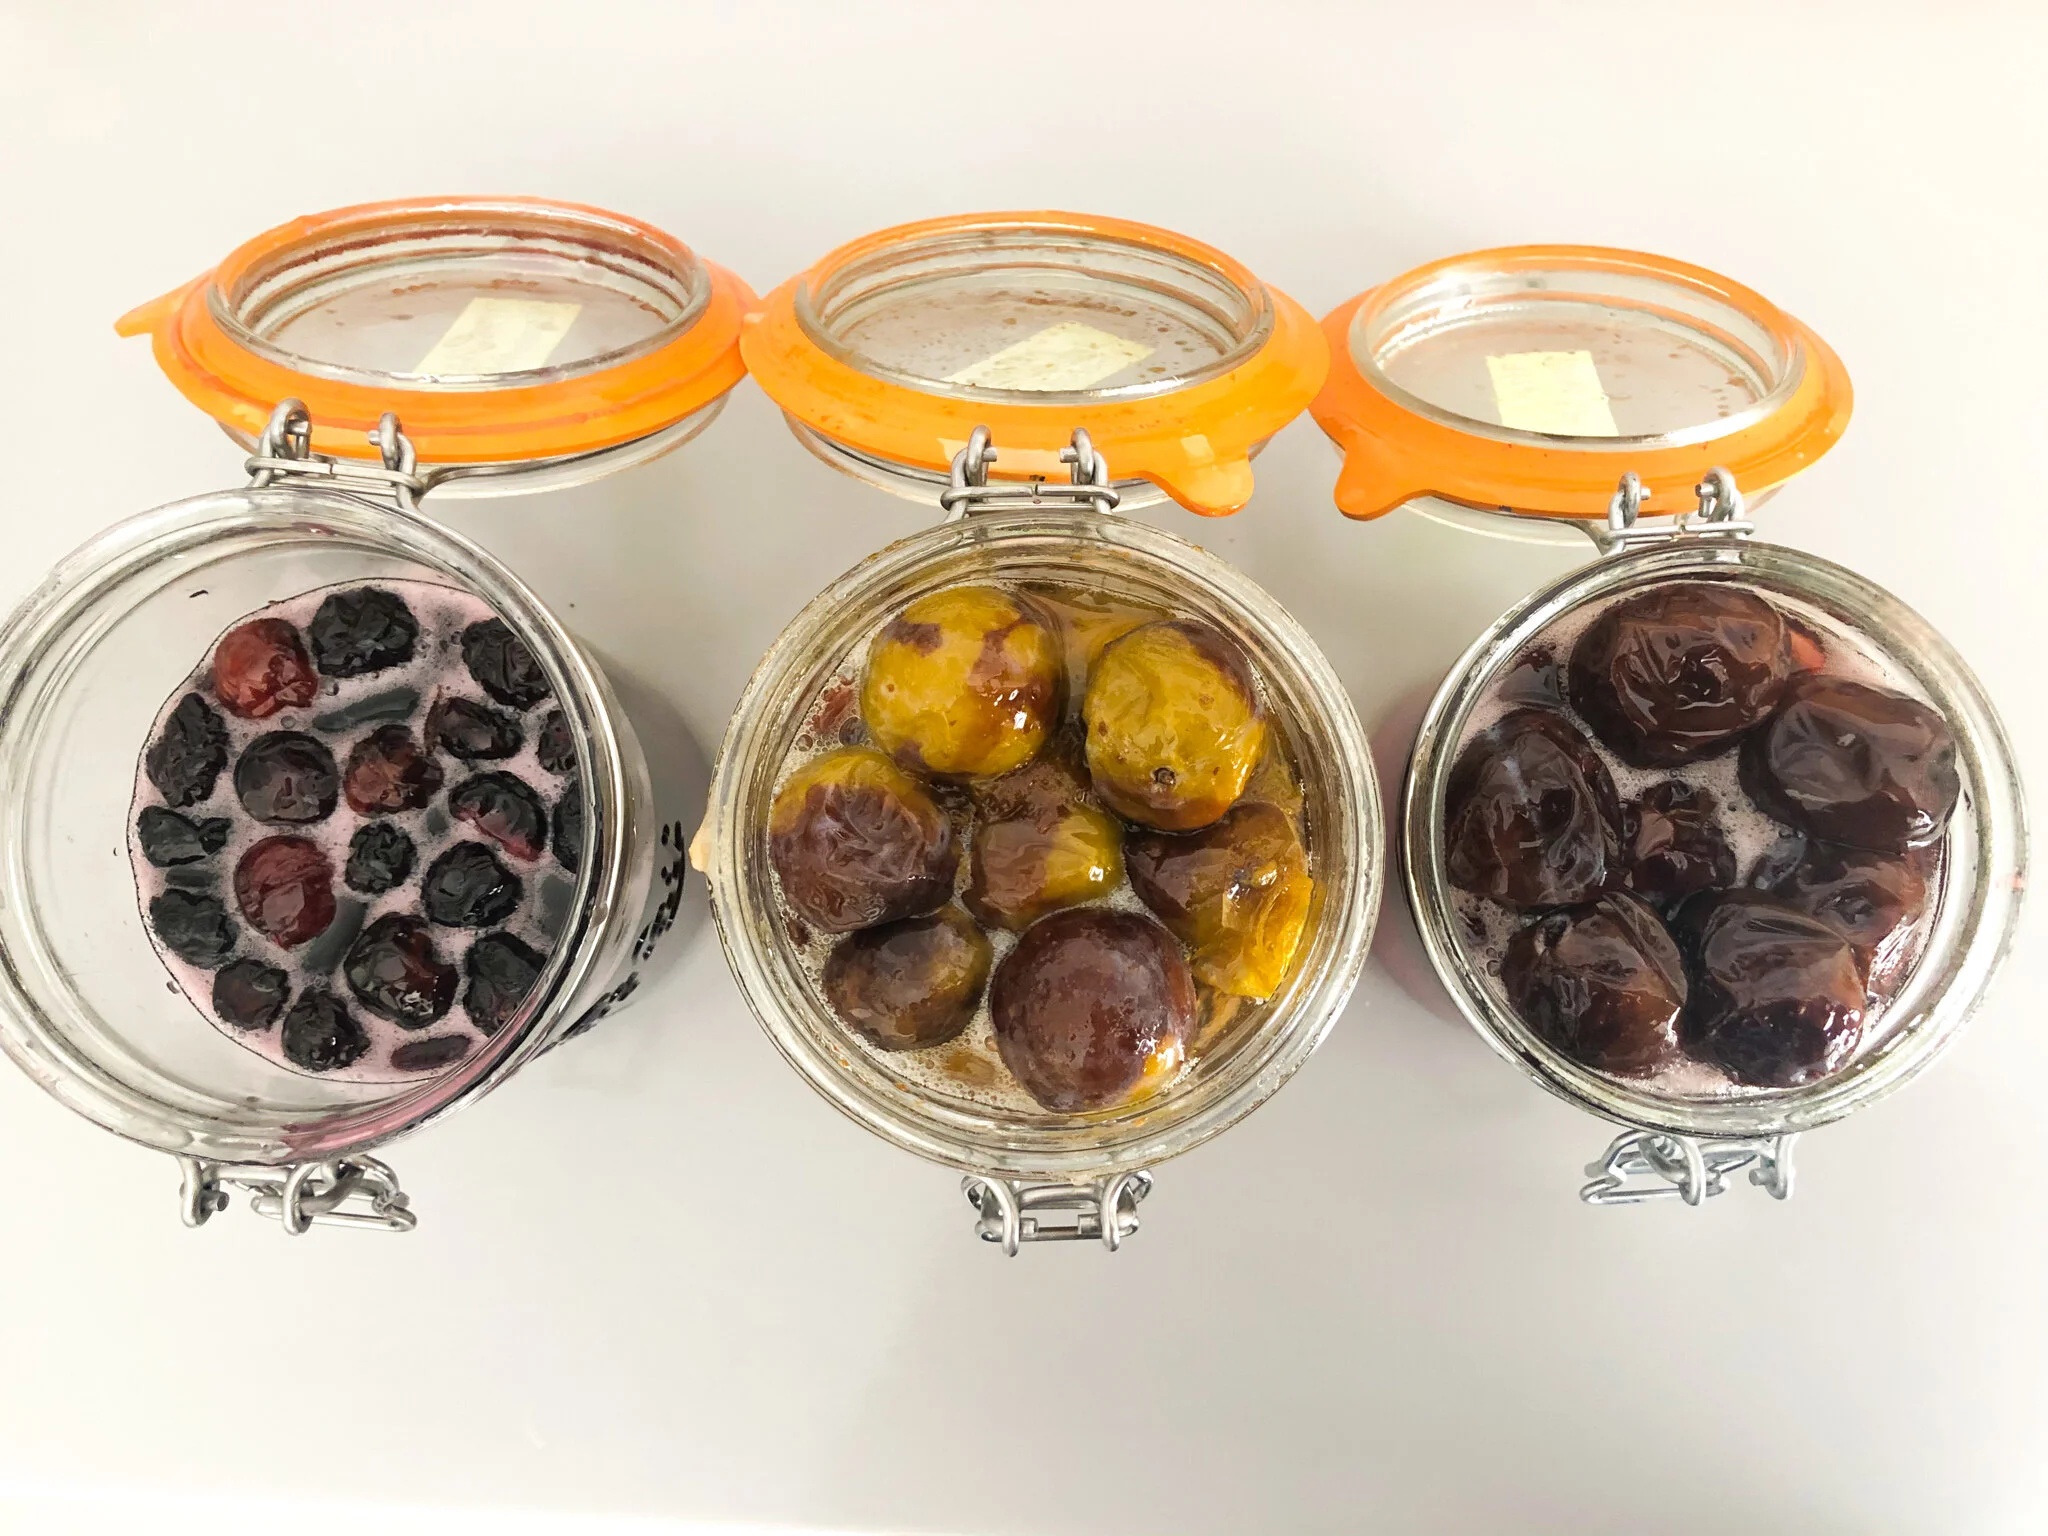
Notice the small white bubbles that indicate fermentation is occurring. These were very bubbly and active because they were kept out in warm summer weather.
The Final Beauty-Syrup
After 100 days, the syrup will be ready to strain into a clean and sterilized glass jar or bottle. Used in teas, cocktails, mocktails, marinades, and however else you want.
Optional Step: Make Plum Infused Liquor
You can leave the remaining fruit in the jar and add a bottle of vodka or four bottles of soju. Wait a month or so for the plums to infuse the alcohol. Strain and add to cocktails!

Maya—A REGAL Queen!

Maya’s Brika
You can learn a lot about someone when cooking together: how they communicate, share, give/take feedback, and occupy space. I've had the pleasure of cooking professionally and casually with folks from all over the world. Each experience requires observation, receptiveness, calibration, and understanding. Yet, with Maya—Parisian friend of Tunisian descent & REGAL Queen—cooking together is comfortable, as if we'd been sharing a kitchen for years. Perhaps it's the shared experience of navigating our first-generation third culture kid lives; the stories we share to keep the connections to our ancestral homes that our families left behind in search of opportunities. Or, the realization that despite vast geographic and cultural differences, both Tunisians and Koreans love the spice and acidity that harissa/pickled chilis and kimchis provide to balance a meal.

Our Tunisian Inspired Feast
During a recent dinner party with Maya and her husband, Andy, Romaine and I decided to make a Tunisian-inspired feast. On the menu: A big green salad, rotisserie lamb shoulder with a liberal sprinkling of ras-el-hanout rouge and summer garlic nestled in teeny incisions in the meat, potatoes and scotch bonnet peppers roasted in the lamb fat, harissa, pickled chilis, Maya’s homemade flatbread (called mlawi or chapati depending on how it’s folded), and brika. Brika (بريك— in Arabic) is a Tunisian triangle-shaped fried pastry with a potato-chip-crispy pastry filled with savory fillings.
Maya associates brika with Ramadan because her family (and Maghrebi Muslims she knows) breaks their fast with brika and chorba (شوربة)—tomato soup with chickpeas and orzo—each night. To Maya, brika represents celebration, family, gathering, and the joys in sharing food with loved ones. Because Ramadan is based on the Hejira lunar calendar, the dates change every year. This year—2020, Ramadan occurred on April 23 - May 23, meaning the sun rose around 4 am and set around 9:30 pm in Paris. During this time, those who are fasting do not drink water or eat any food until the sun has set. When I asked Maya what Ramadan signifies to her, she shared,
"Ramadan feels like a reset, spiritually and physically. Fasting changes my daily routine so much and makes me feel closer to other Muslims all around the world who are fasting too. I feel this sense of community. Ramadan helps me reflect and learn more about myself; about my relationship to my beliefs and spirituality. I feel closer to my ancestors when I practice something that many have done before me, but the experience is the same. Fasting is a way of getting closer to God and my family, and I realize how thankful I am for all that I have access to in this world. Ramadan is a month of generosity: where you become generous, share your meals, share your money, and share your home to any person in need. The last day of Ramadan is a day of celebration. We gather around food and share it with the neighborhood. After a month of fasting, you begin to truly feel and understand how food is a pure blessing. Even the act of drinking water as you wish is something so luxurious."
Brika is popular in food in France and along the Mediterranean and is consumed year-round. A staple in Maghrabi cuisine, Brika's origins lie in the Maghreb region of Northern Africa (Algeria, Libya, Mauritania, Morocco, and Tunisia). I learned from Maya that the region is often conflated with being Arabic (with influences from the Phonecians, Ottomans, Romans, and French—hello colonization!). This conflation can be considered offensive to some of the indigenous people of the Maghreb—the Berbers (self-named Amazigh). Maya's paternal grandmother was a nomadic Berber, and her family decided to settle in Tunisia. Her grandmother maintained her strong Berber (Amazigh) heritage and signified her pride by pitching a tent in front of their family home to exhibit their nomadic heritage. Maya said,
"Tunisians have Berber (Amazigh) blood we speak Arabic and practice Islam. We received some of our art and culture from the Arabic and many other cultures, but we are Berbers (Amazigh). Of course we have a rich history. Tunisia is sitting on the Mediterranean."
The dough that is used for brika is called warqet malssouka (ورقة ملسوقة) in Tunisian Arabic and feuille de brick in French. In Tunisia, Maya's family purchases fresh dough from a lady in the neighborhood who makes it to order in about twenty minutes. Malssouka is a distinctive dough that looks like a translucent flexible sheet of paper and is similar to filo, but thinner. This dough is a vehicle for an endless combination of fillings often dependent on familial tradition and regional variation. When fried, brika transforms from a nearly transparent paper-like dough into a delightfully crisp pocket, sturdy enough to withstand its hearty filling. Maya makes a mouthwatering brika with a combination of chicken, potato, various aromatics, and ras el hanout—a regional spice blend that varies according to the shop you buy it from or the family’s recipe. She then places a generous spoonful of filling onto a prepared sheet of dough. Meticulously, she folds the filling into a neat triangle taking care to ensure that the succulent beauty-filling nestles securely within. Finally, she pan-fries these beauty queens until lightly golden. It takes a bit of practice to get the hang of folding brika. While at first it seemed daunting, with each repetition it became easier and more satisfying.
When I make brika, I will think of Maya; how this food is an extension of her family, a record of their history. I will think of Maya and Andy breaking their fast during Ramadan, and Maya’s stories about cooking with her grandma and mom. How making brika is an act of love. To those with whom I share brika, I will consider how to share what I’ve learned about Maya, the Maghrebi people, and how I can contextualize this food. I’ll acknowledge that what I’ve learned is a mere sliver of what there is to learn about Tunisian culture and cuisine.
I'm incredibly grateful to Maya for teaching me how to make this fabulous dish (twice!), and for allowing me to share her story and recipe with you. I hope that you make this dish and feel connected to Maya and her family. I encourage you to always contextualize the recipes you cook. Commit to honoring traditions, ingredients, and people.
Quotes have been edited for clarity.
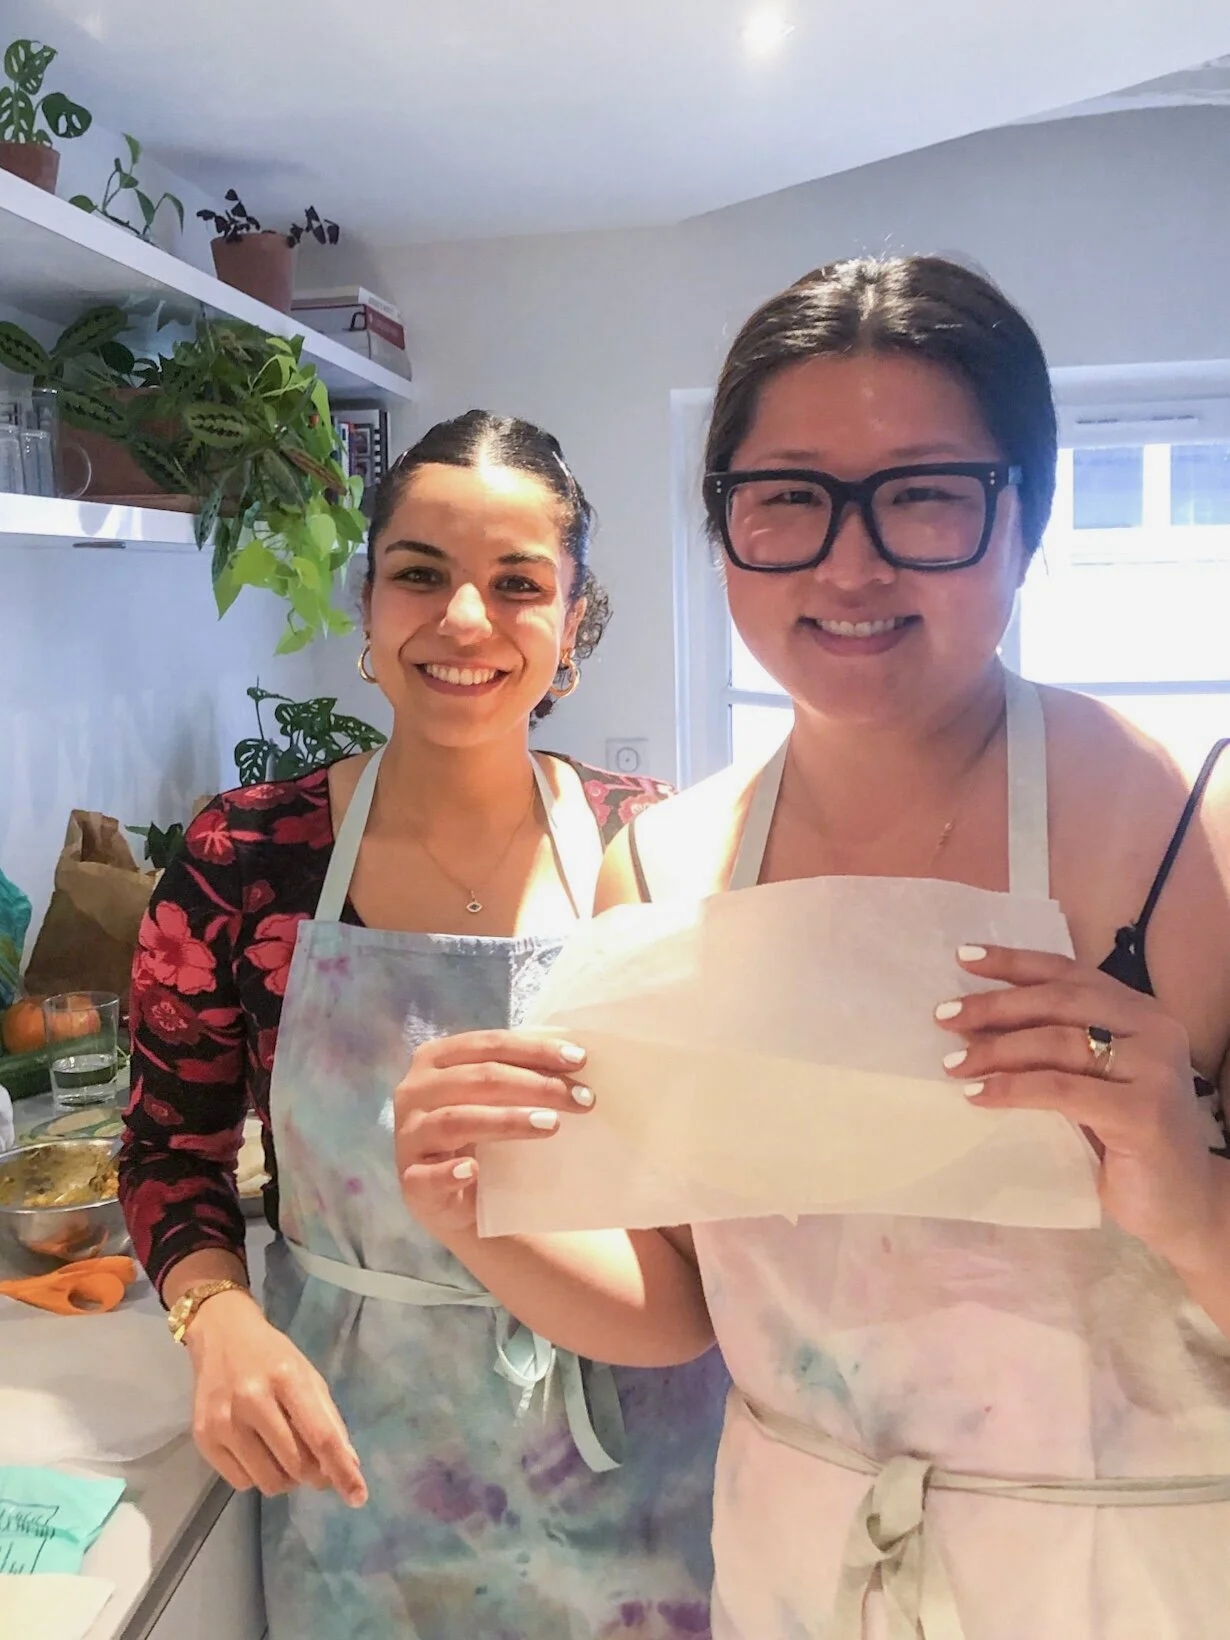
Maya teaching me how to make brika
Recipe Type: Appetizers
Time: 1.5 hours
Servings: 20 brikas
1 small (or half large) onion diced ¼ inch pieces
250 grams (one small) chicken breast diced ¼ inch pieces
4 small or 3 medium starchy potatoes peeled and diced into ½ inch pieces
2 eggs
2 cloves minced garlic
3-4 tablespoons cream cheese
5 slices Gouda or Gruyere cheese
1 tablespoon harissa
1 tablespoon ras el hanout
1 teaspoon turmeric
A handful of parsley leaves roughly chopped
Salt and pepper
Neutral oil for frying (I used sunflower oil)
Olive oil
Feuille de brick (10 pieces), or Filo dough cut into 3" x 10"-ish strips
8-10 inch skillet Baking sheet with a wire rack
Plate or baking sheet
Spoons
Mixing bowls
Small pot
Cutting board
Chef's knife and paring knife
Colander
Bring a small pot of water to boil, add one egg and boil for 8 minutes (set a timer). While the egg is cooking, gather your tools and ingredients.
After the egg has cooked, submerge in a bowl of cold water for five minutes. Wash the small pot and set aside.
Prepare your mise en place in the following order:
Peel and dice potatoes into ¼” cubes, add potatoes to the small pot with a generous pinch of salt, cover with cold water. Cook until tender. Drain with the colander and set aside in a medium bowl to cool.
Chop onion into ¼” pieces, mince garlic, and roughly chop parsley. Set aside onion and parsley on a plate or small baking sheet. Put the minced garlic in the medium mixing bowl with the potatoes.
Lastly, chop the chicken breast into ¼” cubes. It’s easier to chop the chicken breast if you stick it in the freezer for 30-45 minutes beforehand.
Clean knives and cutting board thoroughly with hot soapy water.
Heat 2 tablespoons of olive oil in a skillet over medium-high heat. Add the onions and parsley and cook until the onions become translucent.
Add the diced chicken and cook until the chicken is just cooked through. As you cook, be mindful of the heat. If you notice something is burning or cooking too quickly, lower the heat. Add oil if the chicken is sticking or if the ingredients seem too dry.
Once the chicken is just cooked through, lower the heat to medium-low, add turmeric and ras el hanout to the skillet. Cook together for a minute or so until aromatic.
Remove from heat and add the chicken mixture to the mixing bowl with the potatoes. Let the mixture cool for 10-15 minutes.
While the filling cools, peel the hard boiled egg and chop into small ¼”-ish pieces (I do this directly over the medium bowl).
Clean up your workstation. Wash and dry the skillet and place on the stove.
Once the chicken and potatoes have cooled, add the remaining raw egg, 1 tablespoon of harissa, salt and pepper, and cream cheese (use your hand to break into small ½ inch pieces-so that you get melty little dollops). Mix gently to combine. Taste the filling and adjust seasoning according to your preference.
Watch the “How to Fold Brika” Video (see above).
Gather your dough, if using feuille de brick rounds, cut the dough in half with scissors so that you have 20 semi-circles of dough. If you’re using filo dough, cut the dough into 3”x10”-ish strips.
Cut five slices of your preferred cheese into four equal pieces so that you have 20 small pieces of cheese. If using the semi-circle, fold in half vertically so that the semi-circle becomes a strip.
Place the dough so that the longer straight side is on your left and the shorter folded side is on your right side.
Add a heaping tablespoon of filling to the bottom of dough 2 inches above the bottom.
Fold the left corner of the dough over the filling towards the right side
Then, take the bottom edge of the filled dough and fold it up and to the left so that the bottom diagonal edge lines up to the left vertical edge
Take the left edge and fold it up and to the right to meet the right edge
You should see the brika slowly forming a triangle
Fold the triangle tightly so that the edges contain the filling
Continue folding in this manner until the triangle is complete
Trim the excess dough, and place the seam side down on a plate or baking sheet
Fold all 20 pieces
In the skillet, heat one inch of neutral oil to around 375℉/190℃. If you don't have a thermometer, or can't be bothered like me, simply dip a corner of the triangle into the oil and when the oil bubbles steadily and gently the heat is ready.
If the oil is smoking and the corner of the brika is browning immediately, then the oil is too hot, and will burn the brika. Remove from the heat and wait for it to cool, or add room temperature oil to bring down the heat.
Once the oil is ready, gently place the brika into the oil, seam side down and fry until the first side a light golden brown. Flip the brika and fry it on the other side. Fry the remaining brika in small batches.
Remove the fried brika and drain on a baking sheet lined with a wire rack and put in 200℉/95℃ degree oven to keep warm if serving later.
Continue frying in batches.
Frying Tips
When placing the brika in the oil, get close, and gently slide them in away from you. While it may seem scary to be close to the oil, it's actually safer than dropping in items from a distance. When you drop items into the oil, you risk oil splashing and burning you.
I like to spoon the hot oil over the top of the brikas to get the shape flat, and use two spoons to maneuver them.
Serve fresh and hot, or reserve for later and reheat them in the oven at 350℉/175℃
It’s HOT in Paris. It’s only in the mid-eighties, but I already can’t deal. My American self is learning how to adjust to life without AC, and let me tell you...it is le difficult. One of my strategies to stay cool is by keeping an icy drink within reach at all times. I enjoy cold brewing teas (and coffee). The cold brewing process helps maintain and capture more of the delicate flavors and fragrances that can be lost sometimes when brewing tea in hot water. You can make cold brewed tea with just about any kind of loose leaf tea or tisane. Here are three fabulous recipes for you to try and adapt this summer!
Time: 10 minutes hands on plus 24 hours for brewing
Servings: 4
See recipes below for ingredients
Bottle to store tea
Large container to strain tea into
Large fine mesh sieve
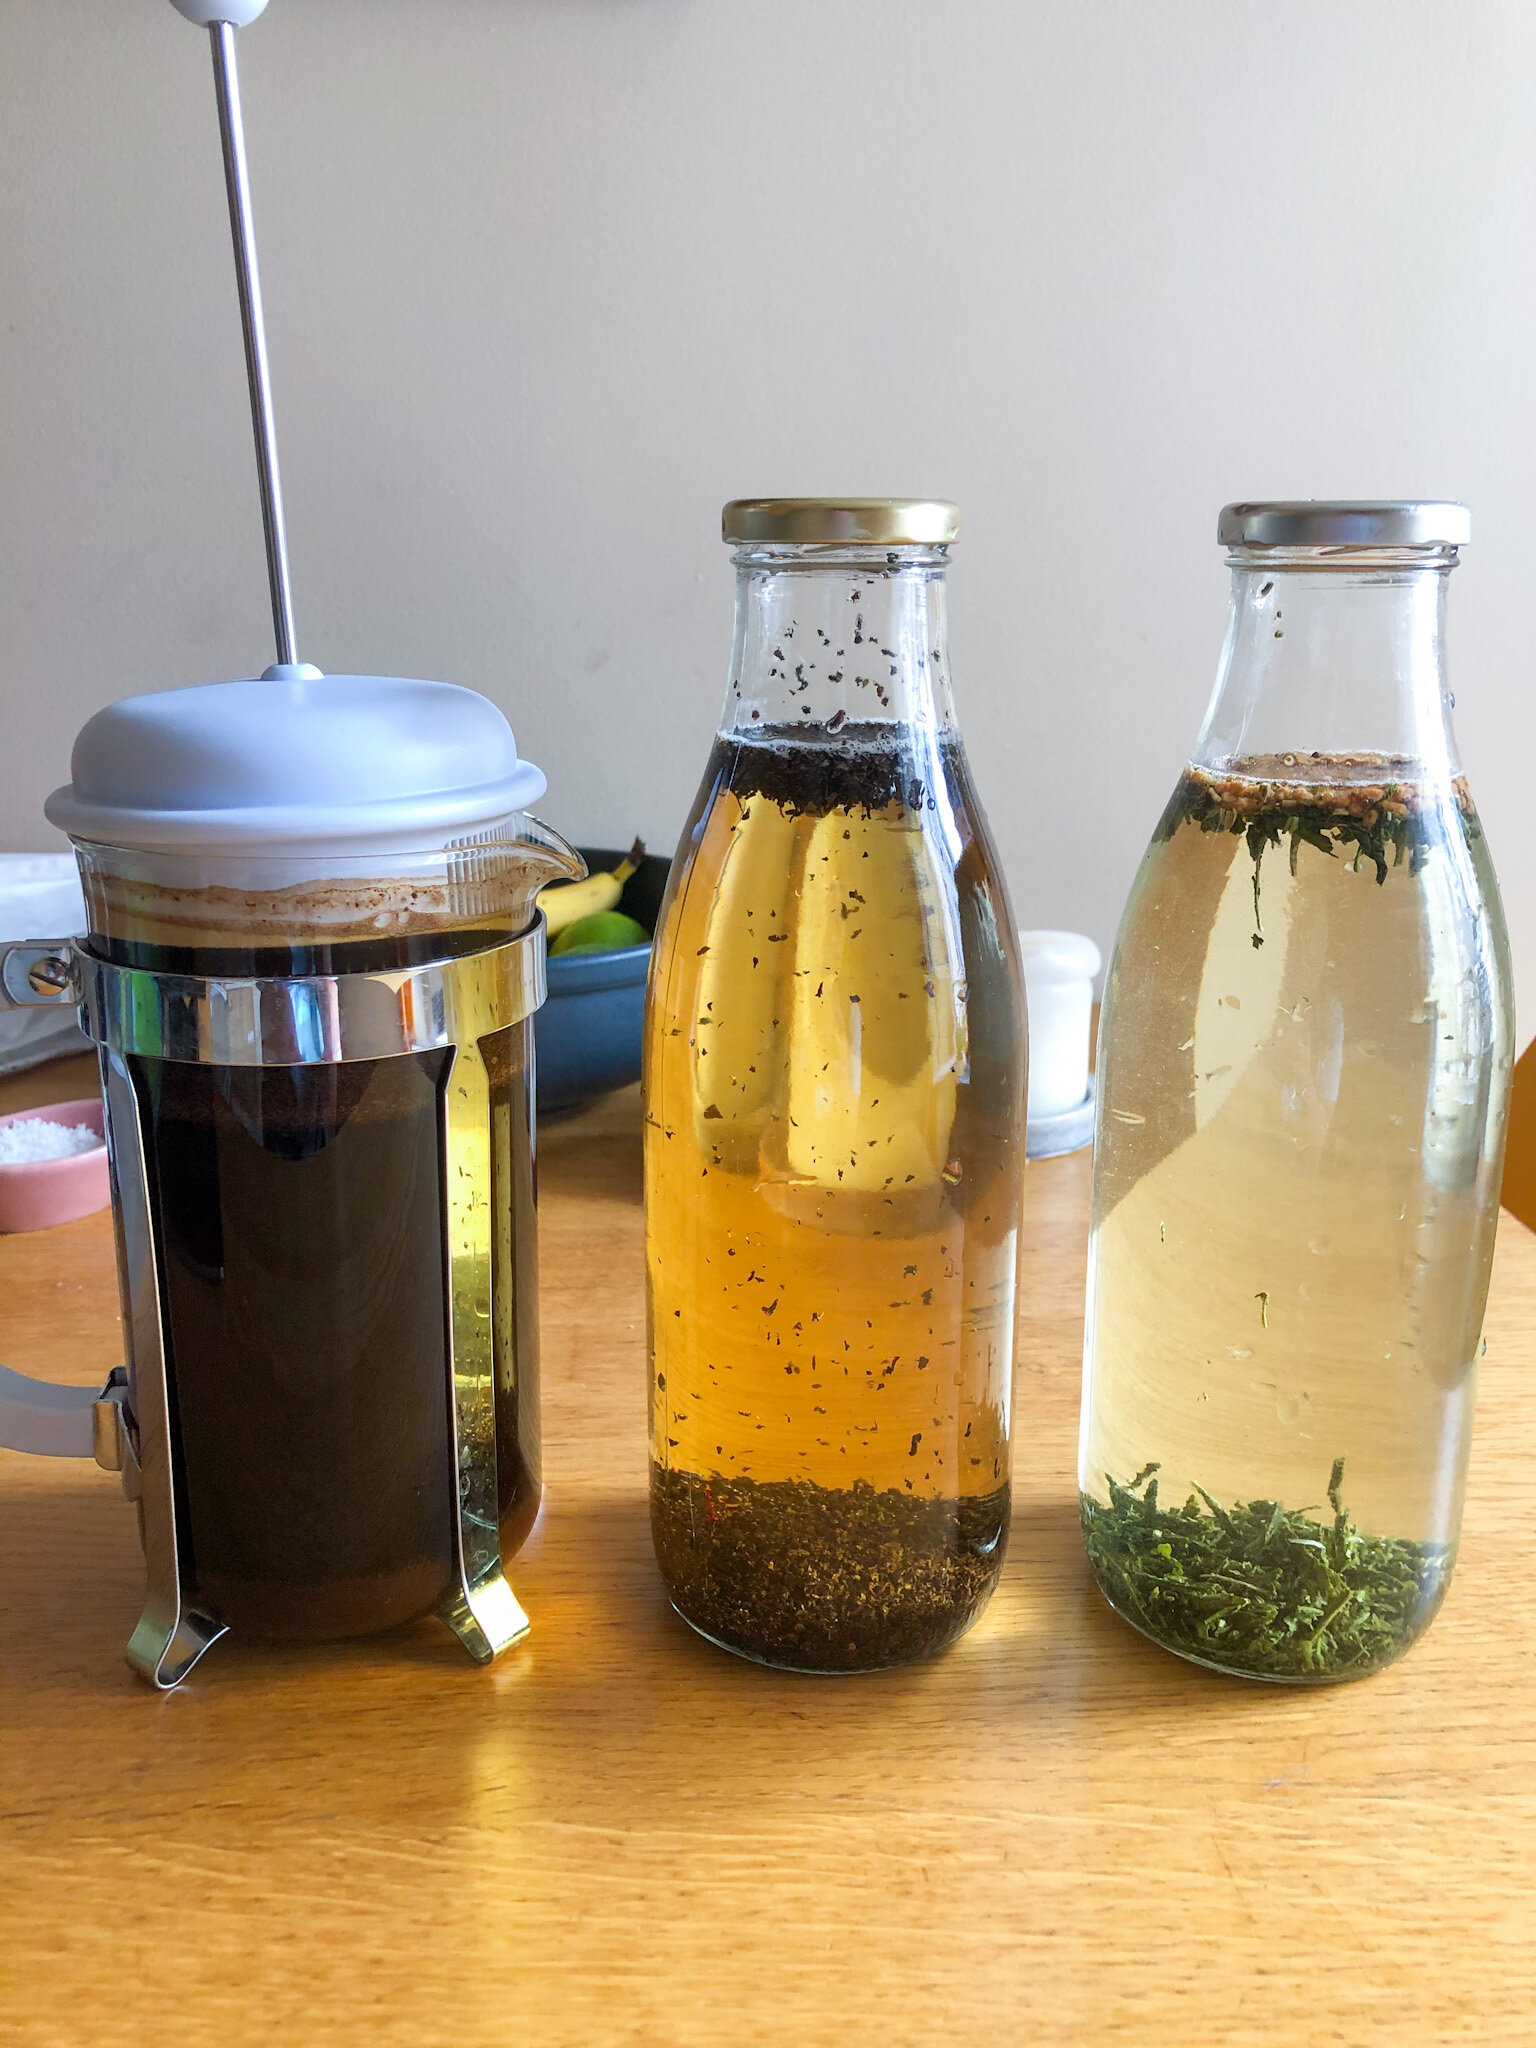
Cold brewing coffee, chai, and genmaicha teas

Cold brewed chai and genmaicha tea

A gorgeous tisane with lemon verbena, fuschia, and cassis flowers
The technique for cold brewing tea is to add four teaspoons of tea to four cups of cold or room temperature water (1 teaspoon per cup is the ratio that you can adjust to whatever your container holds).
Give the tea a stir. Or, if it’s in a bottle, gently shake to incorporate the tea and water. Brew the tea for 24 hours in the fridge or at room temperature. The benefit to steeping in the fridge is that you’ll have cold tea as soon as you strain it.
After 24 hours, strain the tea into a clean bottle and store. If you don’t have another clean bottle, strain into a bowl or large measuring cup, rinse out the brewing bottle, and pour the strained tea back into the original bottle.
You can cold brew most teas and add spices or herbs as you wish! If you find the tea is too strong, dilute with ice or water and adjust the recipe accordingly in the future. Same advice for if the tea is not strong enough.
Serve over ice and with honey syrup or simple syrup (Bring 1 part honey or sugar and 1 part water to a boil until just dissolved. Cool before serving with an iced beverage).
I adore Yasmin’s chai recipe, but wanted a cold version for summer. J’adore how the saffron’s opulent herbaceous flavor shines along with the cardamom. Simply add four teaspoons of loose black tea, three crushed cardamom pods, and two generous pinches of saffron into four cups of water. Steep as described above and serve over ice with simple syrup if desired.
Genmaicha is green tea with toasted brown rice. The rice adds a beautiful nutty flavor and balances the flavors in the green tea. Simply add 4 teaspoons of genmaicha to four cups of water, steep as described above and serve over ice with simple syrup if desired. Be careful not to brew longer than 24 hours or the genmaicha will become thick from the starches in the toasted rice.
I learned of tisanes when I moved to France. Tisanes are herbal teas made of local herbs, flowers, and various greenery. I love the different varieties and enjoy having a glass at night when I want something refreshing without caffeine. With tisanes, I find it’s harder to measure with a teaspoon because I’ve often found large leaves that won’t fit into a measuring spoon. I like to use 4-5 big pinches (around a tablespoon per pinch) of the tisane and add it to around 4 cups of water and steep as described above. This gorgeous tisane that I found starts off a blueish purple (due to the cassis flowers) and then turns light brown over time.

Ail des ours or bear’s garlic
These days, I spend a significant amount of my free time playing Animal Crossing and researching local shops that sell produce from regional and local farms. I’ve tried ordering paniers, or baskets, of fresh produce, but I’ve discovered that while ordering is convenient, I miss the human interaction and knowledge I gain from going to the market and seeing what is on the shelves each week. Fortunately, in my arrondissement in Paris, I have several beautifully stocked shops to visit.
I recently acquired this season’s last ail des ours or bear’s garlic. Bear’s garlic is a type of perennial wild onion—most similar to ramps—that grows in the woodlands of Europe and Asia. The leaves and flowers have a beautiful mild garlic flavor and I was so excited to have them as a consolation for missing ramp season back in New York. One thing I learned about the bear garlic and ramps (or any of these wild alliums) is that you want to leave the roots in the soil and harvest them by cutting above the roots because it takes up to seven years for the plant to reach maturity. If you notice that the ramps that you are getting have roots, I encourage you to talk to your vendor/producer to practice sustainable harvesting so that folks can continue enjoying these beauties.
But I digress, back to the pesto! I made two pestos using this very modify-able recipe with some of my bear garlic and also some GORGEOUS turnip tops. I love making pesto using any variety of greens: seasonal alliums, herbs, and vegetable tops (radishes, turnips, beets, carrots, you get the idea…). Making pesto is an easy, creative, and flavorful way to minimize your food waste and jazz pantry staples. Use your fabulous Eco-friendly pesto as a dip for crudites, a sauce for al dente pasta, a sauce to smear on sourdough, or to top your eggs with. Note, this is not in any way an authentic Italian pesto, but how I like to preserve beautiful produce.

Gorgeous turnip tops
Recipe Type: Quick and Easy
Time: 10 minutes
2 cups greens (ramps, bear’s garlic, vegetable tops) chopped into 2-inch pieces
2 oz Parmesan or Pecorino (2 oz is about the size of 2 golf balls)
1 teaspoon of honey
garlic cloves (omit if using garlicky greens such as ramps/bear’s garlic)
¼ cup roasted nuts (I like pine nuts, walnuts, and pistachios).
Juice of half a lemon
1 teaspoon of lemon zest
Around ½ a cup extra virgin olive oil
Salt and pepper to taste

Ail des ours pesto
In a food processor, pulse the garlic, Parmesan cheese, and roasted nuts until coarsely chopped.
Add the greens a couple of handfuls at a time and pulse until coarsely chopped. If you have a teeny food processor, you can do this in batches.
Add honey, lemon juice, and zest and pulse a few more times to incorporate.
Pour in the oil slowly while the food processor is running until you reach your desired consistency. You may need to add more or less depending on your preference. Add salt and pepper to taste.
Store the pesto in a jar and add a layer of oil on the top to prevent oxidation. The pesto should keep about a week in the fridge. You can also freeze your pesto and it will keep for 3 months frozen.
This week’s Radical Hospitality guest post is from a Ferrandi (culinary school) classmate and good friend, Sven Li. Sven is one of those people who goes above and beyond to make sure that everyone in class has what they need and feel supported. He is always helping set-up, clean-up, and running errands for the team. He is the classmate that is always singing, causing lots of drama by being provocative, and bringing joy.
In December and January, we had a two-month metro/public transportation strike in Paris. During this time, Sven (Radi, Ray, Gabbi) and I would walk an hour to and from school together with various other classmates. On our way home, we would stop by various bakeries and various shops around Paris for a snack and to treat ourselves for these long walks. AND THEN, Machi Machi Paris opened. I was SHEWK. It’s a Taiwanese bubble tea shop that has the most delightful beverages and the BEST bubble tea that I’ve ever encountered. We ended up going nearly every day, and I am now a HUGE Machi Machi fan. I’m so excited to share this recipe by Sven especially since strawberry season has begun in France. I can’t wait to go to Machi Machi again, but until then, thank goodness for this recipe! Follow all of Sven’s culinary adventures here: @sven_spaetzlegott!
Chic,
Jen Kim

Machi Machi friends (from left to right): Ray, Sven (straw in mouth looking sideways), Felix, Gabby, Me, Marcus, & Radi.
Machi Machi became our addiction and we chanced upon it thanks to Ray (@fatfatpenguin). We were obsessed… and Machi Machi was the answer to everything. It became an inside joke and secret password for an exclusive group. We would go as often as three times a week before or after culinary school
Jen was obsessed with the signature strawberry panna cotta drink that was served in a cute bottle, while I was just trying to go through the entire drink menu and try every single drink. (They also had an amazing panna cotta/pudding/crème brûlée drink, but that's for another time).
The last time we went to Machi Machi was 21 Jan 2020, our last day of school and before all this COVID 19 blew up in our faces! We even inducted new members into our cult of Machi machi, radi, Gaby and Marcus.
I really miss everyone, our memories of hanging out at this bubble tea shop and since strawberries are coming into season, why not try to recreate the drink! And it's actually so simple.
I hope everyone can give it a go and share the drink with your friends (either through video conference or face-to-face when all this is over), because Machi Machi means Buddy Buddy in the indigenous language of Taiwan :)
-Sven Li
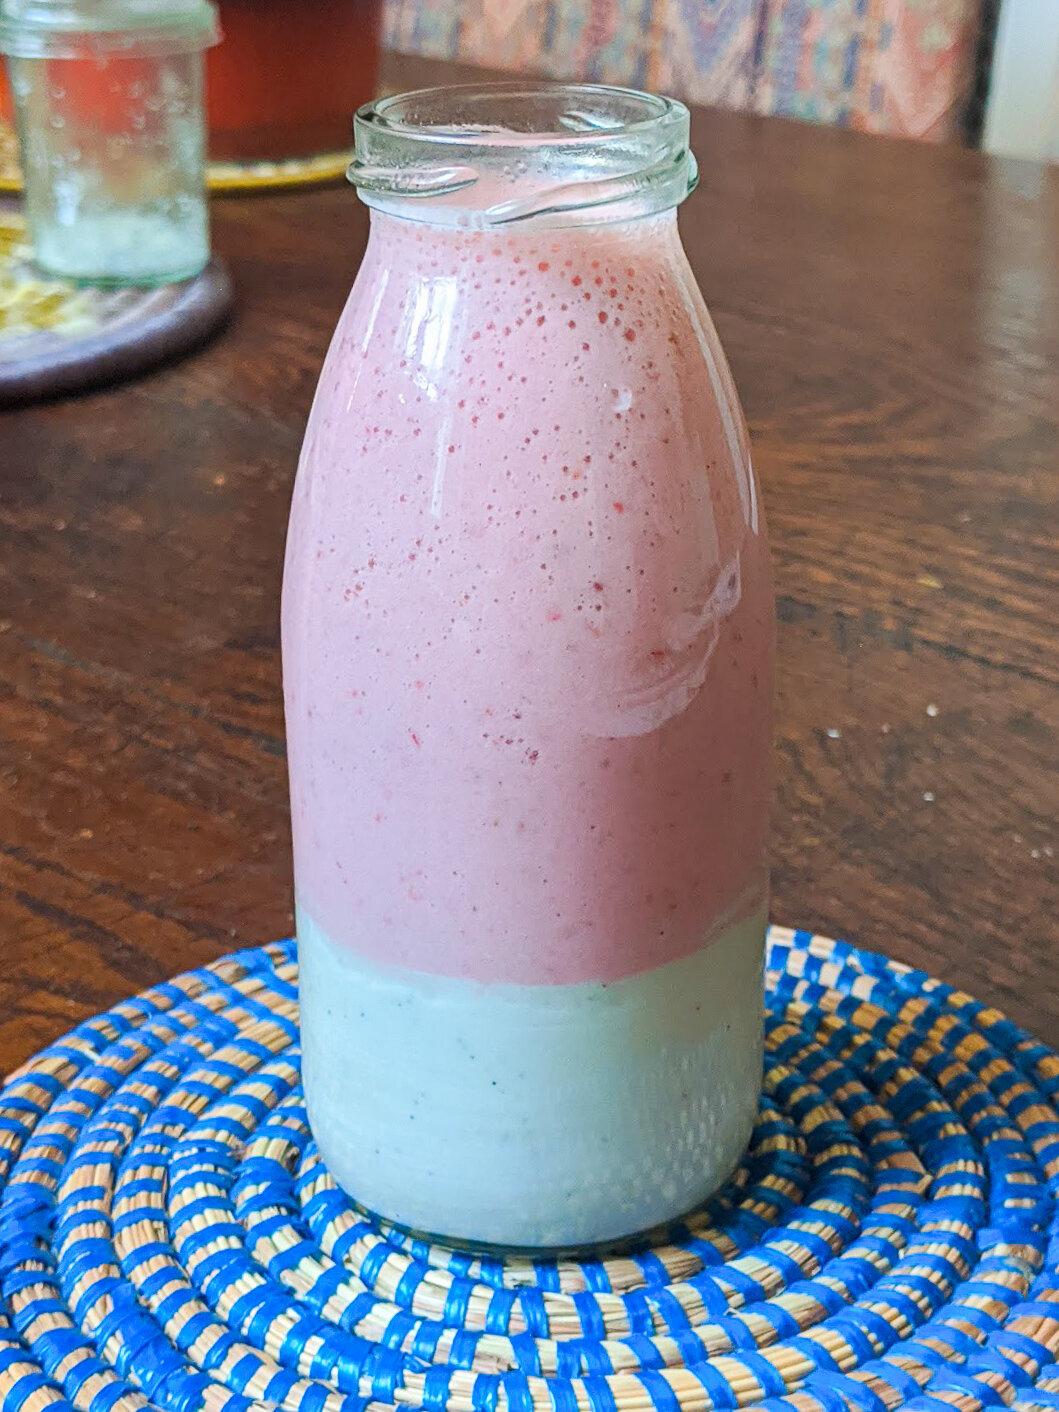
Recipe Type: Quick and Easy
Time: Prep 30 min, chilling overnight
Servings: 2-4, depending on size of container
200g full cream milk
150g whipping cream (at least 30% fat)
1 sheet gelatin leaf (5g approximately)
25g sugar
Half a vanilla pod
150g Strawberries (or other fruits and berries in season)
150g full cream milk
10g sweetener of your choice (adjust accordingly to your taste and how the fruits are)
Pot
Whisk
Sieve
Funnel (if you want to pour into bottles)
Mixer/food processer/immersion blender able to make a nice smoothie/milk shake
Warm the milk slightly to 50°C in a pot.
Cut a vanilla pod in half and scrape the vanilla seeds with a knife. Add the seeds to the warm milk, along with the pod. Take off the heat and allow the vanilla to infuse, the longer the better
During this time, soak the gelatin leaves in icy cold water.
Bring the milk back to a gentle boil, add the sugar and then the cream.
Stir well to combine and take off the heat just when the mixture comes back to boil again.
Allow the mixture to cool before adding the gelatin. Mixture should not be more than 80°C otherwise the gelatin will deactivate.
Squeeze the gelatin well to remove excess water and add to the milk-cream mixture. Stir well.
Strain the mixture with the sieve for a better consistency and to remove excess air bubbles and the vanilla pod. Pour into desired glass or bottles (do sanitize the bottles). The recommended proportion is up to ¼ of the height of the glass or bottles, but you can also adjust according to your preference
Allow the panna cotta to cool to room temperature before setting in the fridge for minimum 4 hours or ideally overnight.
When ready to serve, blend the strawberries, milk and sweetener to a smooth consistency. Adjust the ingredients according to the taste and texture you want.
Pour the strawberry milk into the prepared glass or bottles with the panna cotta set inside. Serve with a fat bubble tea straw so that you can suck up all the goodness!
The Machi Machi crew always recommends us to stick the straw straight in to the bottom to have a taste of the panna cotta first, then draw it up to taste the strawberry milk and finally mix them all up and enjoy the flavours and textures of both!
Juk is a Korean rice porridge (similar to Chinese Congee) made by simmering soaked rice until it bursts and releases its starches to make a beautiful thick porridge. There are countless varieties of Juk. My favorites are abalone juk that my aunties would make for us when we visited South Korea, and a ground rice and pine-nut version that my mom makes. Koreans make juk for breakfast or for their loved ones who are feeling sick because it is very easy to digest and comforting. Juk is gentle AF, and we all need gentle shit right now.
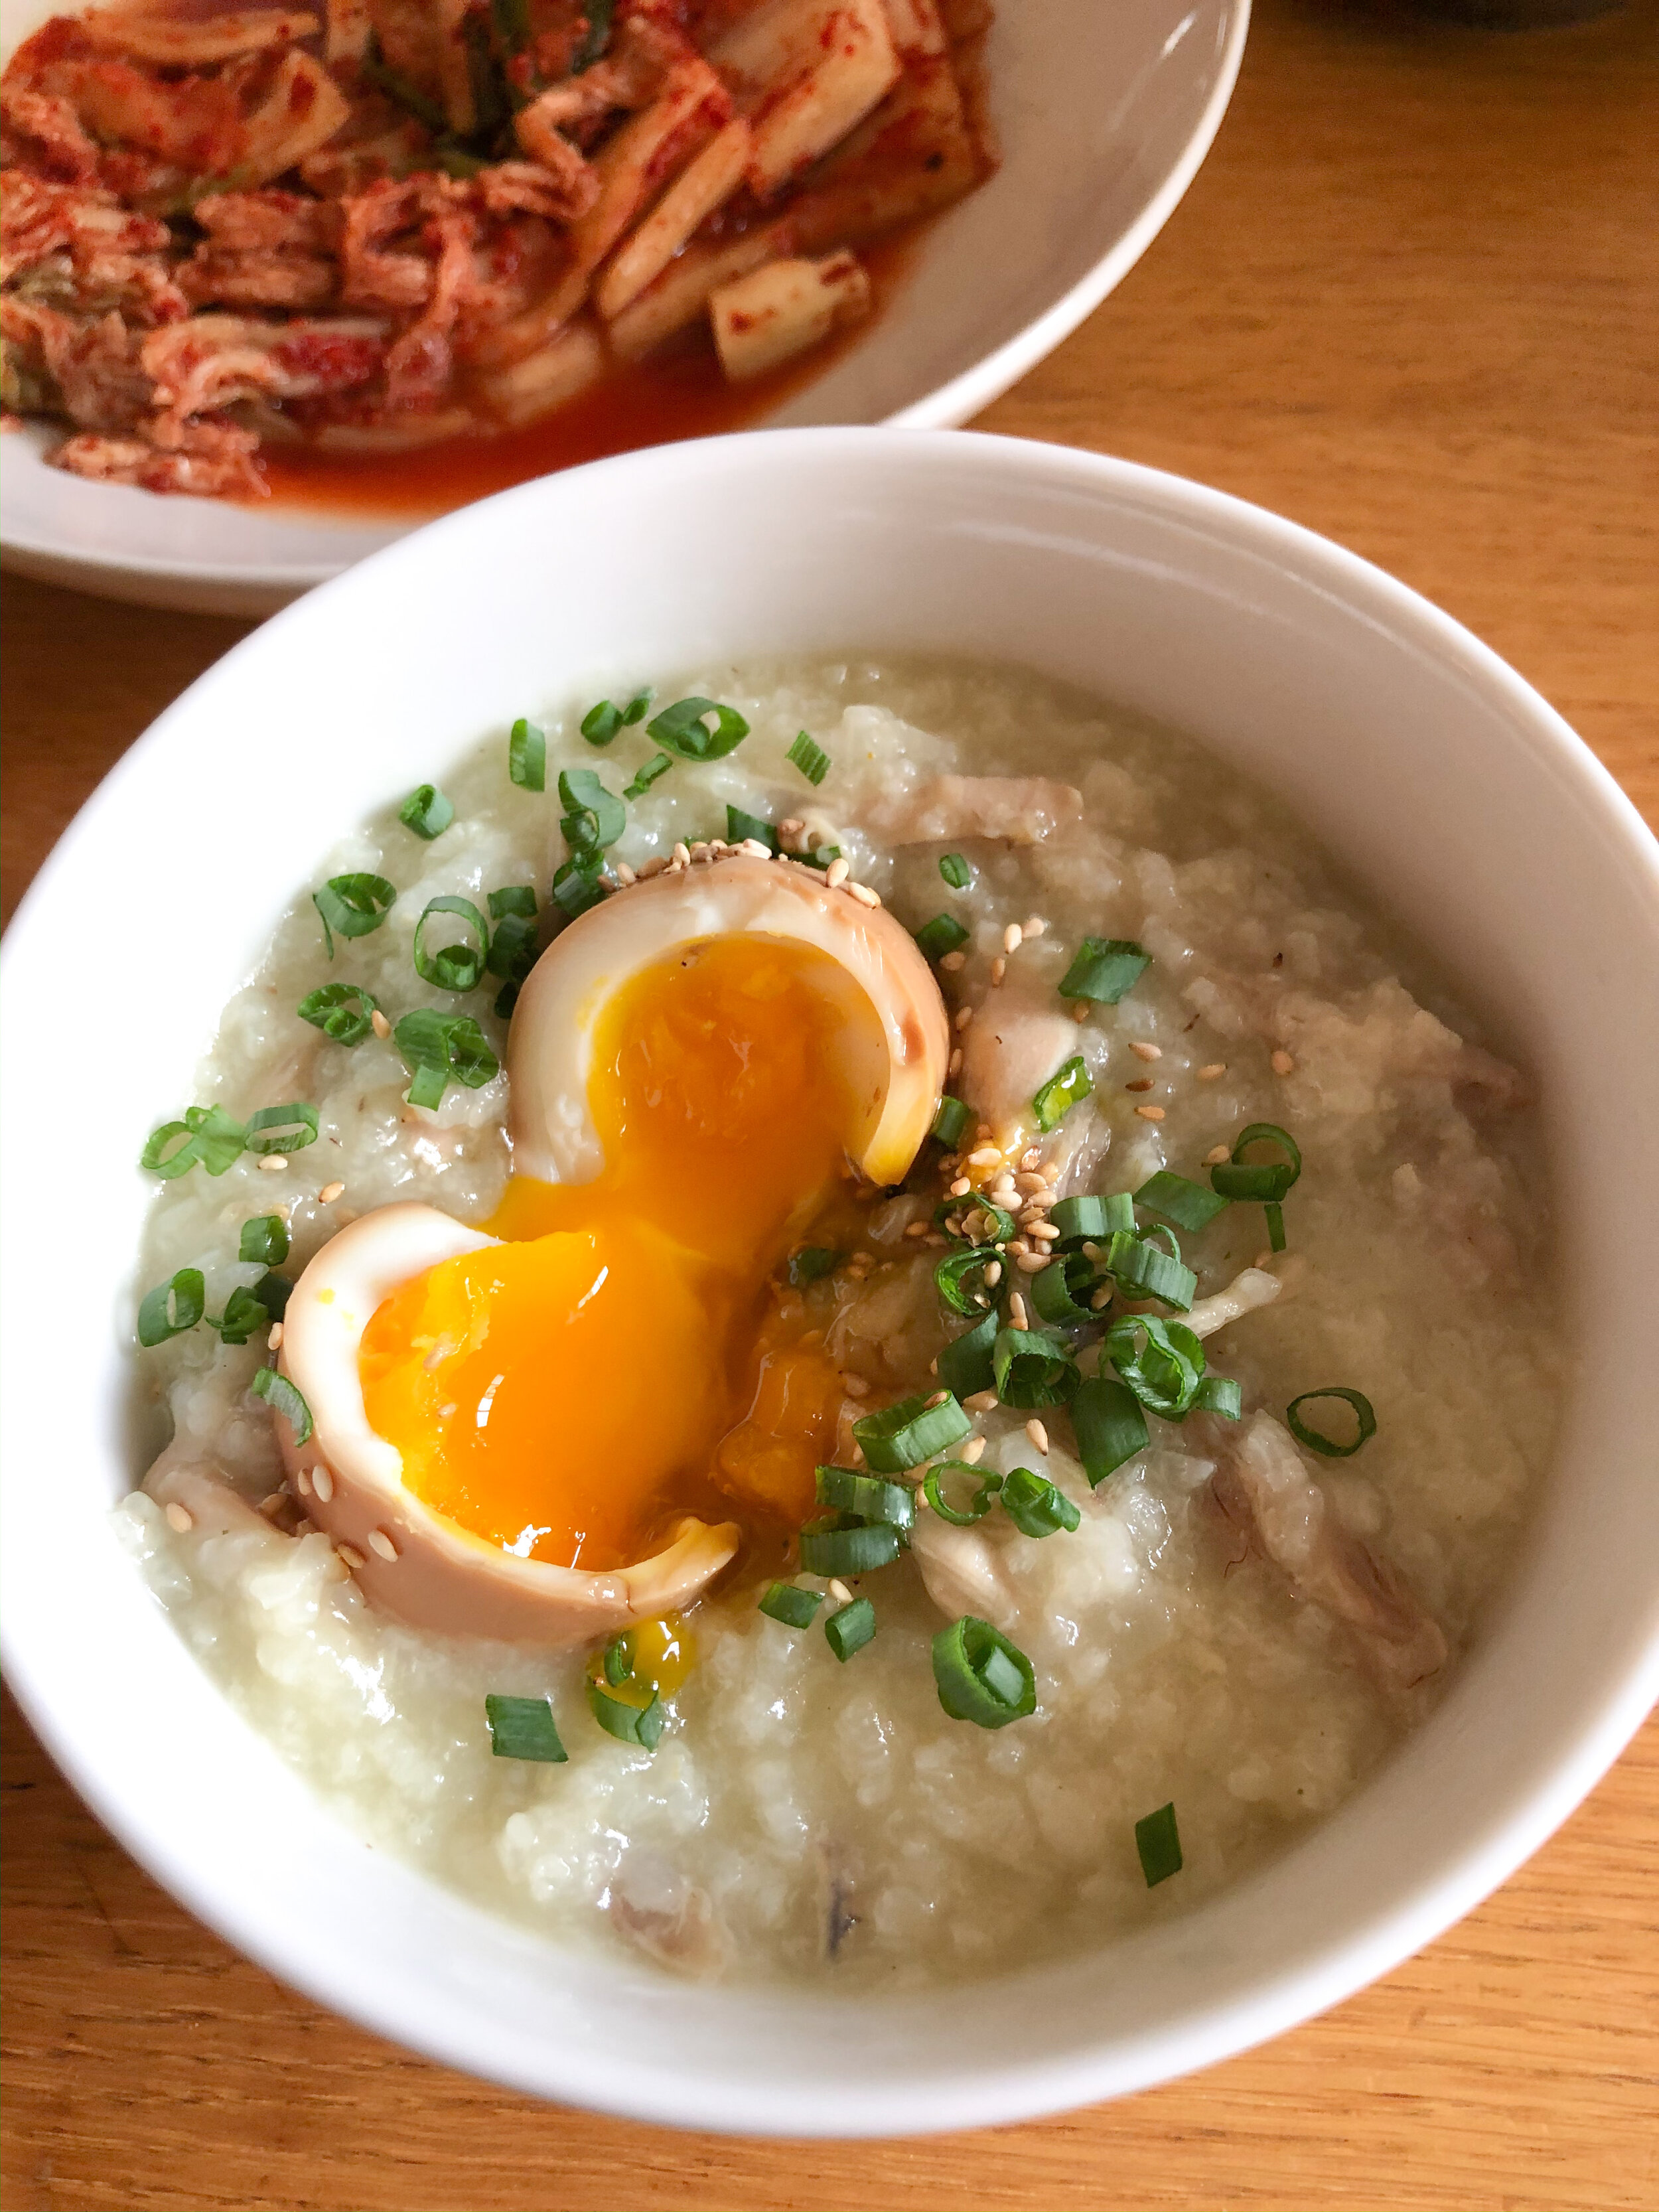
I made dakjuk (dak translates to chicken in Korean) for dinner on Sunday and got some requests to post the recipe. So, here she is! My version has a soy-marinated egg with a runny yolk because j’adore eggs and I believe they are little nuggets of opulence. In addition to being a benevolent queen, I’m also a practical queen. I designed this recipe two ways: using leftovers from my Korean Glamour Chicken Soup recipe, or as it’s written. I’ve included instructions for both versions below. You’re welcome, and I hope you make this gentle beauty.
Recipe Type: Comfort Food
Time: 2 hours
Servings: 4
2 whole raw chicken legs (thigh and drumstick attached with skin and bones)*
4-5 cups chicken stock*
1 cup short grain rice or glutinous rice
1 scallion thinly sliced
4 cloves peeled garlic
½ onion diced into ½ inch pieces
Sesame seeds
Optional
4 eggs
½ cup soy sauce
*You can make this recipe the day after you make Korean Glamour Chicken Soup with leftover dark meat (legs and thighs) and broth.
Equipment (Heading 2)
Medium Pot
Small Pot
Various mixing bowls
Fine mesh sieve
Soak Rice
Place rice into the fine mesh sieve and rinse under cold water until the water runs clear. Add to a medium bowl and cover with around 2 inches of water. Soak for one to two hours.
Prepare and Gather Ingredients
Peel garlic, dice onion into small cubes, and slice scallions. Set ingredients aside in small prep bowls (or whatever you have).
Prepare Eggs
Bring a small pot of water to boil over high heat for the eggs. Once the water boils, lower the heat to medium until the water is boiling steadily, but not aggressively. With a spoon, carefully lower each egg into the water and boil for seven minutes. This should, in theory, yield a soft boiled egg with a runny yolk. I recommend testing one egg first to ensure that you achieve your ideal runniness of egg yolk. If your test egg is too runny, then add 30 seconds-one minute to your cook time. If it’s overcooked, then subtract 30 seconds-one minute.
Once the egg has cooked, remove the egg and place into a bowl of ice water and let sit for approximately five minutes.
Peel the eggs and place into a shallow small bowl with soy sauce to marinate at room temperature. If the soy sauce doesn’t cover the egg that is totally fine, simply rotate the egg every 15 minutes or so.
Marinate for one to two hours maximum. Otherwise the eggs will become too salty.
Cook Juk
Place the chicken legs and garlic into a medium pot. Add the chicken stock and bring to a boil over high heat. Once the stock boils, lower the heat to medium-low and cook the chicken legs with a gentle simmer for an hour, or until the meat easily falls off the bone. Keep the pot covered so the chicken stock maintains its volume. The chicken legs will give off beautiful fat in the stock. Leave it. The fat is delicious chicken-y flavor.
Remove the legs and let cool on a plate.
If you are using leftover chicken and broth from Korean Glamour Chicken soup, you can skip the previous steps, and reheat the broth in a medium pot. Shred about one cup of the leftover dark meat (legs and thighs), discard skin and bones, and set aside.
Drain the soaked rice with the fine mesh sieve, and add the drained rice and diced onions to the pot of gently boiling stock. Adjust the heat and bring to a gentle of simmer. Stir occasionally.
When the chicken legs are cool enough to handle, shred the chicken into big pieces with your hands (or if too hot, use two forks). Toss the skin and bones. Add the chicken to the juk.
Continue cooking the dakjuk for 20-30 minutes stirring occasionally. You’ll notice the dakjuk thickening as the rice cooks longer. Towards the last ten minutes of cooking, adjust the thickness of the juk to your personal preference: To thicken, continue cooking and boil off the liquid. If the dakjuk is too thick, add water or extra stock (if you have) to loosen.
Once the dakjuk is cooked to your liking, season to taste with salt and pepper.
Ladle the dakjuk into bowls and top with sliced scallions, one soy cured egg per person (remove the egg from the soy sauce - save the soy sauce for another batch of eggs), and sesame seeds. Serve with kimchi.
If you have leftovers, reheat on the stove over low heat. Add some water to loosen. The juk will continue to loosen as it warms.

Hello Angels. What a bizarre and scary time we are living through. I hope you are healthy, in quarantine (if you have the privilege to be), and being generous and kind to yourself as you read this. As soon as Romaine and I began staying home (in France we started on March 16th), I resolved to be as productive as possible and create lots of content for Le Dinner Party, write multiple moving and groundbreaking essays about cuisine/my transition into the culinary world, and maximize my time! However, these things did not happen. I started strong. Week one: I cooked up a storm, wrote, signed up for Master Class, video conferenced hard, and walked miles every day. Week two: it was an up and down battle. Some days I struggled to get out of bed; some days I walked 3 miles, did an online workout, and cooked relentlessly. End of Week 2: I gave up, ordered in burgers (twice) and couldn’t look at my kitchen. This is week three: I’m taking it day by day, batch cooking (so that I don’t have to cook every day), slowing down, and mostly trying to be kind to myself and my partner.
Back to the galette! I’m V excited to share this recipe with you because it’s the first recipe that I developed that incorporates techniques that I learned in culinary school. I’ve tested her multiple times, sent her off to my dear friend Dave (who I fondly call My Big Strong Wife) and his fabulous cat Gabin, and now she is ready for you. This is a solid medium-level weekend project. Medium-level means you have a chunk of time and you’re willing to challenge yourself a little bit. When writing out this recipe, I tried to break it into four clear and distinct phases. I encourage you to focus on executing each of them beautifully because you absolutely can do this: make a flaky bomb-ass-dough, cook sweet jammy caramelized onions, pan fry golden potatoes, and finally bake the thing. I hope you make this galette and enjoy sharing her. If you live alone, go ahead and give some to a friend or a neighbor (sans contact of course) because food is enjoyed best when shared.
I hope you all are staying safe and healthy. Sending you all my love, dahlings.
Recipe Type: Weekend Project
Time: 2-3 hours
Servings: 4
Galette Dough (Pâte Brisée)
35 grams whole wheat flour (¼ cup)
95 grams white all purpose flour (¾ cup)
95 grams butter (7 tablespoons)*
25 grams (around 1.5 tablespoons) of whole milk
1 egg yolk
A generous pinch of salt
Filling
3 medium onions
Optional grated cheese (Swiss, Emmental, Gruyere, Comté, etc.)
21 grams of butter (1 tablespoon)*
2 cloves garlic
3 small or 2 medium potatoes
3-4 sprigs fresh thyme
1 egg yolk
Salt/pepper
Neutral cooking oil such as grapeseed or sunflower oil
Lemon for zesting
Crème fraîche or sour cream for serving
*This recipe uses a total of 8 tablespoons or 1 stick of butter
Large nonstick skillet with a lid or a baking sheet to cover for potatoes
Baking sheet
Parchment paper
Bench scraper (or butter knife)
Plastic film wrap
Oven
Fridge
Part 1 Galette Dough (Pâte Brisée) 10 minutes plus 1 hour to chill
Why you should weigh ingredients
Measure ingredients for the galette dough:
Pick an album that you want to listen to. Blast it.
Mix whole wheat, all purpose flour (AP), and salt together into a medium bowl. If you don’t have whole wheat flour, it’s completely fine to substitute with 100% AP flour.
Measure milk into a small container and set aside.
Measure butter, cut into one inch cubes, and set aside.
Crack an egg, separate the yolk, and set aside. Keep the 2 egg whites for an egg white scramble or store in the fridge to make cocktails with them later.
Chop the butter into small pieces into the flour with a bench scraper or knife:
Pour the dry ingredients into a pile or mound onto a clean surface.
Add the cubed butter into the middle of the flour mound.
With your bench scraper or butter knife, cut the butter into small pieces while keeping it in the mound of flour(the sizes will vary, but you’re going for irregular pea sized).
Then reshape the flour into a mound using your bench scraper.
Combine the flour and butter with your hands. By grabbing a palmful of the flour/butter mixture with both palms and rubbing your hands vigorously together to combine the butter into the dry flour. Grab another handful of flour and repeat until you have a shaggy dough with butter incorporated throughout.

Chopping butter into flour

Combine flour with your hands
Incorporate wet ingredients:
Gather the shaggy dough into another mound.
Make a little well in the center of the dough (kind of like when you make fresh pasta) big enough to hold the egg yolk and the milk.
Add the milk and egg yolk into the well and with a fork, whisk the egg yolk and milk in the crater. Slowly add flour to liquid with your fork from the outside of the well a little bit at a time into the well until the wet and dry ingredients are incorporated. Then bring the dough together with your hands. Use your bench scraper to help you by scraping the dough together.
Gently knead the dough until it comes together. The dough should have flecks of butter and not completely smooth. Take care to just combine the dough so that you don’t overwork it. If you overwork the dough it will develop gluten and lose tenderness.
Flatten the dough into a round 4-5 inch disk and wrap the dough in plastic film/cling wrap. Rest the dough in the fridge while you prepare the onions and potatoes.

Incorporating wet ingredients with a well

Dough wrapped in plastic film ready to chill
Part 2: Caramelized Onions 30-45 minutes
Peel three onions. Cut them in half (lengthwise making sure to cut vertically from the root of the onion to the tip), and then cut into 1/2 inch half moon slices.
Place a large skillet over medium heat and add 1 tablespoon of butter and 2 tablespoons of neutral cooking oil. When the butter has melted and begins to bubble and sizzle in the pan, add the onions to the pan.
Give the onions a quick stir, then leave them alone for 3-4 minutes until they start turning to brown. Stir the onions after 3-4 minutes and continue cooking. They will begin browning. If they start browning too quickly or burning, turn down the heat and/or add oil.
While the onions are cooking, peel and mince garlic, and prepare the potatoes to pan fry later (see below).
When the onions turn a deep honey brown, add the garlic and two sprigs of thyme. Cook until the garlic softens. If you notice lots of brown bits stuck to the pan, then add a couple tablespoons of water to deglaze the pan. Stir to remove all the delicious fond—brown bits—from the pot.
When the garlic has cooked, is fragrant, and has turned translucent (a couple of minutes), season with salt and pepper to taste. Remove from heat and scoop them into a bowl and set aside.
Part 3: Pan-fry Potatoes 15 minutes
Preheat your oven to 400 ℉ (200 ℃)
Wipe out/wash the nonstick skillet and place on medium high heat. Add two to three tablespoons of neutral cooking oil. Once hot, give the oil a swirl to coat the bottom of the pan, and carefully place potatoes in a single layer on the pan.
Sprinkle two to three tablespoons of water on top of the potatoes, sprinkle salt on them, and cover. The water will create steam and cook the top of the potatoes while the oil will brown the bottoms. Let these cook for 3-4 minutes or so, peeking at the bottoms of the potatoes every once in a while.
Flip the potatoes over to brown on the other side when they’re golden and replace the lid. Note that the potatoes will cook at different rates depending on the different hot spots on the pan.
Once the potatoes are browned and cooked through (you’ll know because they will be soft and easy to pierce with the tip of a small knife), remove them from the pan and place onto a plate lined with a paper towel. Taste them and add salt as needed and season with pepper.
Assemble Galette
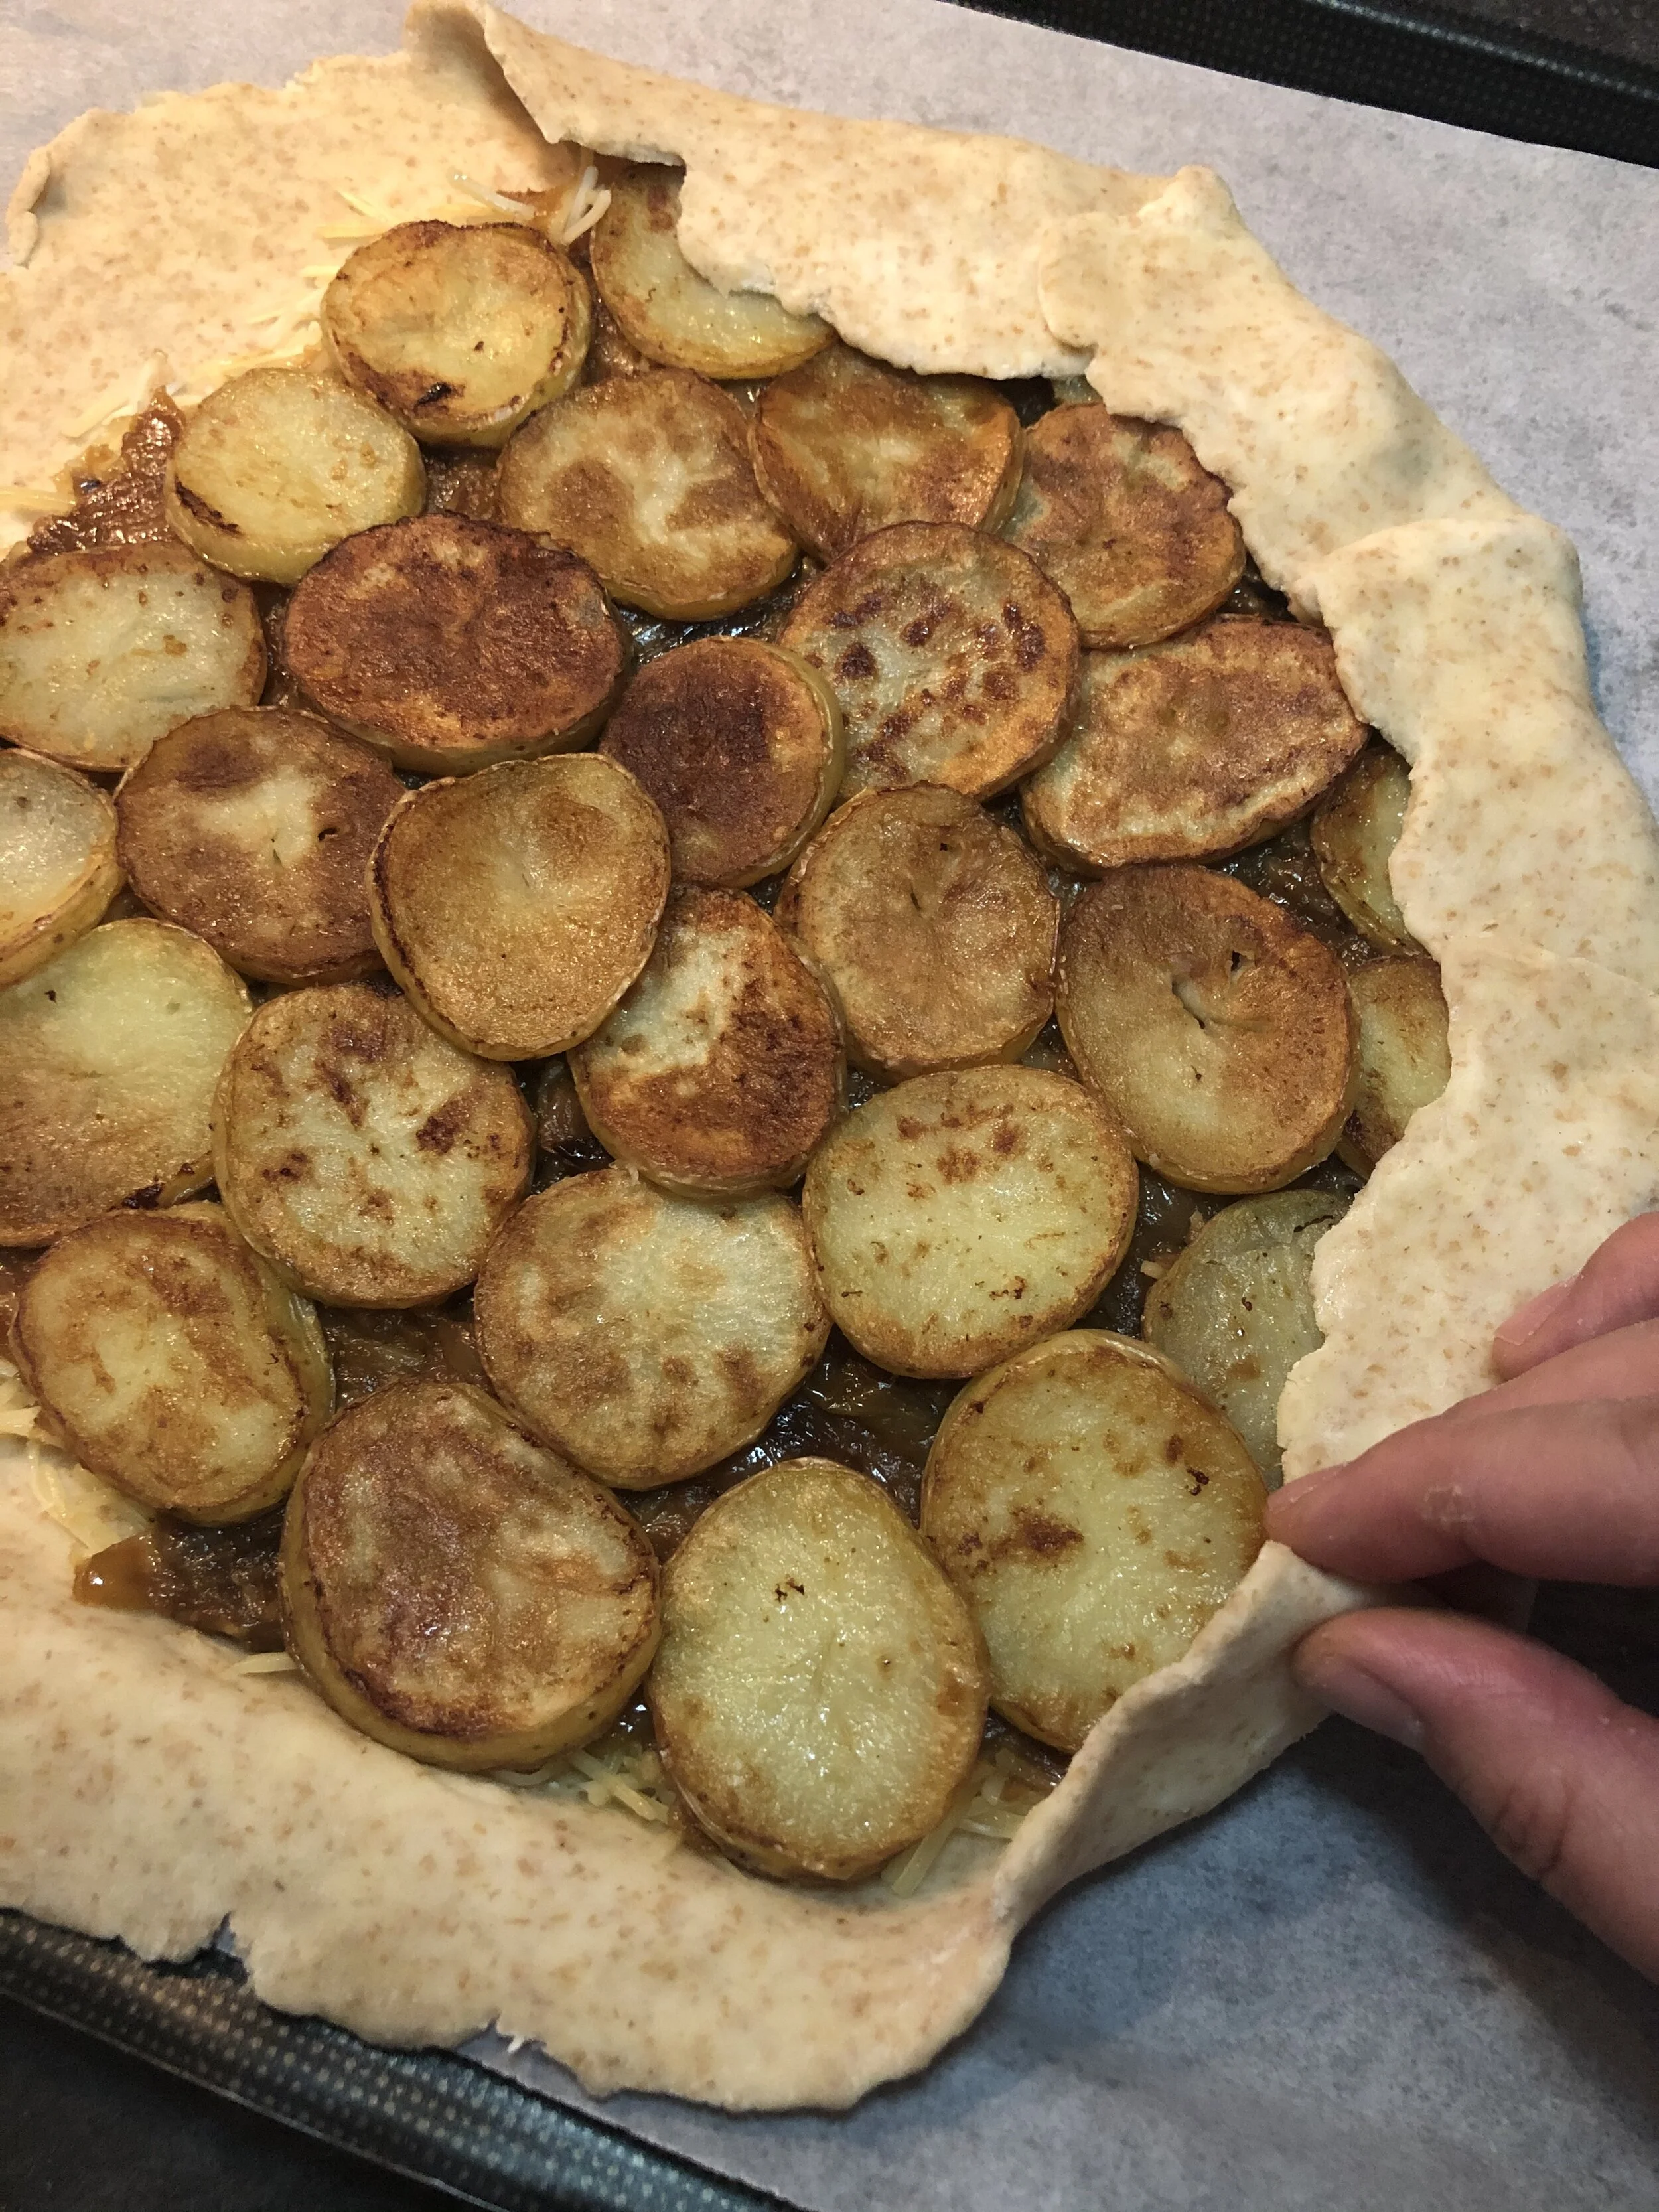
Folding galette dough

Folded galette before brushing crust with egg yolk
Remove the dough from the fridge.
Sprinkle flour evenly on a clean surface, and place the unwrapped dough on the flour.
Sprinkle the top of the dough with flour and with your rolling pin, give your dough a 3-4 good whacks. Then rotate the dough 90 degrees and give it 3-4 more whacks. This will start to soften the dough while helping it maintain the round shape.
Begin rolling your dough into a circle that is 12 inches in diameter and is around ¼ and inch thick.
Place your dough onto a parchment sheet lined baking sheet. If you need help visualizing, then watch this video.
Place the filling in the galette leaving a two inch border. Start with the cheese (if using), then top with onion, and add potatoes on the top.
Fold the galette dough crust over the filling by folding four-ish inch sections of the edge of the crust overlapping them slightly.
Brush the crust with a beaten egg yolk and drizzle a little bit of olive oil or add pats of butter to the top of the potatoes.
Place the galette in the oven and bake for 25-40 minutes (how long it takes to bake will depend on your oven). Rotate the galette once in the middle of cooking.
The galette is ready when the crust turns deep brown, and the bottom of the galette is golden. Check the bottom of the galette by carefully lifting the galette with a large spatula and peeking. Take care not to break the galette.
When ready, remove the galette and let cool for a few minutes before sprinkling the galette with thyme leaves picked from the remaining two sprigs of thyme.
Serve with a dollop of sour cream or crème fraiche and zest a lemon over the top. Serve with a green salad with a simple vinaigrette (one part lemon juice, one part oil, salt/pepper — a teaspoon of Dijon mustard optional)


Updated: January 24, 2024
When I originally posted this, it was a recipe for a cute cucumber pickle, but that felt too restrictive. I’ve updated this recipe to focus on the brine so that you can add whatever you want as the pickling vegetable.
This brine will make crunchy, sweet, sour, and perfectly acidic pickles that can be ready in a few hours. I love the brightness and pops of tang these beauties add to bites of food.
Make sure you subscribe to the newsletter to stay up to date on events, classes and all other exciting things happening!
Recipe Type: Quick and Easy
Time: 30 minutes
For the brine
1 cup water
½ cup white vinegar
½ cup apple cider vinegar
3 tablespoons sugar
2 teaspoons Diamond Crystal Kosher Salt
½ teaspoon coriander seeds
½ teaspoon whole peppercorns
3 cloves crushed garlic
1 green chili pepper (like serrano or jalapeno) stem removed
Optional: a bayleaf, sprig of thyme, rosemary, dill, or any other green herb you have on hand
For the pickles
2-3 cups of thinly sliced produce for the pickles: beets, cucumber, radish, onions, shallots, carrots, etc.
Paring knife, chefs knife, cutting board
Mandoline (optional)
Small pot
1 quart jar and lid
Add 1 cup of water, ½ cup of apple cider and white vinegar, 3 tablespoons of sugar, and 2 teaspoons of Diamond Crystal Kosher Salt into a small saucepan and bring up to a boil. Keep an eye on the brine while you prep your vegetables. If the brine comes to a boil before you’ve finished prepping your vegetables, simply turn off the heat and leave on the stove until you need it.
While the brine is heating, prep your vegetables. Wash, peel, and thinly slice your pickling vegetables and place into a quart sized mason jar.
To the mason jar add ½ a teaspoon of coriander seeds and black pepper, three cloves of garlic, green chili pepper, and a sprig of herbs if you’re using.
Pour the hot brine into the mason jar over the vegetables making sure all the vegetables are submerged in the brine.
Let cool for an hour uncovered. Cover with lid and place into your fridge. The pickles will be ready to eat after a couple of hours.
They will be good to enjoy for about a week. Make sure to put a date on the jar to know when you made your pickles.
Party trick
You can reuse the pickling brine. After one week, strain the brine, compost the old veggies, and bring the brine up to a boil. Add a teaspoon of salt and another tablespoon of sugar, and boil for at least one minute. Fill a fresh jar with veggies and pour over. I wouldn’t recommend recyling the bring past one more boil, it will become too diluted.
Enjoy!
My Ma, Judy Coleman—one of my fabulous mother-in-laws, makes the BEST home fries, and has graciously taught me how to make them. This no-recipe recipe can be made with a few ingredients that I usually have on hand and half an hour. Frying and steaming the potatoes and onions simultaneously yields beautifully browned, crisp, and tender morsels with pops of sweetness and umami from the caramelized onions.

Recipe Type: No Recipe Recipe
Time: 30 min
Servings: Customizable (The following guidance makes enough for 2. Scale up as needed.)
From: French Omelette & Ma’s Home Fries
3 small/medium potatoes per person - peeled and diced into 1 inch cubes
½ onion
Cooking Oil
Pantry spices (I used onion powder/garlic powder/and Slap Yo Mamma Cajun spice mix)
Salt and Pepper to Taste
Chopped fresh herbs you have on hand (optional for garnish)
Sour cream or crème fraîche (optional)
Nonstick frying pan, 8” or bigger
Lid for pan (or baking sheet to cover)
Wooden Spoon
Wash and peel potatoes (if you have a thin skinned potato, you can leave skin on) and cut into 1 inch pieces. Cut half an onion into ½ inch slices.
Heat nonstick frying pan over medium high heat and add 2-3 teaspoons of some cooking oil (olive, grape seed, sunflower, etc.).
Once the oil is hot, add potatoes and onions to the pan. Sprinkle with your preferred spices and add 2-3 teaspoons of water on top of the potatoes. Cover the pan and cook. You’ll hear the potatoes/onions sizzle while cook. This is great! Leave them alone to do their thing for 2-3 minutes.
After 2-3 minutes, lift the lid and give the potatoes/onions a stir and cover again. Lower the heat to medium and continue stirring every 2-4 minutes. The lid and water will steam the potatoes until they become fall-apart tender while the heat from the bottom of the pan/stove will brown the potatoes and caramelize the onions. If you notice the potatoes starting to burn, then lower the heat and/or add more cooking oil.
Continue cooking and stirring the potatoes and onions until they are browned and there are lots of crusty bits (around 15-30 minutes). You’ll want to stir the potatoes more frequently toward the end of cooking.
Serve immediately. If you have any fresh herbs or sour cream/crème fraîche on hands go ahead and top the potatoes with them.

These French party glamour egg angels are called Oeuf Mimosa because they look like the bright yellow fluffy flowers of Mimosa trees that grow in France (and elsewhere). Create the lewk of these beauties by topping them with hard boiled egg yolks that have been pressed through a sieve to make teeny beautiful fluffy yolks. Since this recipe is quite simple, it is essential to use high quality ingredients so these eggs can transform into the eleganza that they deserve to be.

Mimosa flowers
Recipe Type: Party Food, Snack
Time: 30 min
Servings: 4-6
7 eggs
¼ cup Homemade Mayo
Lemon Juice
Chopped chives
Salt
Pepper
Various mixing bowls
Mesh Sieve
Medium Pot
Spoon
A couple of plates
Knife
Cutting board
Bring water to boil in a medium sized pot. Once the water boils, lower the heat so that the water is gently simmering. Then, carefully lower the eggs into the simmering water with a large spoon of some sort. You do not want to crack the eggs at this stage. Boil the eggs for 10 minutes.
While the eggs are boiling, prepare a bowl full of ice water and chop chives finely. Set aside.
Once the eggs are cooked put them in the ice water and let chill for 5-10 minutes. This will help you peel the eggs easily. After le ice bath, peel the eggs (it’s easier if you do it in the water), rinse them, and set on a plate lined with a paper towel.
Cut eggs in half lengthwise and separate the yolks. Pass 2 yolks at a time through a fine mesh sieve (mine is 6 inches in diameter) placed on top of a bowl. I scrape the egg yolks with a spoon back and forth until you see the egg yolks coming off in a delicate fluff of glory of the other side. Do this for all of your yolks. I promise, this is the most tedious part of the recipe. Make sure to scrape the yolks off the sieve with the back of your spoon GENTLY.
Once all of the yolks have been fluffed through the sieve, reserve around 3-4 tablespoons of the yolk to top the eggs later.
In another mixing bowl, add mayonnaise gradually—a couple tablespoons at a time— to the fluffed yolks and mix until you get a creamy filling. Add lemon juice, salt, and pepper to taste at the end.
Spoon the egg yolk mixture into the egg white shells. Use one spoon to scoop the filling from the bowl, and one spoon to gently push the filling off of the other spoon into the egg white. Fill all of the egg whites.
Then, using a spoon or very dry/clean fingertips, sprinkle the reserved fluffy egg yolk on top of all of the devilled eggs. Top with a sprinkle with chives. Voila, you have a very elegant plate of devilled eggs!
Let me tell you something that might be provocative — mayonnaise is a sauce that is really easy to make. You don’t need an immersion blender or special equipment. You simply need a whisk, some oil, an egg (plus a few other ingredients), and a sense of possibility. My chef at culinary school would regularly tell us that his 6 year old daughter could make this sauce with her eyes closed. Je pense (I think) if this young child can, so can you.
If you don’t care to read, here is a how to video of me making mayo in two minutes and 48 seconds.

Recipe Type: Quick and Easy, Condiment, Sauce
Time: 5 min
1 super fresh high quality egg yolk at room temperature
Around 3/4 cup grape seed oil (or any other neutral oil)
2-3 tablespoons high quality olive oil
Salt/Pepper to taste
1 teaspoon Dijon mustard
½ Lemon or apple cider vinegar
Mixing bowl
Jar to store
Whisk
Dishtowel
Separate an egg yolk and place into the mixing bowl. Set the mixing bowl on top of a dishtowel to provide stability to the bowl. Add 1 teaspoon of Dijon mustard. Whisk to incorporate.
Then, gradually add the neutral oil to the eggs while whisking to incorporate. Start with a very small amount (like a teaspoon at a time) at a time until the sauce begins to emulsify.
Once the sauce begins to emulsify, you can gradually add more oil while whisking vigorously. The sauce will thicken the more oil you add and the more you whisk. One egg yolk will hold around 3/4 cup to 1 cup of oil. Be careful not to add too much oil or the sauce will break.
The final texture of the mayonnaise should resemble that of a pudding. When the mayonnaise is nearly the texture that you want, add 2-3 tablespoons of olive oil at the end for flavor.
Once the texture of mayonnaise is to your liking, stop adding oil, and add 1-2 teaspoons of lemon juice (or apple cider vinegar), salt, and pepper to taste.
Store the mayonnaise in a jar in the fridge for up to five days.
Roast Chicken
Roasted Potatoes with Garlic
Green Salad or Green Beans

On Sunday, Paris slows down. It seems as if folks are choosing to prioritize themselves, their loved ones, and life. I’ve learned that Sundays are for roasting chicken (le poulet du dimanche). If you know me, you know I fuck with chicken. People are always shewk when I pull a beauty bird out of the oven. Here’s the thing though, it’s really easy to do. Go ahead, impress your guests and add this to your culinary portfolio of skills.
The key to successful bird roasting is to dry brine — salt it the day before you plan to roast. I usually get my chicken the day before I plan to serve it, salt her, and leave her uncovered in the fridge and overnight. The dry brining process seasons the meat while drying out the skin so that it gets super crispy in the oven. When I’m ready to roast, I set the chicken on top of a bed of potatoes with whole cloves of garlic tossed in duck fat and throw her in the oven. The smell of roasting chicken filling our teeny apartment and is a cozy, luxurious, and comforting moment.
When procuring chicken (or any meat or fish), Romaine and I prefer to eat higher quality meat less frequently. I believe it’s important to get a bird raised without antibiotics or growth hormones. We plan our meals for the week and if we know we are going to splurge on a nice chicken, we will plan more vegetable forward meals for the rest of the week. I recognize and acknowledge that my privilege in my ability to have a choice in the matter. I understand that not everyone has this luxury. In France, it’s easy to find out what kind of chicken you are purchasing. In the states, you have to do a little more research (which is bullshit—we should know what is in our supermarkets without having to do extensive research). Get the highest quality chicken that is within your price range, and do some research if you have to. The chicken that you roast is a good investment because you can freeze the carcass and save it to make chicken stock on another day (I’ll post a recipe soon for stock).
Recipe Type: Weekend Meal, Easy
Time: 1.5 hours to roast and prep plus 24 hours to salt the chicken
Servings: 4
1 whole chicken of the highest quality that you can afford.
Kosher Salt
Pepper
2 lbs of fingerling potatoes scrubbed
1 lb of green beans trimmed
6-7 peeled whole garlic cloves
A couple sprigs of thyme
Roasting pan or large cast iron skillet
1 medium pot for green beans
Saturday Evening

Put around 2-3 tablespoons of kosher salt into a small bowl. Take chicken out of the packaging and wipe carefully with paper towels (no need to rinse). Salt the outside and inside of the chicken liberally over the sink so that you keep the raw chicken moments as contained as possible.
Place the chicken on a plate uncovered in your fridge breast side up. Refrigerate for 12-24 hours. This process is known as dry brining - for more information read this guide by Serious Eats.
Wash your sink thoroughly with soapy hot water.
Sunday evening (1-2 hours before you plan to roast your bird)
1-1.5 hours before roasting Pull the chicken out of the fridge and let it come to room temperature.
30 minutes before roasting - wash your potatoes, strain them, and set into the bottom of the roasting rack. Add the whole garlic cloves. Drizzle with 1-2 tablespoons of fat (preferably duck fat if you have, or olive/grape seed oil). Season with salt.
15 minutes before roasting - preheat oven to 400℉ or 200℃
When ready to roast, set the chicken on top of the potatoes. Add a sprig of thyme into the cavity of the chicken and add the rest to the potatoes.
Roast chicken in the oven for around 1 hour until cooked through (about 165 degrees F or 74 degrees C). This will depend on the size of your chicken. Rotate the chicken in the oven halfway through cooking to ensure even cooking.
When cooked through, pull out of oven and let rest for 10 minutes.
After the chicken has rested, carve the chicken and serve with potatoes and whole garlic cloves.
Serve with boiled green beans or a salad with a simple vinaigrette (one part lemon juice, one part oil, salt/pepper — a teaspoon of Dijon mustard optional)
Friday or Saturday AM
Go grocery shopping
Saturday 6pm
Salt chicken
Sunday 7pm dinner
4:45 pm pull chicken out of fridge to come to room temperature
5:30 pm - preheat oven
5:45 pm stick chicken in the oven
Wash salad greens and prepare vinaigrette or start boiling water for green beans
6:45 pm - check on chicken and pull out of oven if ready
I live for cold brewed coffee. I drink her all four seasons. You will find me in the dead of winter in a furry hat and parka clutching a cold brew with my mittens. Sometimes I take her with a splash of whole milk. Sometimes, I want her crispy, cold, and black. My new schedule requires that I wake up at 6 am on certain mornings and on those days, cold brew coffee is my one true light and joy. The thing is, cold brew is REALLY EASY to make and hell of a lot cheaper than buying it out. Also, it’s super eco-friendly to byo coffee rather than contributing to all the single-use plastic/paper waste.

Recipe Type: Quick and Easy
Time: 24 hours and 15 minutes to filter
Servings: 6
From Le Hangover Party
64 grams coarsely ground coffee
800 ml of water
4 cup French Press
Stainless steel pour over coffee filter or a paper coffee filter over a mesh strainer (optional)
A vessel to strain your coffee into the first time (optional)
A vessel to store your liquid gold
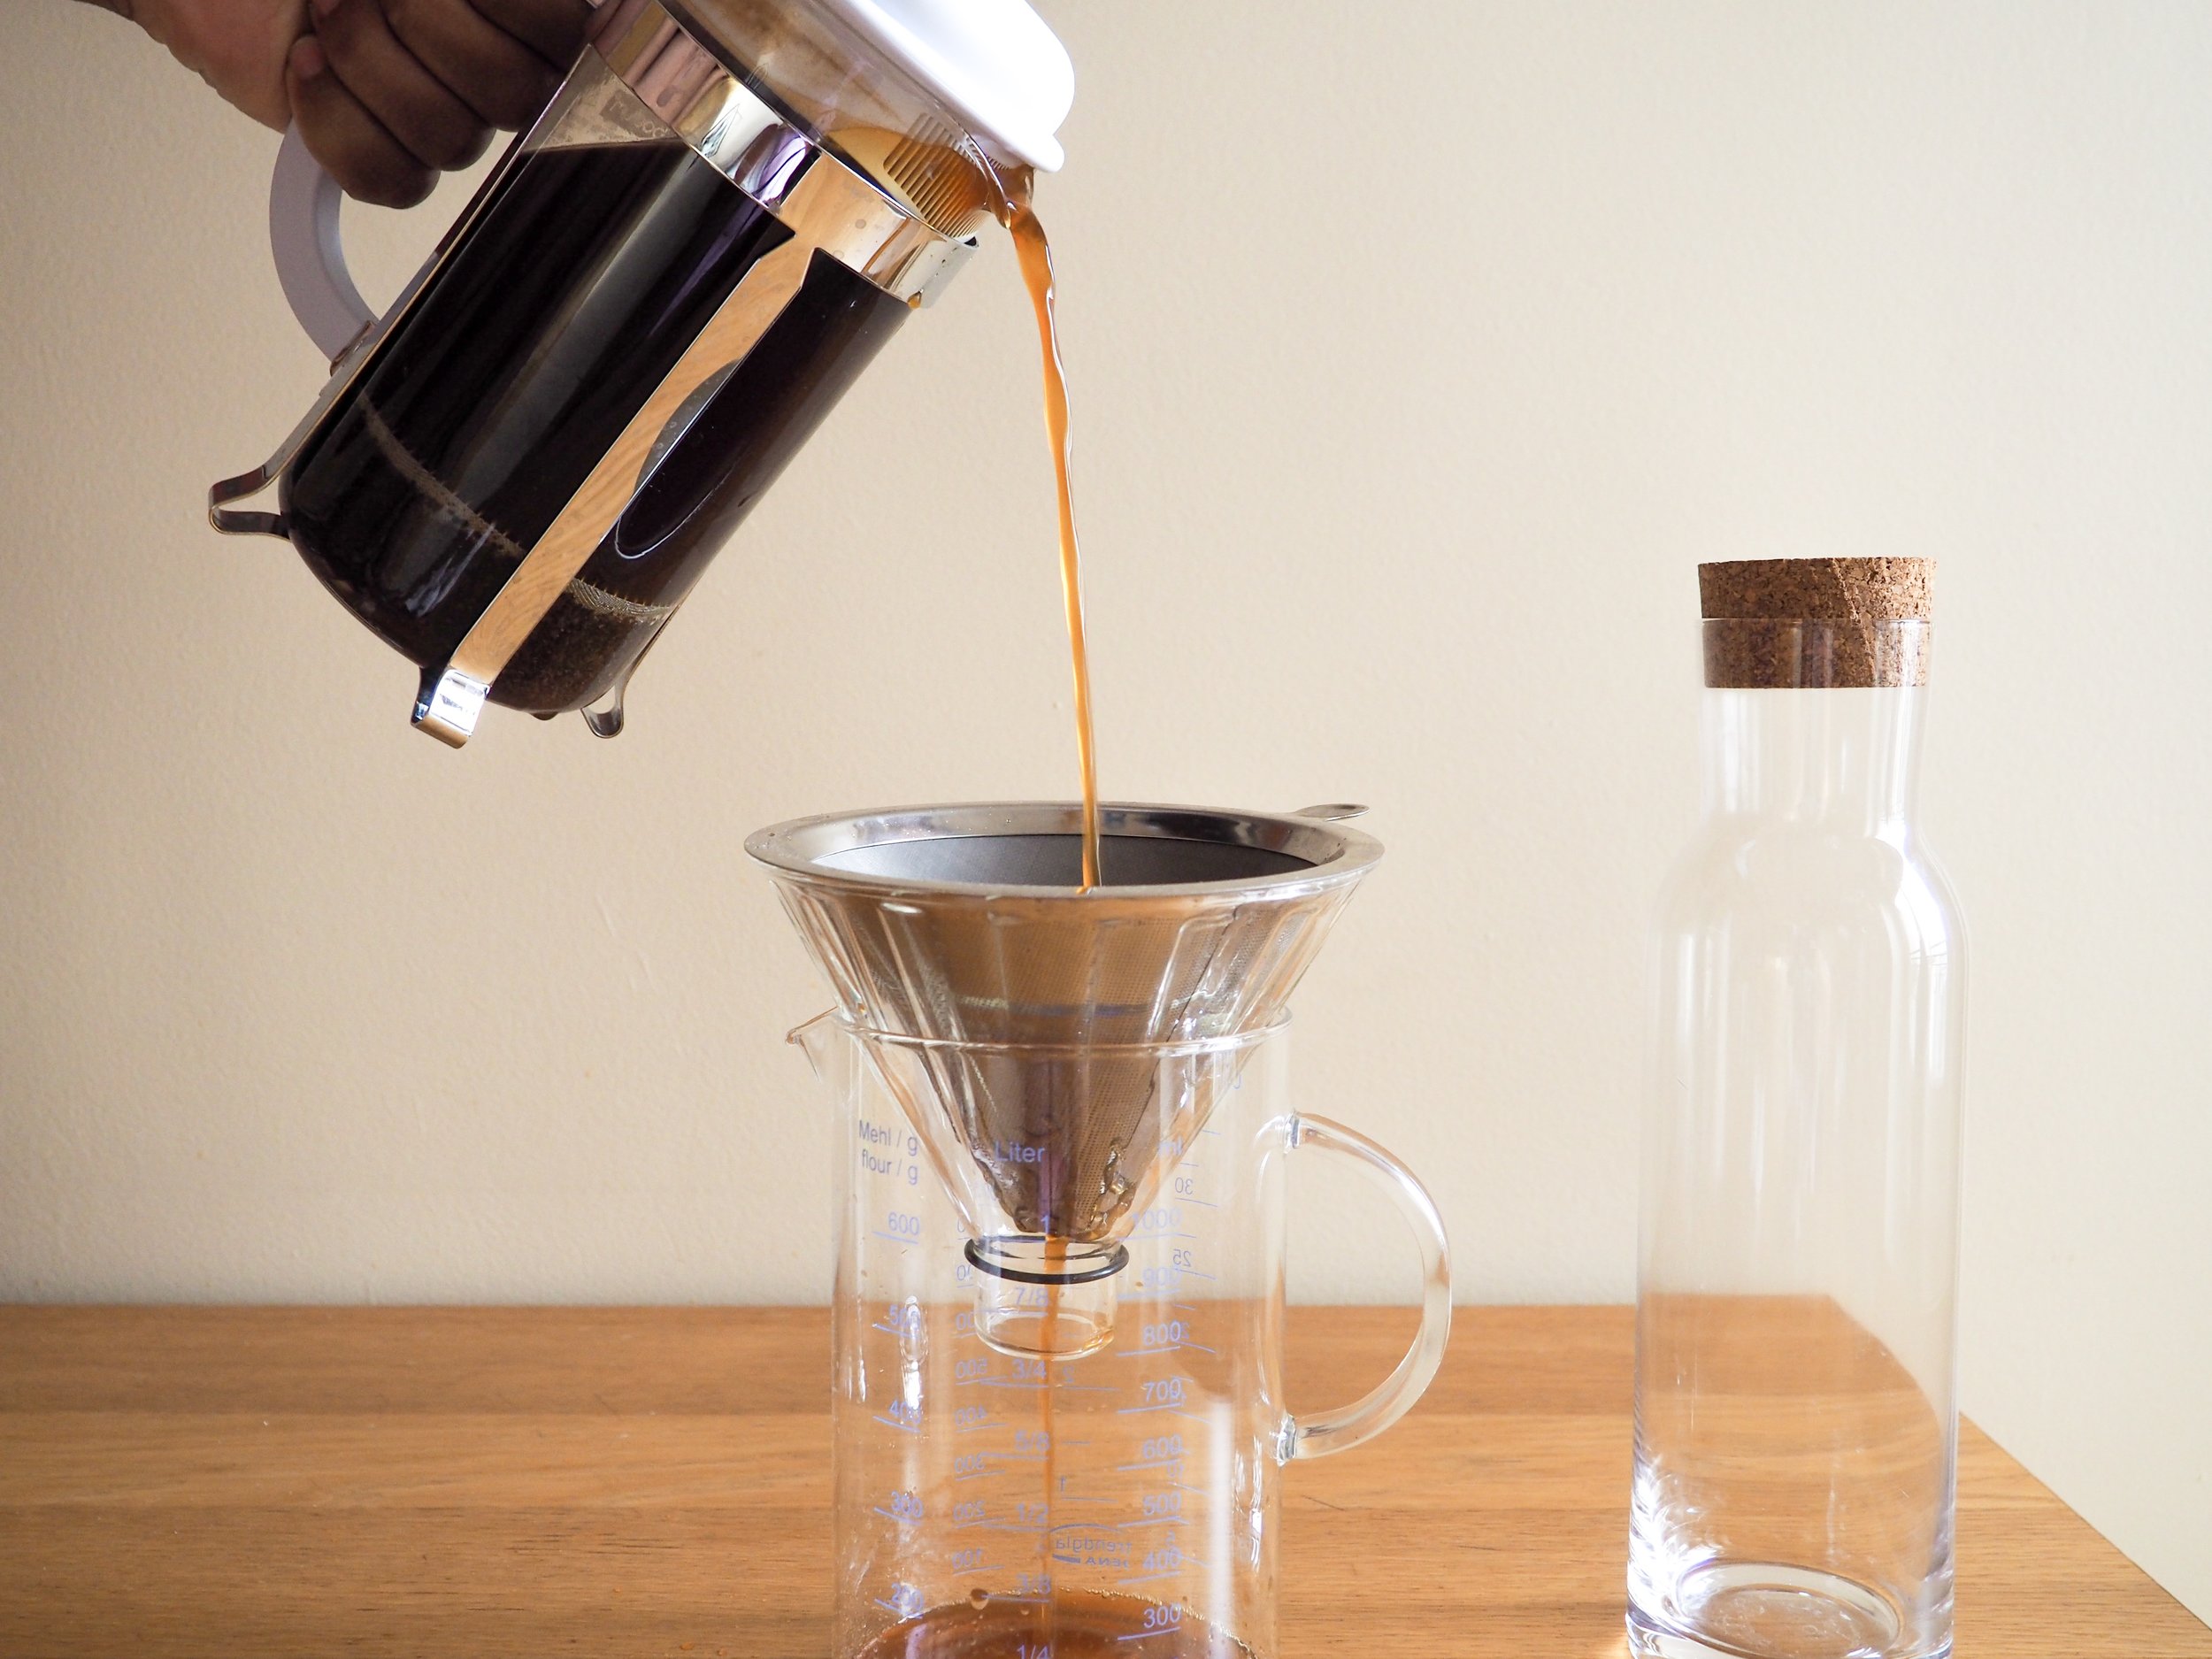
First round of filtering
If you have a coffee grinder, grind the beans on the coarsest setting right before brewing. If you don’t (which we don’t in Paris) ask the place where you bought your beans to grind the bag for you. I learned that for cold brew, if the beans are ground too fine, then the bitter flavors will be more prominent in your final cold brew. The ratio for cold brew is 80 grams of coffee per liter of water. Since I have a 4 cup French Press (and a liter is around 4.23 cups), I adjusted my measurements to 64 grams of coffee and 800 ml of water (80% of the original).
Place coffee grinds into the French Press and fill with water. Mix the coffee with a spoon and set the lid on the french press and press slightly. Do not fully press down on the plunger. Set aside at room temperature and let the coffee brew for 24 hours.
After 24 hours, plunge the french press. You can serve as is, or if you want a smooth ass brew, pour through the stainless steel pour over filter (or paper filter) into the first vessel. This first filter takes a longer time. You may need to rinse out the filter in the middle of the batch.
After the first round of filtering, rinse out the filter and place over the final storage vessel. Filter the cold brew a second time. This time should be much quicker.

Final filtration
Store cold brew in the fridge and serve over ice.
Late summer/early fall is when peppers are in peak season in New York City, and they are magnificent. Floral, spicy, & fragrant, these beauty queen peppers can transform into a flavorful and complex hot sauce with some salt water and time. This hot-sauce is preserved through lacto-fermentation (just like kimchi). The Lactobacillus bacteria converts the sugars found in the peppers into lactic acid and creates an acidic environment that preserves the peppers. Fermentation takes anywhere from 1-2 weeks depending on how hot your kitchen gets, and this recipe can easily be scaled up or down as needed.

Recipe Type: Easy project
Time: 30 minute hands on time and 1- 2 weeks of fermentation
Servings:
1/4 tsp coriander seeds
2 garlic cloves
1/4 teaspoon peppercorns in the color of your choice
Fresh chilis in any variety
Optional additional produce like tomatoes or tomatillos
Optional 1/4 onion
Salt
Glass jar or fermentation crock large enough to hold your produce
Optional - fermentation weights
Mixing bowls
Colander
Scale (optional)
Food safe disposable gloves
Blender
Containers to store the hotsauce - sterilized

Recipe updated August 24, 2023.
I’ve modified this to be more of a technique and guidance rather than a prescribed recipe. I want to encourage you to experiment and have fun with this hot sauce.
Originally, I made this hot sauce using exclusively chilis, but realized that I riff on this recipe when I make my hot sauce. I am lucky to have lived in places with an abundance of gorgeous produce and will add whatever is looking delicious and is in peak season. Right now, I have an abudance of tomatillo, tomatoes, and other local peppers that our farmers have been producing. The key to proper fermentation is using brine that’s at least 5% salt (if you don’t want to measure a good rule of thumb is if it tastes as salty as seawater, you’ll have enough salt in the water). Happy fermenting, and let me know how it’s going (tag me on ig or send me an email)!
Prepare your produce. I suggest wearing disposable food-safe gloves while you prepare spicy chilis as a precaution. Cut peppers into 2 inch pieces and get rid of the stems (compost, please), if you want more heat, leave the seeds and gills inside the pepper, if you want less heat, remove. Cut additional produce into 2 inch chunks as well. Place all produce including onion and garlic into your fermentation jar.
Prepare salt brine in a mixing bowl. Mix one quart of water with 5% of its weight in salt. You can use a scale and calculate the weight of the salt or use this pickling brine calculator. If you don’t have a scale, no problem, mix your salt into one quart of water gradually tasting the water as you go. It should taste salty like seawater (FYI -Lacto-fermentation needs only 2% salt to occur).
Add the remaining spices into the crock: the coriander seeds, cardamom pods, garlic, and peppercorns. Pour the saltwater brine over the peppers and ensure the liquid covers the peppers. If you have fermentation weights, gently place them over the pepper to submerge them under the liquid.
Set your fermentation jar/crock in a cool part of your kitchen and let it ferment for 1 - 2 weeks. Within the first two days, you should see tiny bubbles coming out of the peppers. This means your peppers are fermenting. If you don’t see bubbles coming out of the peppers within 5 days, I would advise you to toss the batch and start over. If your kitchen is warm, then let it ferment in the kitchen for 2 days, and then transfer to the fridge to continue fermenting for 2 weeks.
Make sure to let gas out of your jar every few days so that pressure doesn’t build up in the jar.
Once the produce has fermented, they’ll let off less gas and will have changed slightly in color and texture (they’ll become less vibrant). Strain the produce over a bowl. Carefully remove all of the cardamom pods and other spices that you don’t want to blend into the sauce and discard (okay to bend the cardamom and whole pepper).
Place the produce into the blender and add 1/4 cup of the brine to the produce. Blend until smooth. Taste the sauce. Add more brine if you want the sauce to be more liquid, but note, you’ll add more salt into the hot sauce. I like to season my hot sauce just a touch saltier than I want the final product to be by adding a generous pinch of salt to the blended hot sauce. I do this because the sauce will continue to ferment and the salt with mellow over time.
Store the hot sauce in the sterilized containers in the fridge. I store mine in mason jars. They’ll continue to ferment in the fridge and should be good for up to a year — if it makes it that long.
Enjoy with Breakfast Nachos or on anything really. I love to give little bottles as gifts!
Nachos are DELICIOUS, easy to make, and such a crowd pleaser. As a Texas raised queen, I grew up with access to beautiful Mexican and Tex-Mex cuisine. My interpretation of nachos is based on the flavors of my home state and is kind of a template that is customizable to your preferences. Bake these beauties on a half-size baking sheet covered with parchment paper for a low mess meal. You can prepare the ingredients the night before and assemble the nachos right before (or as) your guests arrive. Set the whole tray in the center of the table and let everyone dig in. Easy, chic, delicious!

Recipe Type: Quick and Easy, Brunch
Time: 30 minutes
Servings: 4
From Le Hangover Party menu
Nacho foundation
One bag of tortilla chips
Two 8 oz bars of melty cheese. I use a combo of Monterrey Jack and Cheddar you don’t need to buy super fancy cheese for these nachos (you can also buy grated cheese, but usually these cheeses are covered in starch so that it doesn’t stick together in the bag. I don’t much care for that)
1 15 oz. can of re-fried beans
Toppings (this is what I used for this round of nachos, but you can use whatever you want)
2 Sliced fresh or pickled chilis - I used fresh serrano chilis in this batch
½ cup of sliced radishes
¼ cup cilantro (wash/dry and pick leaves off or roughly chop - cilantro stems are tender and you can eat them)
4-5 bacon slices
1 avocado sliced
1 lime cut into wedges
2-3 green onions sliced
White vinegar (optional - a couple tablespoons or so)
4 eggs
Cheese Grater
Half-size baking sheet
Parchment paper
Mandoline (optional for slicing vegetables)
Fish spatula
Small saucepan to heat refried beans
Skillet to cook bacon
Wash and dry produce in a bowl filled with water and an optional splash of white vinegar (to clean produce).
If using bacon, cook the bacon in a skillet. Once cooked, remove from pan onto a paper towel lined plate.
Heat canned refried beans in a saucepan with a lid (optional thin out the beans with a little water). Once the beans are bubbling, take them off heat and set aside.
Chop/slice/prep all the toppings for your nachos, grate cheese, and set ingredients aside. If you’re planning to make the nachos the next day cover and store in fridge.
15 minutes before you’re ready to heat your nachos, preheat oven to 350 ℉.
Place parchment paper on a baking sheet and spread chips evenly over the sheet. Distribute re-fried beans over the chips. Then, top with as much cheese as you want. The key to a great bite is to make sure that you cover as many chips with some cheese/beans. Be equitable and intentional in how you distribute ingredients.
Pop the nachos into the oven until the cheese melts. This takes around 10 minutes give or take a few depending on your oven. Keep your eye on the oven. The nachos are ready when the cheese is melted and oozy.
When the cheese on the nachos are nearly melted to perfection, begin to fry the eggs. I believe a fish spatula is the best spatula for fried eggs. Set aside on a plate when fried.
Pull the hot nachos out of the oven and scatter all of the toppings all over the nachos and top with the fried eggs.

Serve immediately family style with lacto-fermented hot sauce. I simply put the whole baking sheet in the middle of my table (on top of a trivet or towel of course). Enjoy!
Romaine and I moved out of our Brooklyn apartment at the end of August and moved into our Paris apartment two weeks later — in September. While eating out in Paris is fabulous, it is also decadent…too decadent. By the end of our two nomadic weeks, we were both fighting colds and craving home cooked food. This glamour chicken soup is the first meal I made for us in our new Paris apartment because it’s easy, satisfying, and incredibly comforting. It’s a version of the soup my mom used to make for our family that I’ve made countless times over the years. Romaine and I visited a Korean grocery store and bought some ponytail cabbage kimchi, sesame oil, and rice before we picked up the keys for our new place. I hope this chicken soup brings you as much comfort as it did for me in my first few weeks in Paris.

Recipe Type: Comfort Food
Time: 1-2 hours
Servings: 4-6
1 whole (glamour) chicken
1 onion
3 scallions whites and greens cut into ¼ inch slices
4 inch piece of ginger peeled and cut into 2 pieces
6-10 cloves of peeled garlic (depending on how many cloves you want to peel)
2 teaspoons of sesame oil
Salt and Pepper


Prepare your ingredients: peel the garlic cloves, peel the onion and cut in half making sure to keep the root tact to keep the onion half together, peel and cut ginger into two pieces.
Place the pot near the sink and remove any stray feathers and giblets that may be left on the glamour chicken. Rinse the bird carefully in the sink and drain well with paper towels and then place her into the pot. Make sure to thoroughly sanitize and clean any areas the chicken may have touched!
Add garlic, onion, ginger and add enough water to submerge the glamour chicken 2-3 inches (about 6-10 cups of water depending on the size of your chicken/pot).
Place the pot on the stove over high heat until the whole pot comes to a boil. Once boiling, lower heat to medium low so that the liquid has a gentle rolling boil. Keep the lid slightly ajar on the pot.
Boil the chicken for about an hour and a half for a smaller chicken (2-3 lbs) and around two hours for a larger bird (4-6 lbs). Check the bird every 20 minutes or so and skim the fat off the top of the broth as it cooks and add more water if too much evaporates. You want to cook the chicken enough to get a beauty-beige broth without overcooking the breast meat.
Once the beauty-broth and bird are cooked, carefully pull the chicken out of the broth and place on a plate to chill out for 5-10 minutes before chopping up and serving. Strain the broth with a colander to remove the aromatic vegetables.
Prepare the dipping sauce by adding 1 teaspoon of salt, a couple grinds of black pepper and drizzling 1-2 teaspoons of sesame oil
Serve each person with a piece of chicken, steamed Steamed Korean Rice and My Mother’s Kimchi (or store bought ponytail radish kimchi in a pinch like me). Both recipes can be found in Le Kimchi Party!
Guests should add sliced scallions to the soup and add salt/pepper to taste.
Dip pieces of chicken in the sesame/salt sauce and enjoy!
Soup will keep in the fridge for 3 days. Make sure to bring to a full bowl before eating leftovers. If you have extra broth, simply freeze and use as stock in the future.
Squash blossoms have a delicate vegetal flavor and has a slight snap when you bite through the green stem. While I adore them deep friend and stuffed with cheese, putting them into a quesadilla with some homemade lacto-fermented salsa (recipe coming soon) is just as fabulous, but much easier to make.
Read More